
©voyager, all rights reserved
Link to previous post – Russia – Famous Graves
As I was saying last time, I have given my belt grinder a complete overhaul.
Since now I knew that I can do it and it will work, I was not so stingy about spending money so I bought for about 50€ a few beech wood profiles 50×50 and 50×30 mm, some new ball bearings and a few other thing.
First thing I have done after that was to remove the belt support and compeltely dismantle the idler wheels. I have rebuild them. Instead of using threaded rods throughout I used about 100 mm length of a 10 mm rod on which I cut thread on the ends – on one side just about 1 cm each side . This has provided better fit with the inner opening of the ball bearings. I also shortened the inner spacer between the ball bearings so that I can sink in the nuts inside so it and the rod are flush with the wheel edge.
This has allowed me to to fix the wheels on the future idler on only one side, so I fixed them perpendicular to 50×30 profile and after that I got distracted.

©Charly, all rights reserved. Click for full size.
The distraction was the spanning wheel, which I did not intend to rebuild. But changing belts was a bit awkward – I had to pull on the lever with left hand and change the belt with the right hand. And I got an idea on how to improve that. So I have built out of plywood a gravity latch that falls into position when the lever is pulled beyond certain point. That frees both hands to put on the belt comfortably and without hassle. When the belt is on I lift the latch, the spring spans the arm and after I let go the latch end lays on the top of the spanning arm without restraining it.
©Charly, all rights reserved. Click for full size.
With that done I returned to the idler. Whilst I did spend some money on good materials, I did not spend too much time with planning except in my head. So I was still working by mostly piling stuff on other stuff making it up as I go along. I did not bother with precision too much and relied heavily on epoxy to fill any gaps and I added dovels and sometimes screws for strength
The only thing that I actually have spent some time to make precise was the parallelity of the wheels.
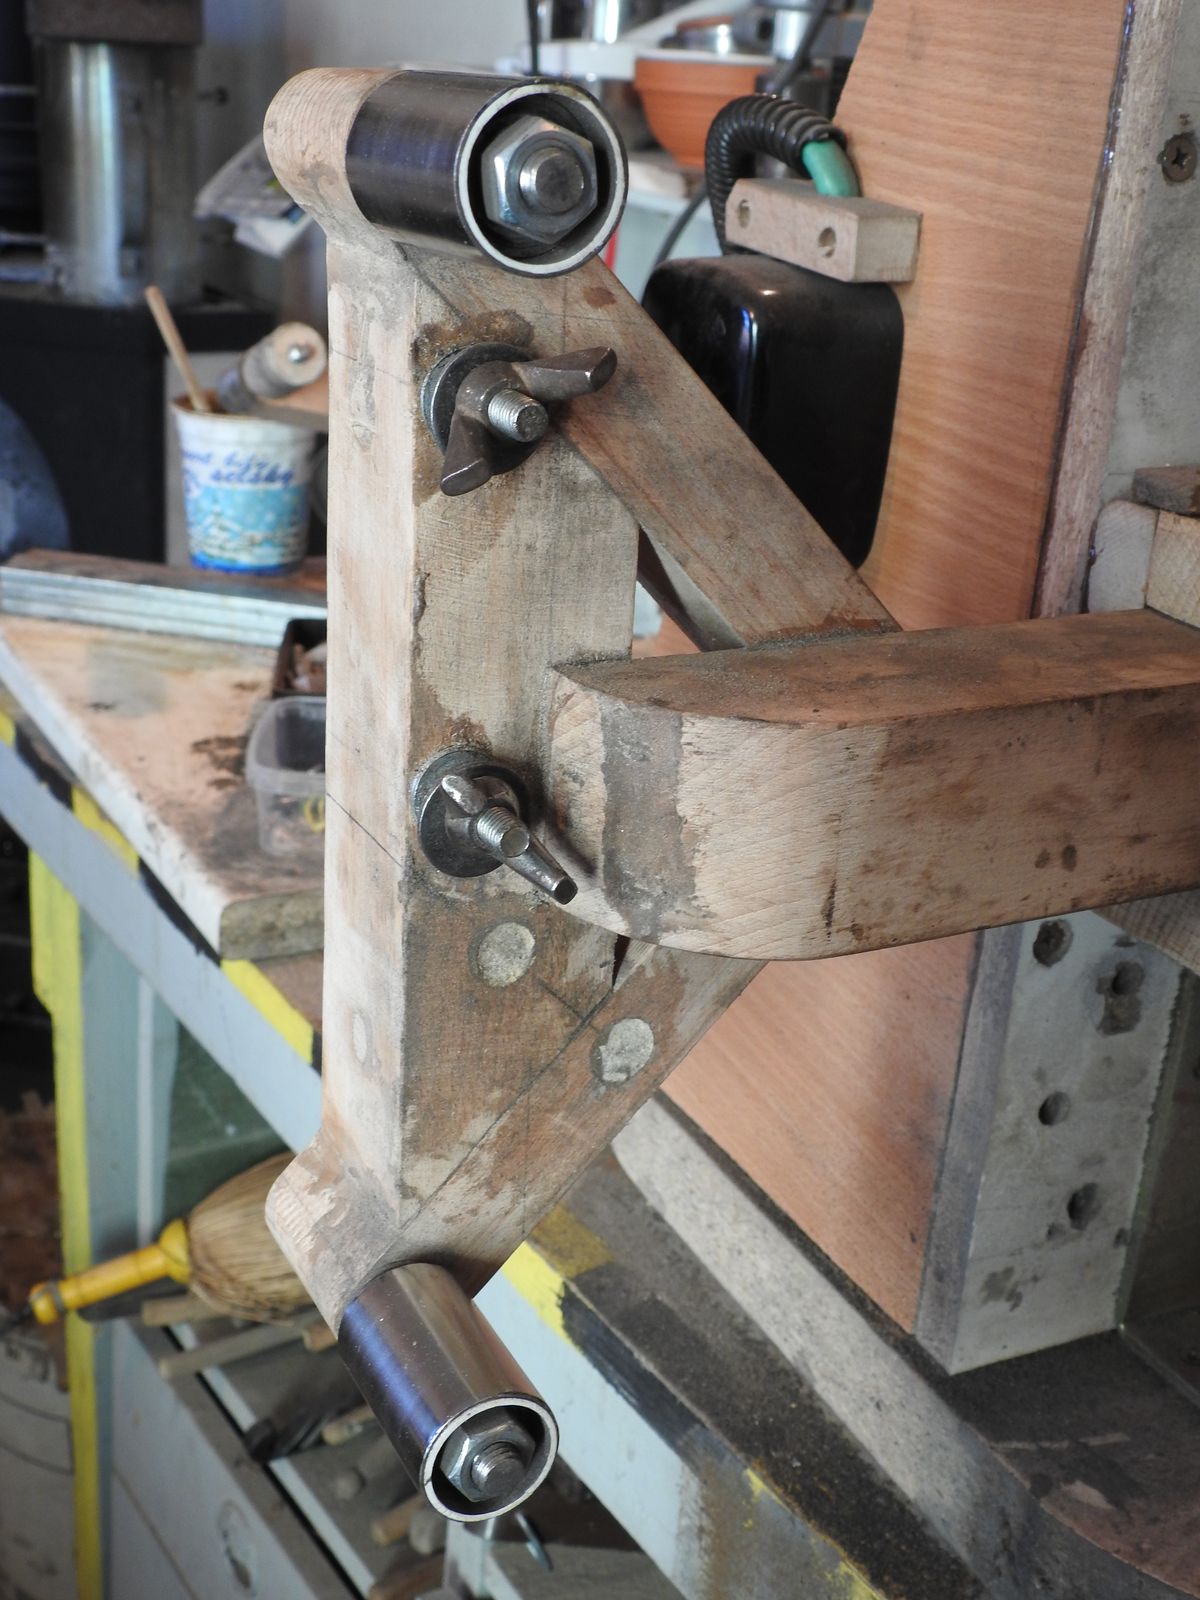
On the idler I prepared two screws with wing nuts for fixing the platen, and on the other side are two screws for fixing the support table (not seen here, but the positions are the pale circles in the lower half).
With that done I have cut two platens out of an old U profile that was rusting in my garden for years. Here is the final setup with all threee options visible. Left is setting for 20 cm hardbelt, middle 12 cm hardbelt, 10 cm slackbelt and right is 24 cm slackbelt.

©Charly, all rights reserved. Click for full size.
After this was done and tested – which I have done by truing the platens by alternating them as support/workpiece against each other on the grinder – I gave the whole thing a new coat of paint. The machine blue and the detacheable idler arm pale grey.

©Charly, all rights reserved. Click for full size.

©Charly, all rights reserved. Click for full size.
It is Amazing how a simple paint can improve the looks of things, isn’t it? I am glad to say that it all works as intended.
Next step is to make second detacheable arm with changeable wheels of different diameters, for hollow grind an fullers.


©voyager, all rights reserved
It’s another beautiful day here and I’m enjoying the freedom of being outside without being all bundled up. For the past few days Jack and I have been walking in a new area because our usual forest path hasn’t been cleared yet of several large fallen trees. Jack thinks this new route is pretty swell. It runs close to the river and he’s been able to frolic in the water every day. I don’t think the route is swell and it’s not because of the wet dog. It’s because of all the dead trees. Several years ago my area was hard hit by the emerald ash borer beetle. (Agrilus planipennis) It destroyed every tree in the park that connects with this path and many more were cut down in neighbouring areas to help to help prevent the spread. What was once a lush green park with mature trees is now riddled with decaying stumps and fallen branches. Our winters have become so warm that these critters can now survive this far north. One more victim of climate change.
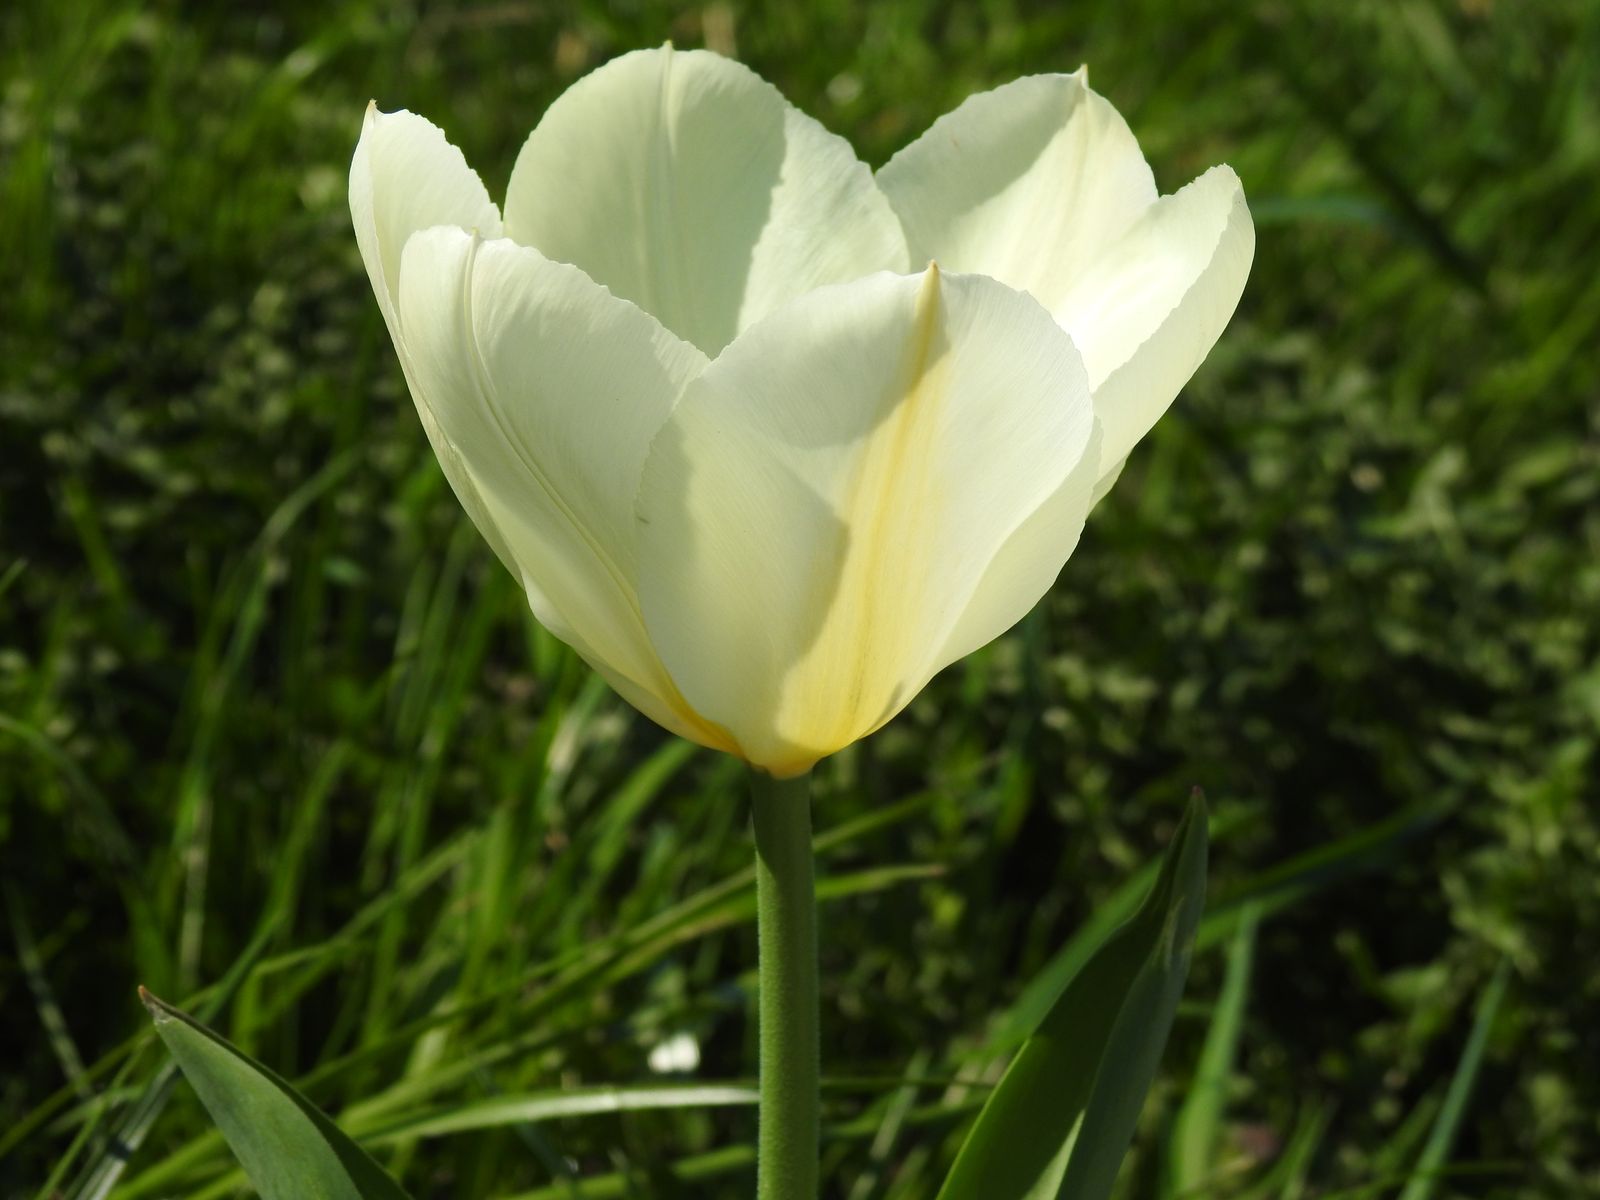
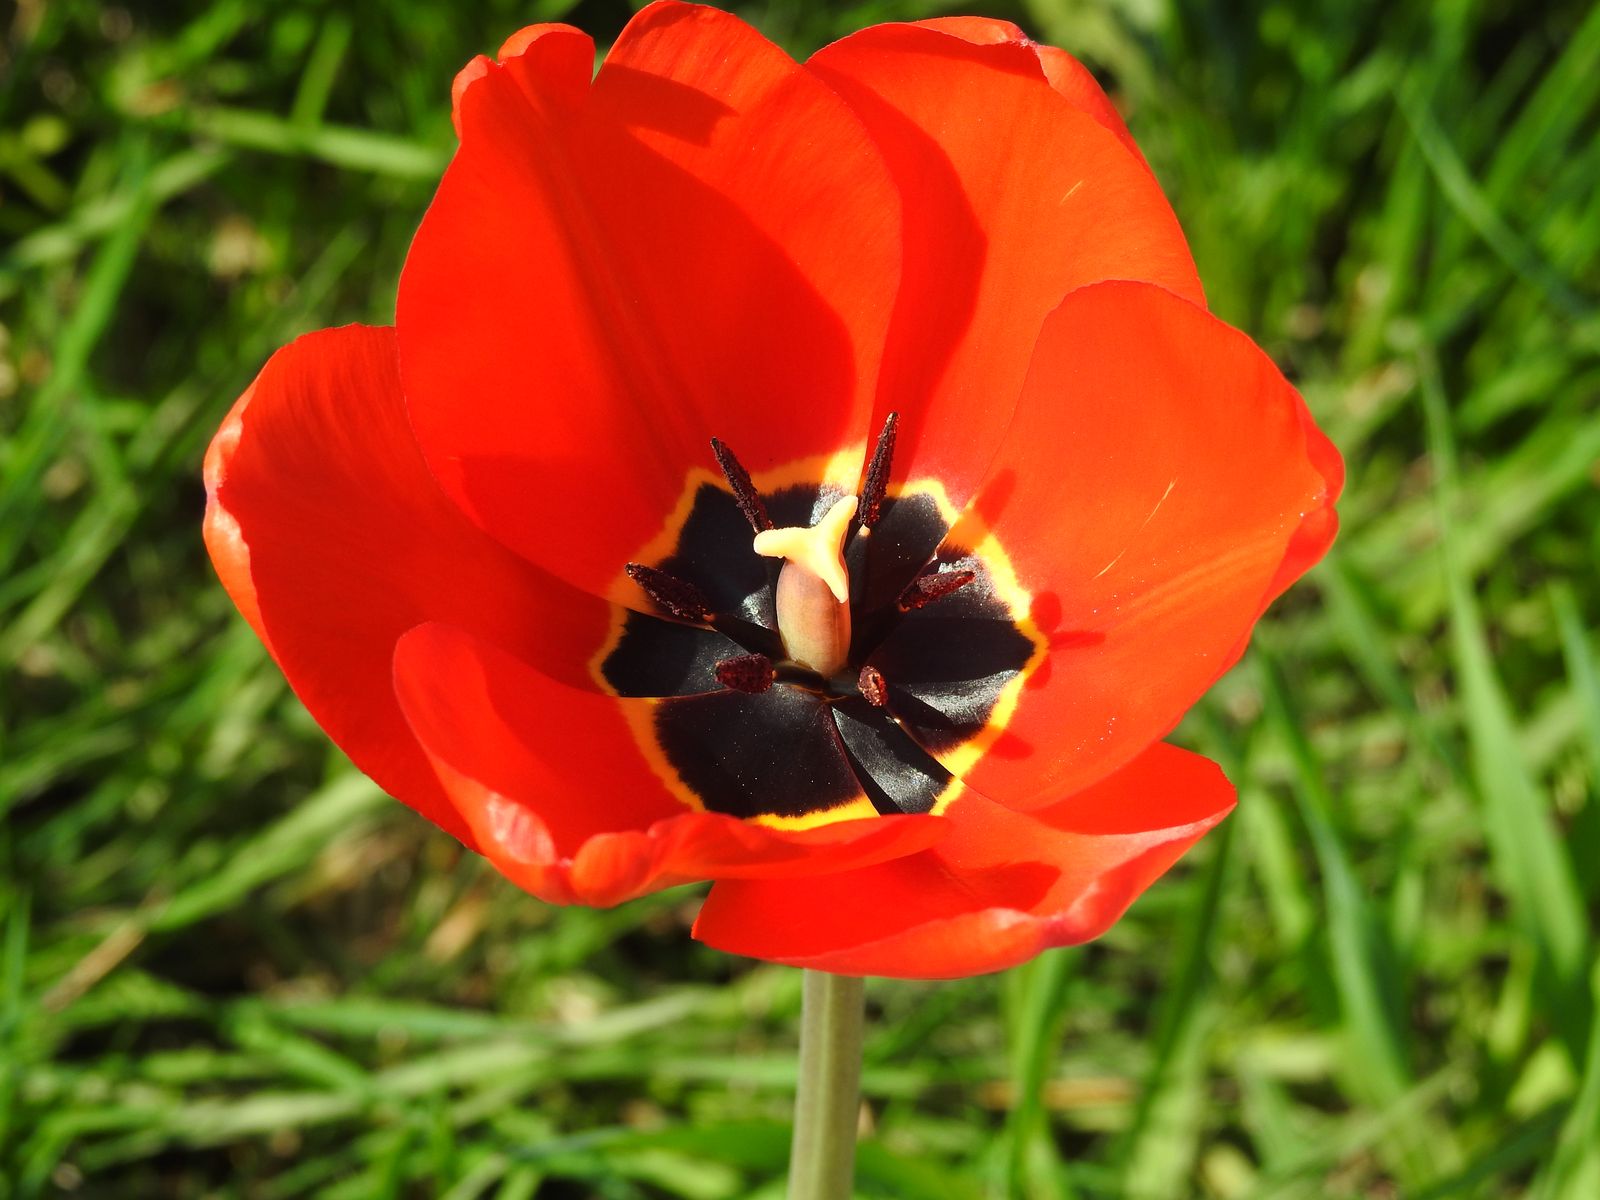
Tulips blossomed this weekend, mostly the red ones. I only have a few lila ones and those open slightly later.
Click for full size and enjoy.


©Charly, all rights reserved.

Yeah, it’s that time again. For once, we were scheduled for a decent time, and I took advantage to sleep in, heading out now. If all goes well, we’ll be back very late; if things don’t go well, I’m sure you’ll all hear about it. (I developed a…complication yesterday.)
Anyroad, I leave you all in the more than capable hands of Voyager & Charly. Have a good Monday, everyone.
Tom Rosenthal – Don’t Die Curious (Official Lyric Video) from Chloe Jackson on Vimeo.
Open Thread, don’t be an asshole. Thanks.
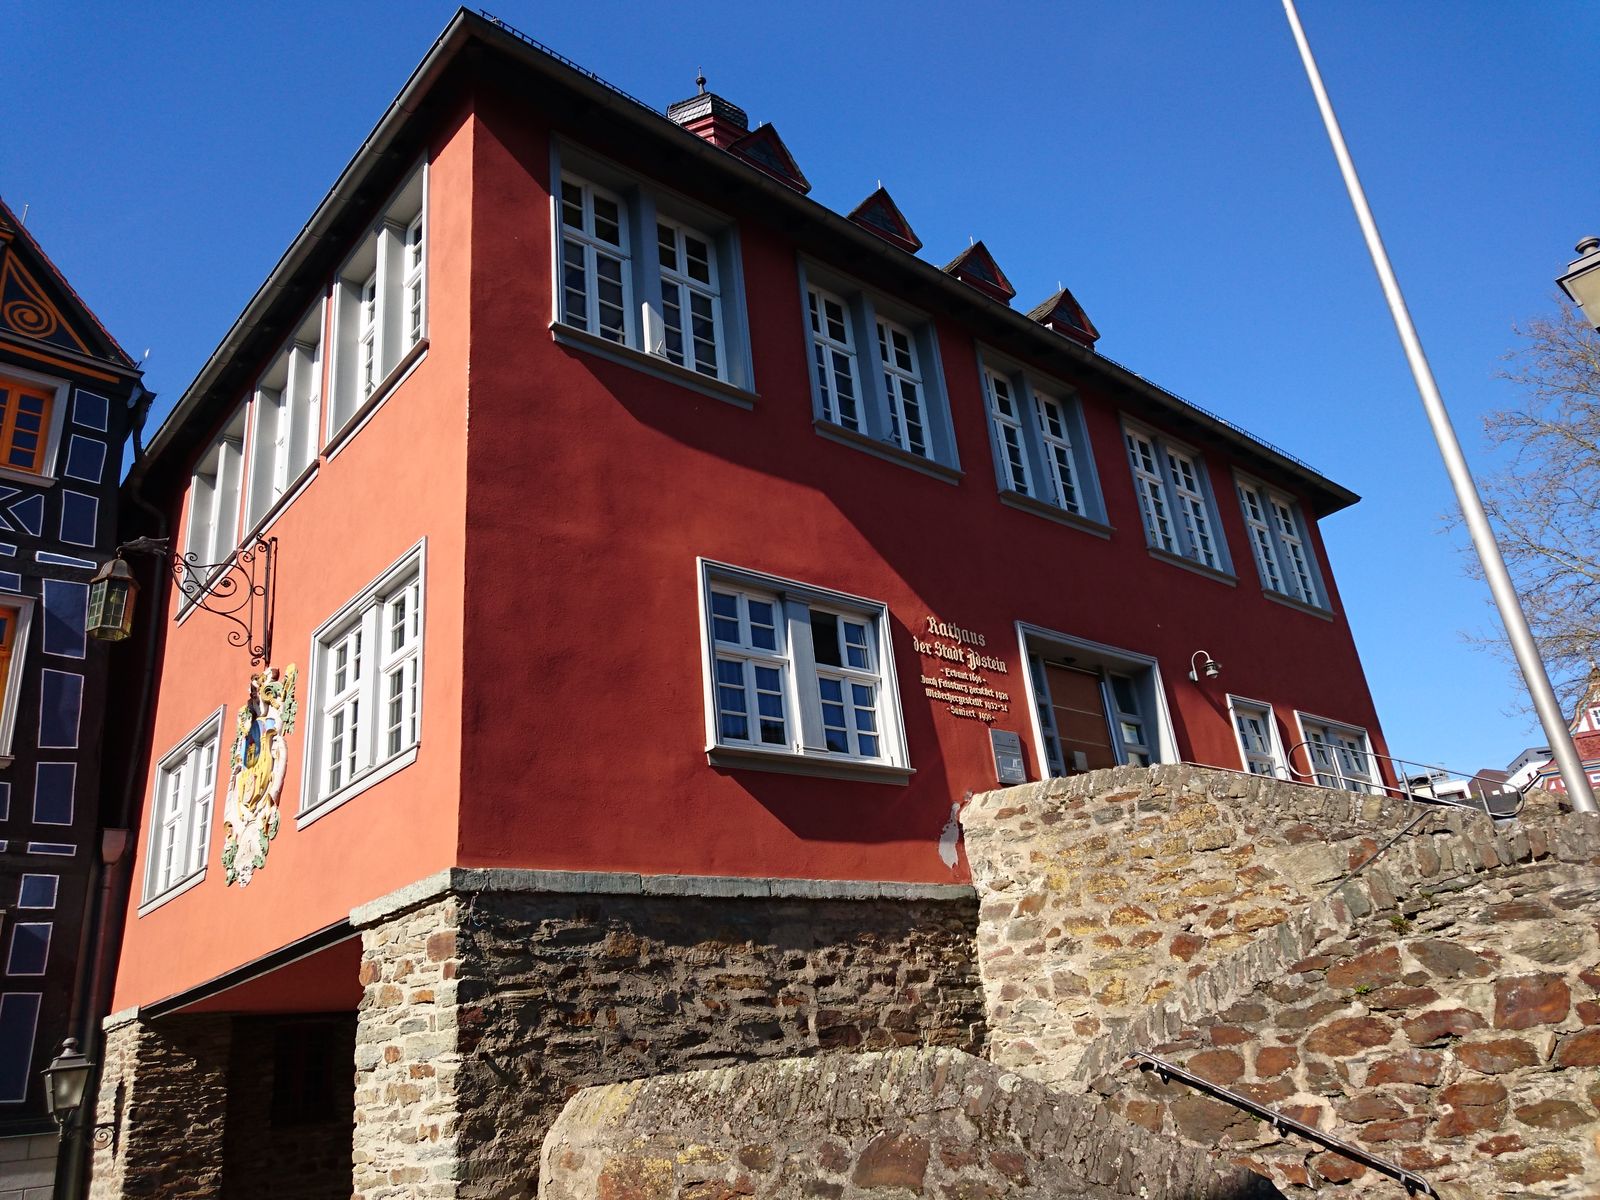
Rathaus has of course nothing to do with rats, unless you mean politicians. Which would be insulting to rats, I guess. Rathaus is from german words for a counsel (Rat) and a house (Haus) and means town hall.
The building is nothing extraordinary in the context of the town, but to the right side of it is a beautiful gate to the castle. Unfortunately you can only imagine the gate, because it was being repaired at the time of our visit so I could not take good pictures of it . And I did not have time to spend with the various plaques around the staircase either.


©Charly, all rights reserved. Click for full size.
Parkway Drive – Wishing Wells. Winston is kinda scary, but it’s a great song. Lyrics below the fold.
Äng.
Äng is meadow in Swedish. The sunset picture is a variant version of a picture from the Laajalahti Nature Preserve I’ve used before and sent to this blog. While there are trees in the picture, there’s open land that is used for as a cow pasture there, in order to restore traditional seashore meadowland.
The night time picture is from summer 2017. I was walking home from my cousin’s wedding and decided to take some night photos.
Ä is used in at least Finnish, Swedish, Estonian and German. In different languages, different pronunciations are used, but it’s generally a wovel pronounced in the frontal part of the mouth. In Finnish and Swedish it’s the second to last letter in the alphabet.
Click for full size!


© Ice Swimmer, all rights reserved.
From rq, click for full size!


© rq, all rights reserved.
A colourful dinosaur from Giliell, click for full size!


© Giliell, all rights reserved.
Today, after finishing with my bonsai trees for now, I got an hour or so to use and get a shot at hardening the blade.
I was so stressed from working almost non-stop the whole weekend and trying to manage to replant all my outdoor bonsai trees that I forgot to take pictures of the process and only could take pictures afterwards. So here is a picture of my setup. I was hardening two blades.
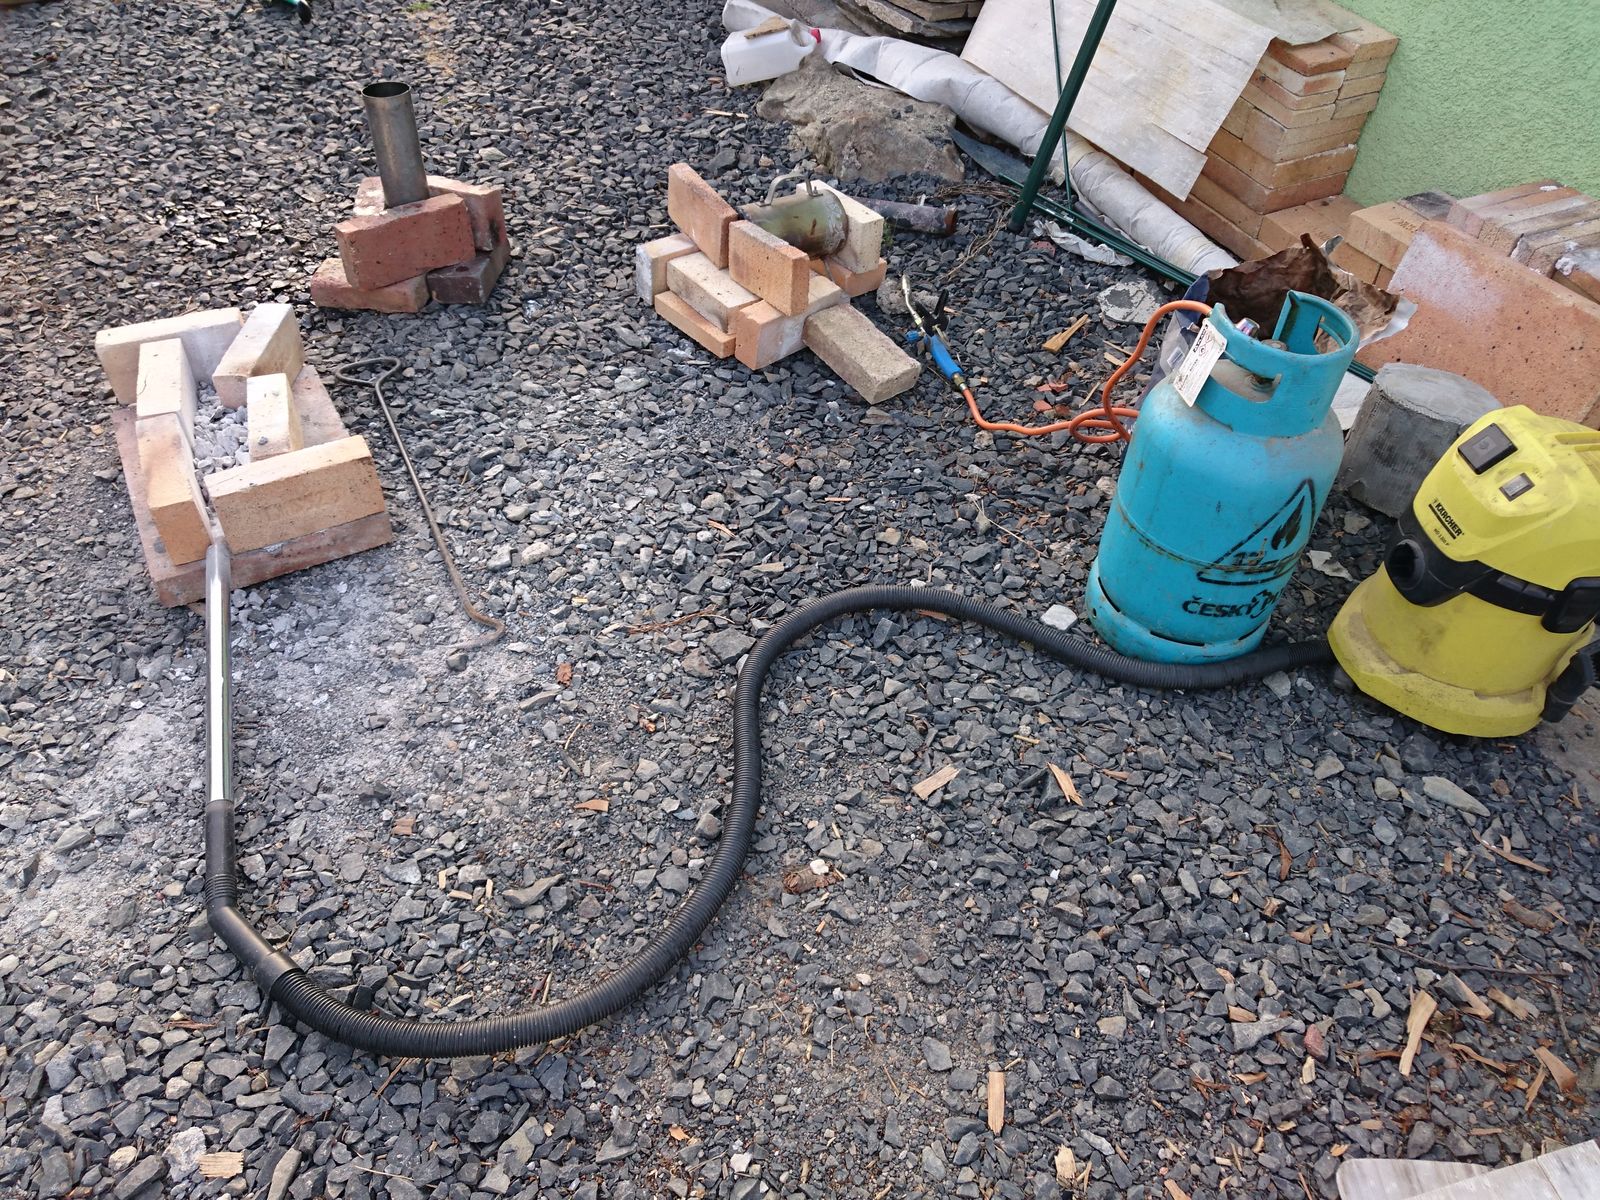
Blade hardening setup.
Slight contrast with Marcus’s fully equipped workshop I guess :-). On the right is gas mini-forge where a future kitchen knife was heated up most of the time, on the left is a charcoal fire between fireclay bricks for the dagger and in the middle is quenching oil. This is the main reason why I cannot harden blades in bad weather – I have to go outside to do it.
And here are the blades after hardening and before tempering, covered in burned oil and, in the case of the dagger, slag and scale.

Blades after quench.
I am not all together sure It was a complete success. I am sure it was a 50% success. I definitively successfully hardened the kitchen knife. Which is slightly strange, because the kitchen knife is made from N690 steel that is allegedly difficult to harden in impromptu settings, whereas the dagger is simple carbon steel that should have been easy-peasy. The kitchen knife is completely without deformation, the dagger got a very slight bend that I was able to correct after tempering the blades in kitchen oven at 150°C for an hour. In fact, it was maybe too easy to correct. File skids on the kitchen blade like on glass, but it is possible to make a shallow bite with it into the dagger.
The problem might be that I tried to coat the dagger with an experimental anti-scaling solution that unfortunately did not work as intended. Back to the drawing board there I guess. So it might be that the blade is hardened, but a few tenths of a mm on the surface have slightly lowered carbon content due to decarburization. The N690 steel blade was not covered in the solution, but was covered with stainless steel foil that burned through towards the end.
I have no way to measure the hardness of the steel, and I am probably not going and try to re-harden the blade. I will proceed and we will see what comes out of it.
The most prestigious cemetery in Russia lies on the other side of Lenin’s tomb, directly in the Kremlin wall necropolis. That is where the greatest of Russians lie. There you will find Stalin, Brezhnev, Chernenko and astronaut Yuri Gargarin. Very few are up to this highest of honors, though, so where do the rich and famous of Russia go when they die? The answer is likely the Novodevichy Cemetery in Moscow.
The cemetery is large and active with many visitors, some to visit specific graves and others to view the entire site as an outdoor gallery filled with history and graced by the best of Russian art. Despite large numbers of people the cemetery maintains a quiet, reflective quality. Some graves have small chairs for guests. Many graves have small offerings of fruit or sweets. Many more have fresh flowers and there is, conveniently, a florist’s shop at the front gate. There are several graves that I photographed that I was unable to locate information about. They are so beautiful that I include them anyway. I really wish I’d had more time here. Lots more time. What a very special place. (I apologize about the quality. My real camera broke and I was using an old spare)
First, I’ll start with the well-known graves.

Boris Yeltsin

Nikita Krushchev
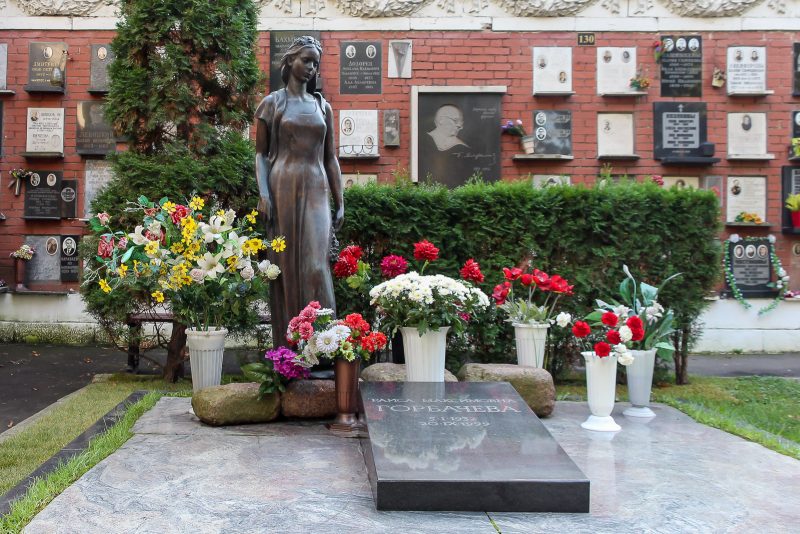
Raisa Gorbechov, wife of Mikhail Gorbachov

Anton Checkov

Yuri Nikulin, beloved actor and clown with his dog

General A Lebed
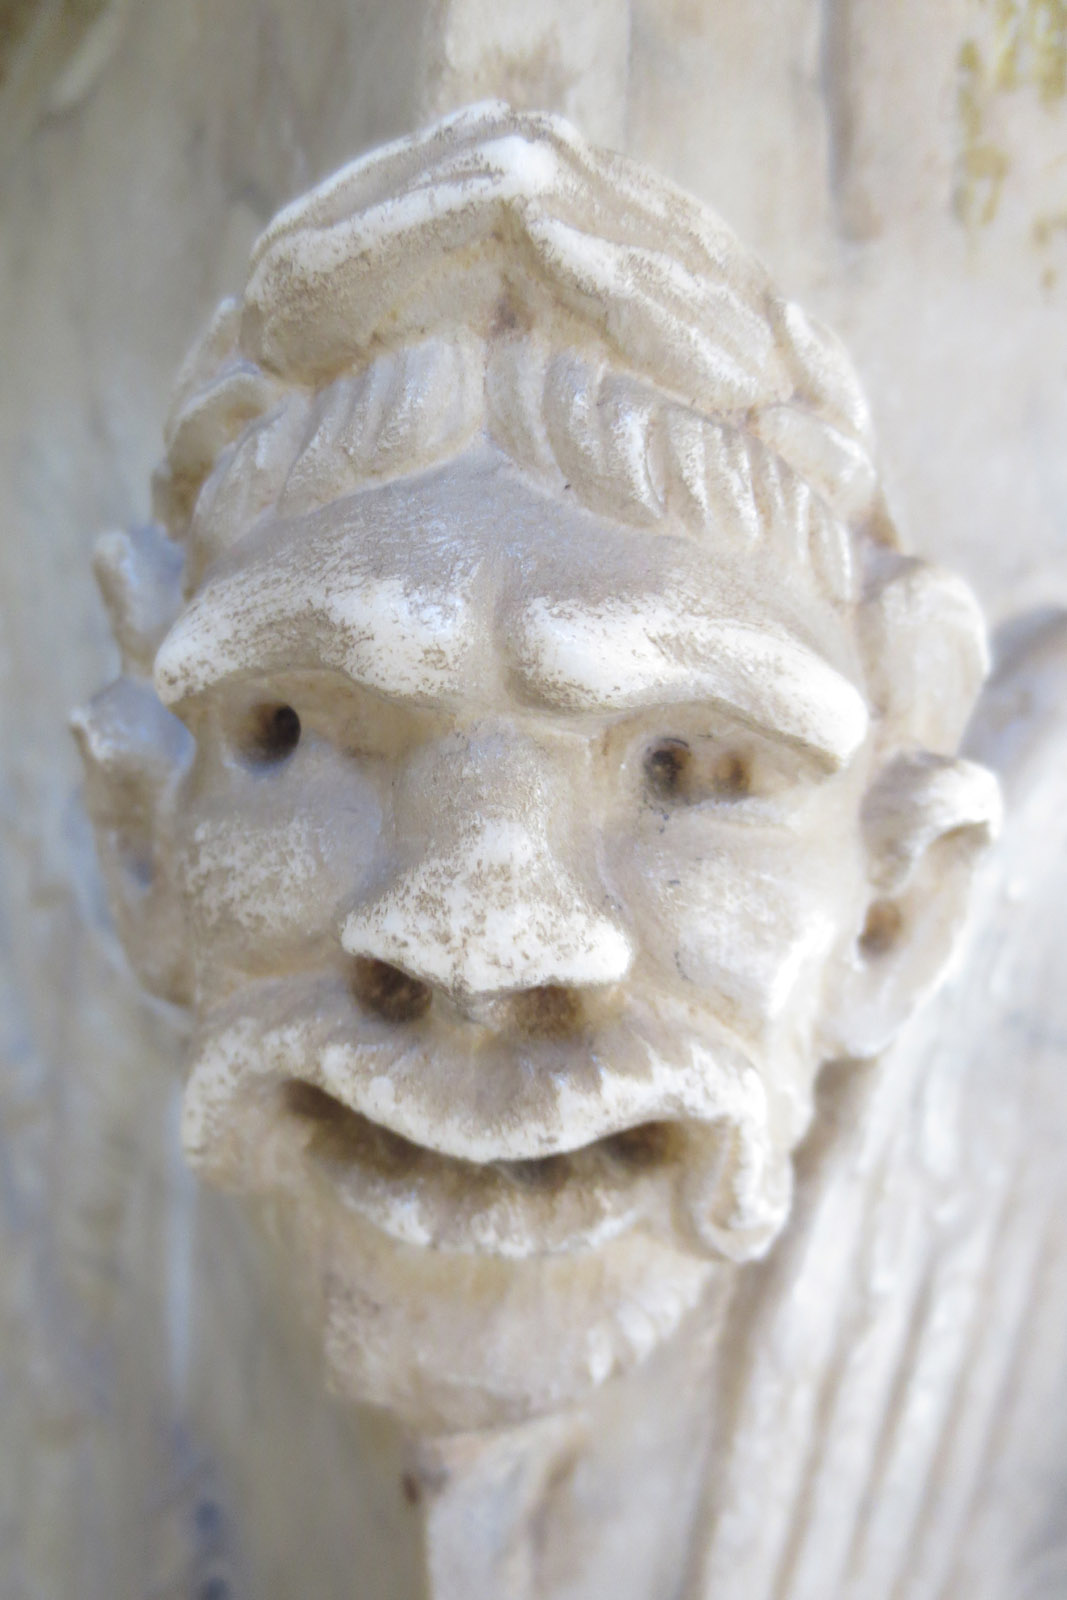
And now for the beautiful graves I could not identify. The last is my favourite. But first, the flower shop. (note: some names have been added to the original post. See below.)

Florist, Novodevichy Cemetery

Russian entertainer Boris Brunov

Cat lover Valentina Reinholdovna Gliere

Come and sit

Russian singer

Someone to keep watch, Yelizaveta Kairova

Agony

Young lovers

Living tree
©voyager, all rights reserved
Edit note: Thanks to meaderborn and Ice Swimmer for helping me fill in a few names on my unidentified list. I have added their names in respect.
Link to previous Post – Russia – The Novodevichy Nunnery