From Giliell, click for full size!


© Giliell, all rights reserved.
From Giliell, click for full size!
© Giliell, all rights reserved.

©voyager, all rights reserved
The Road Not Taken
Two roads diverged in a yellow wood,
And sorry I could not travel both
And be one traveler, long I stood
And looked down one as far as I could
To where it bent in the undergrowth;
Then took the other, as just as fair,
And having perhaps the better claim,
Because it was grassy and wanted wear;
Though as for that the passing there
Had worn them really about the same,
And both that morning equally lay
In leaves no step had trodden black.
Oh, I kept the first for another day!
Yet knowing how way leads on to way,
I doubted if I should ever come back.
I shall be telling this with a sigh
Somewhere ages and ages hence:
Two roads diverged in a wood, and I—
I took the one less traveled by,
And that has made all the difference.
BY ROBERT FROST
A sparow on the roof “If I were a big bird, chibbi, chabbi, chaibbi-chibbi-chumb…”.
Sorry everyone, but I have to take a day. Grimhild is acting up, which means “Behave!” Here’s Chas & Alfie, most adorable couple ever to make it up to you. (Click for full size.) I’ll be back on Sunday.

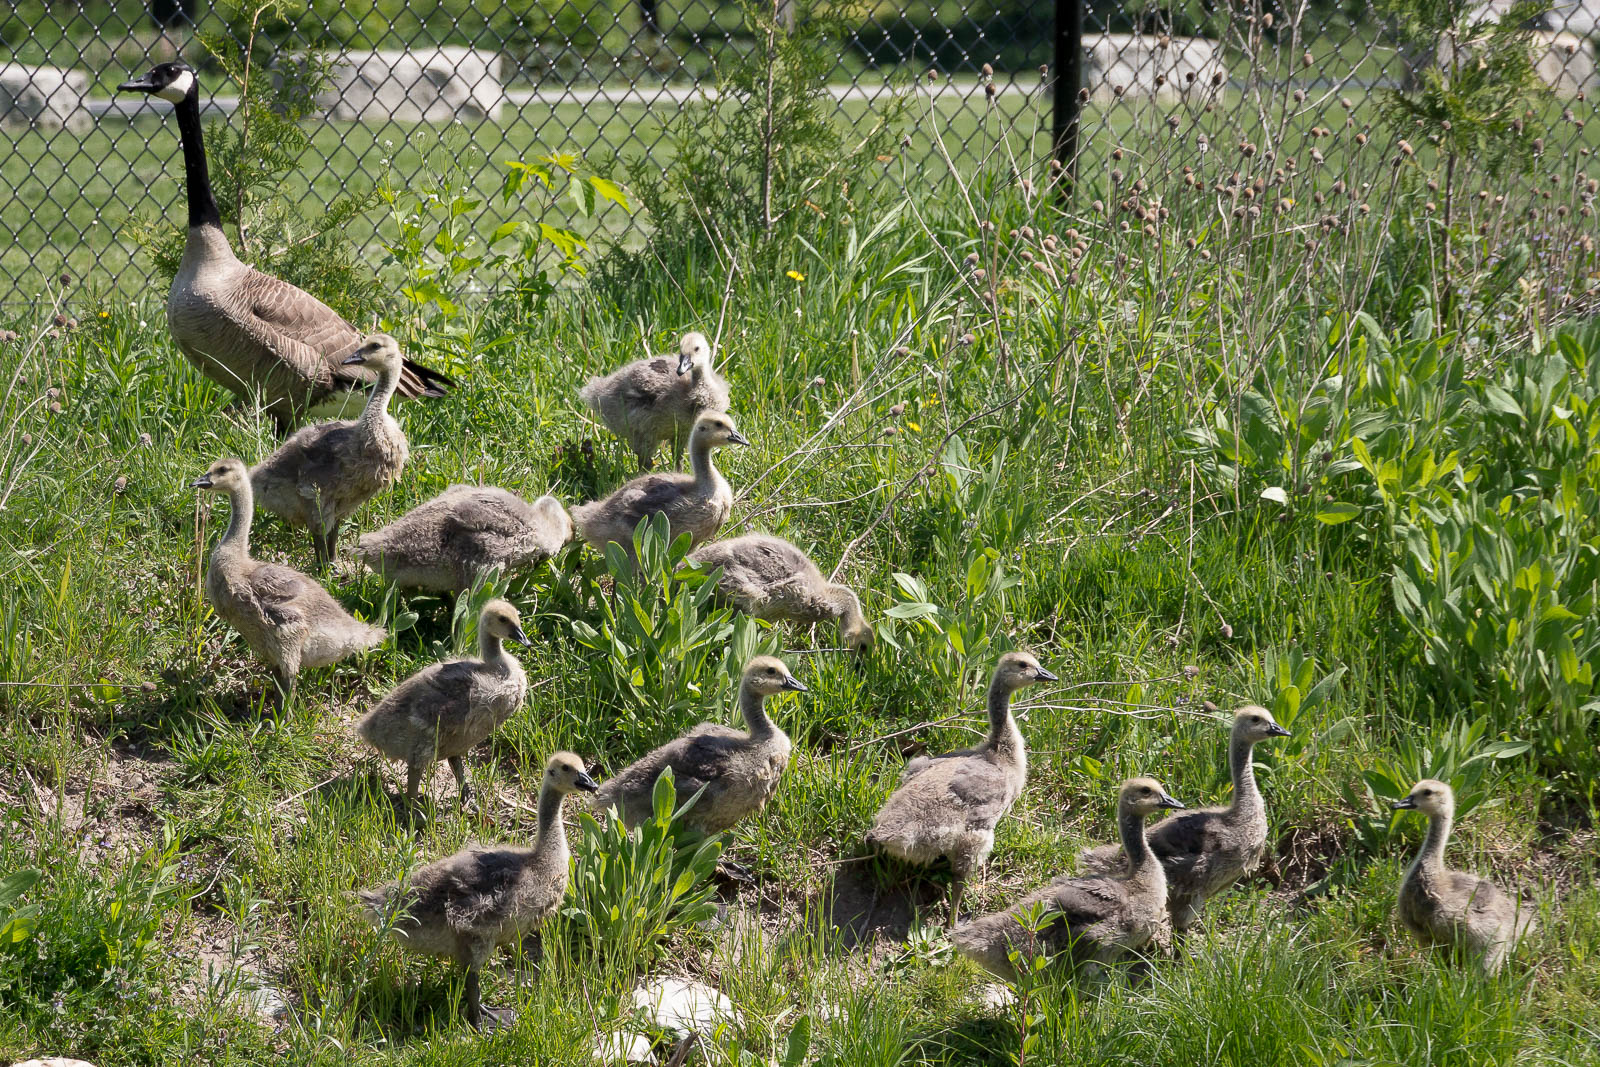
It’s been 10 days since I checked in on the goslings and they’ve gotten so big. Their beaks have developed into the adult shape, their necks are much longer and their colour has turned from yellow to light brown. You can also see the beginnings of adult feathers and the development of real wings. I wonder at what age they will take to the air?
©voyager, all rights reserved
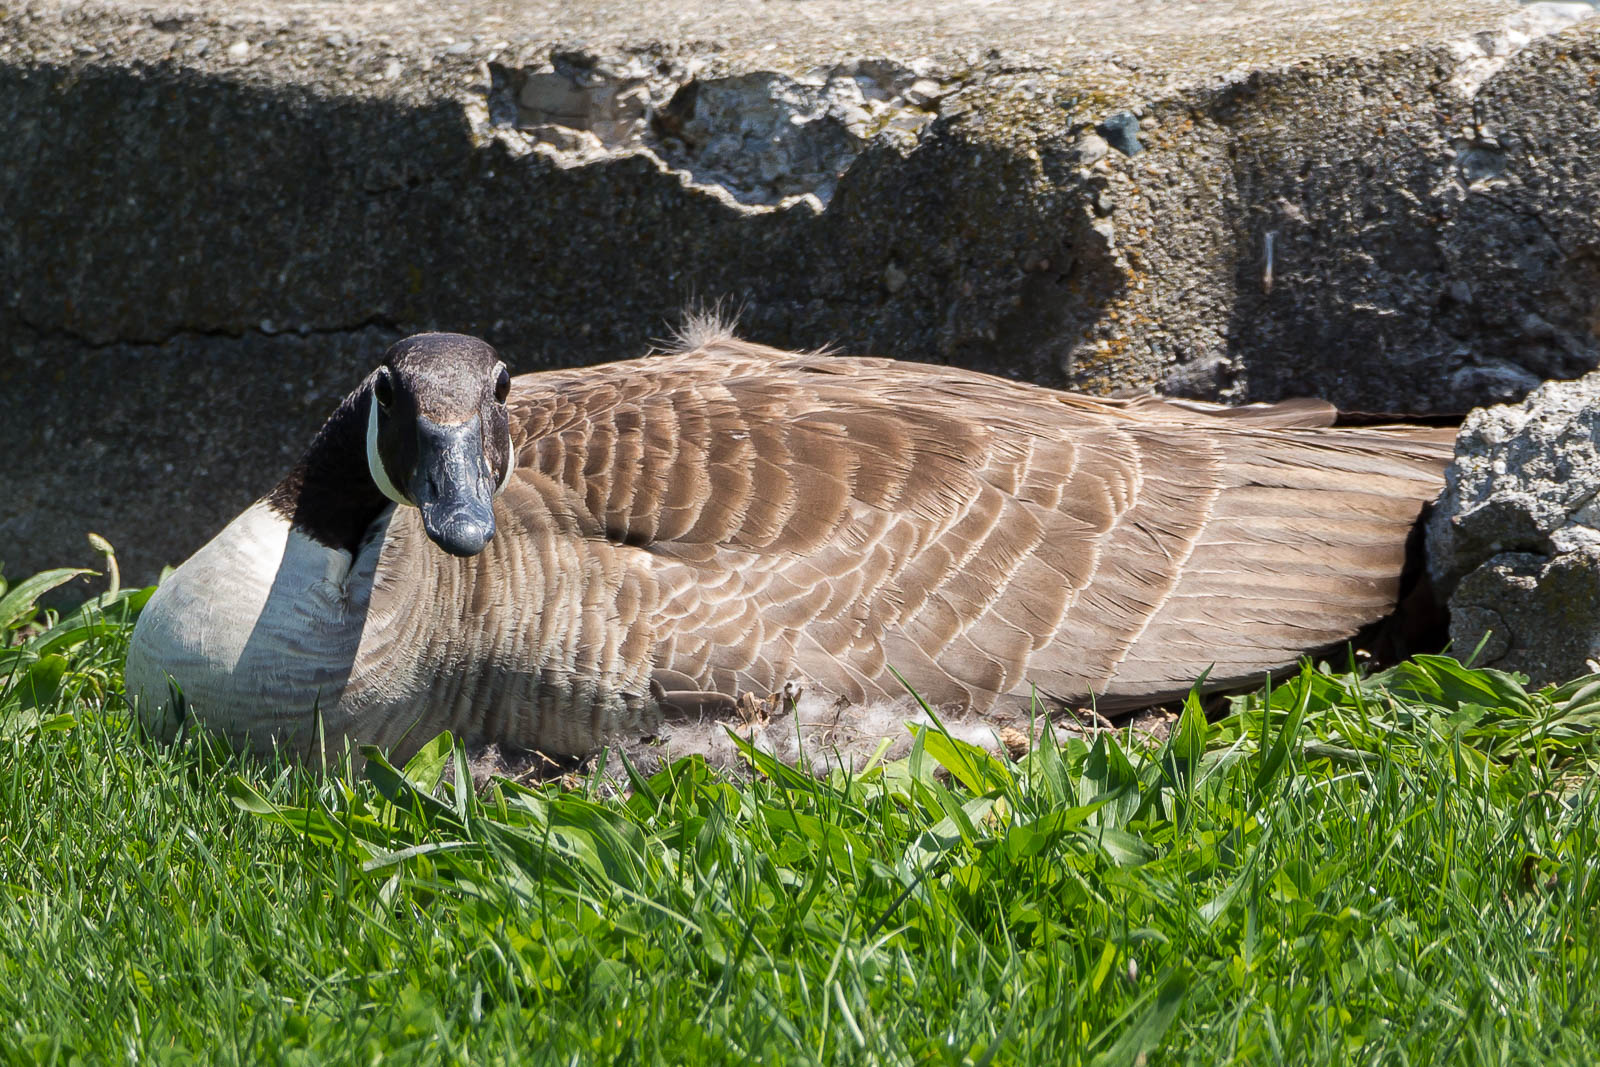
On the other side of the park, though, one poor mama is still incubating her eggs and she has nested right against the concrete barrier to the pond. It’s a busy spot near a parking lot with lots of people coming and going. I’ve been pondering this choice and have concluded that the concrete barrier protects her on one side so no one can sneak up on her and that the parade of people probably keep other geese from bothering her. Even so, she is wary and was giving Jack the evil eye. I have no doubt that she would have launched an attack had I let Jack any closer. Not a silly goose after all.
Much like people still use fungus riddled Diamond Willow to make walking sticks and other items, spalted wood was also a part of the art of Intarsia, a specific type of wood inlay. Here are a few stunning examples, and you can see and read much more about the history of this art at the Public Domain Review.
The technique of Intarsia — the fitting together of pieces of intricately cut wood to make often complex images — has produced some of the most awe-inspiring pieces of Renaissance craftsmanship.
Note: if you click over to the Met Museum, the way to see the images full size is to click on ‘download’. All the images here, click for full size!
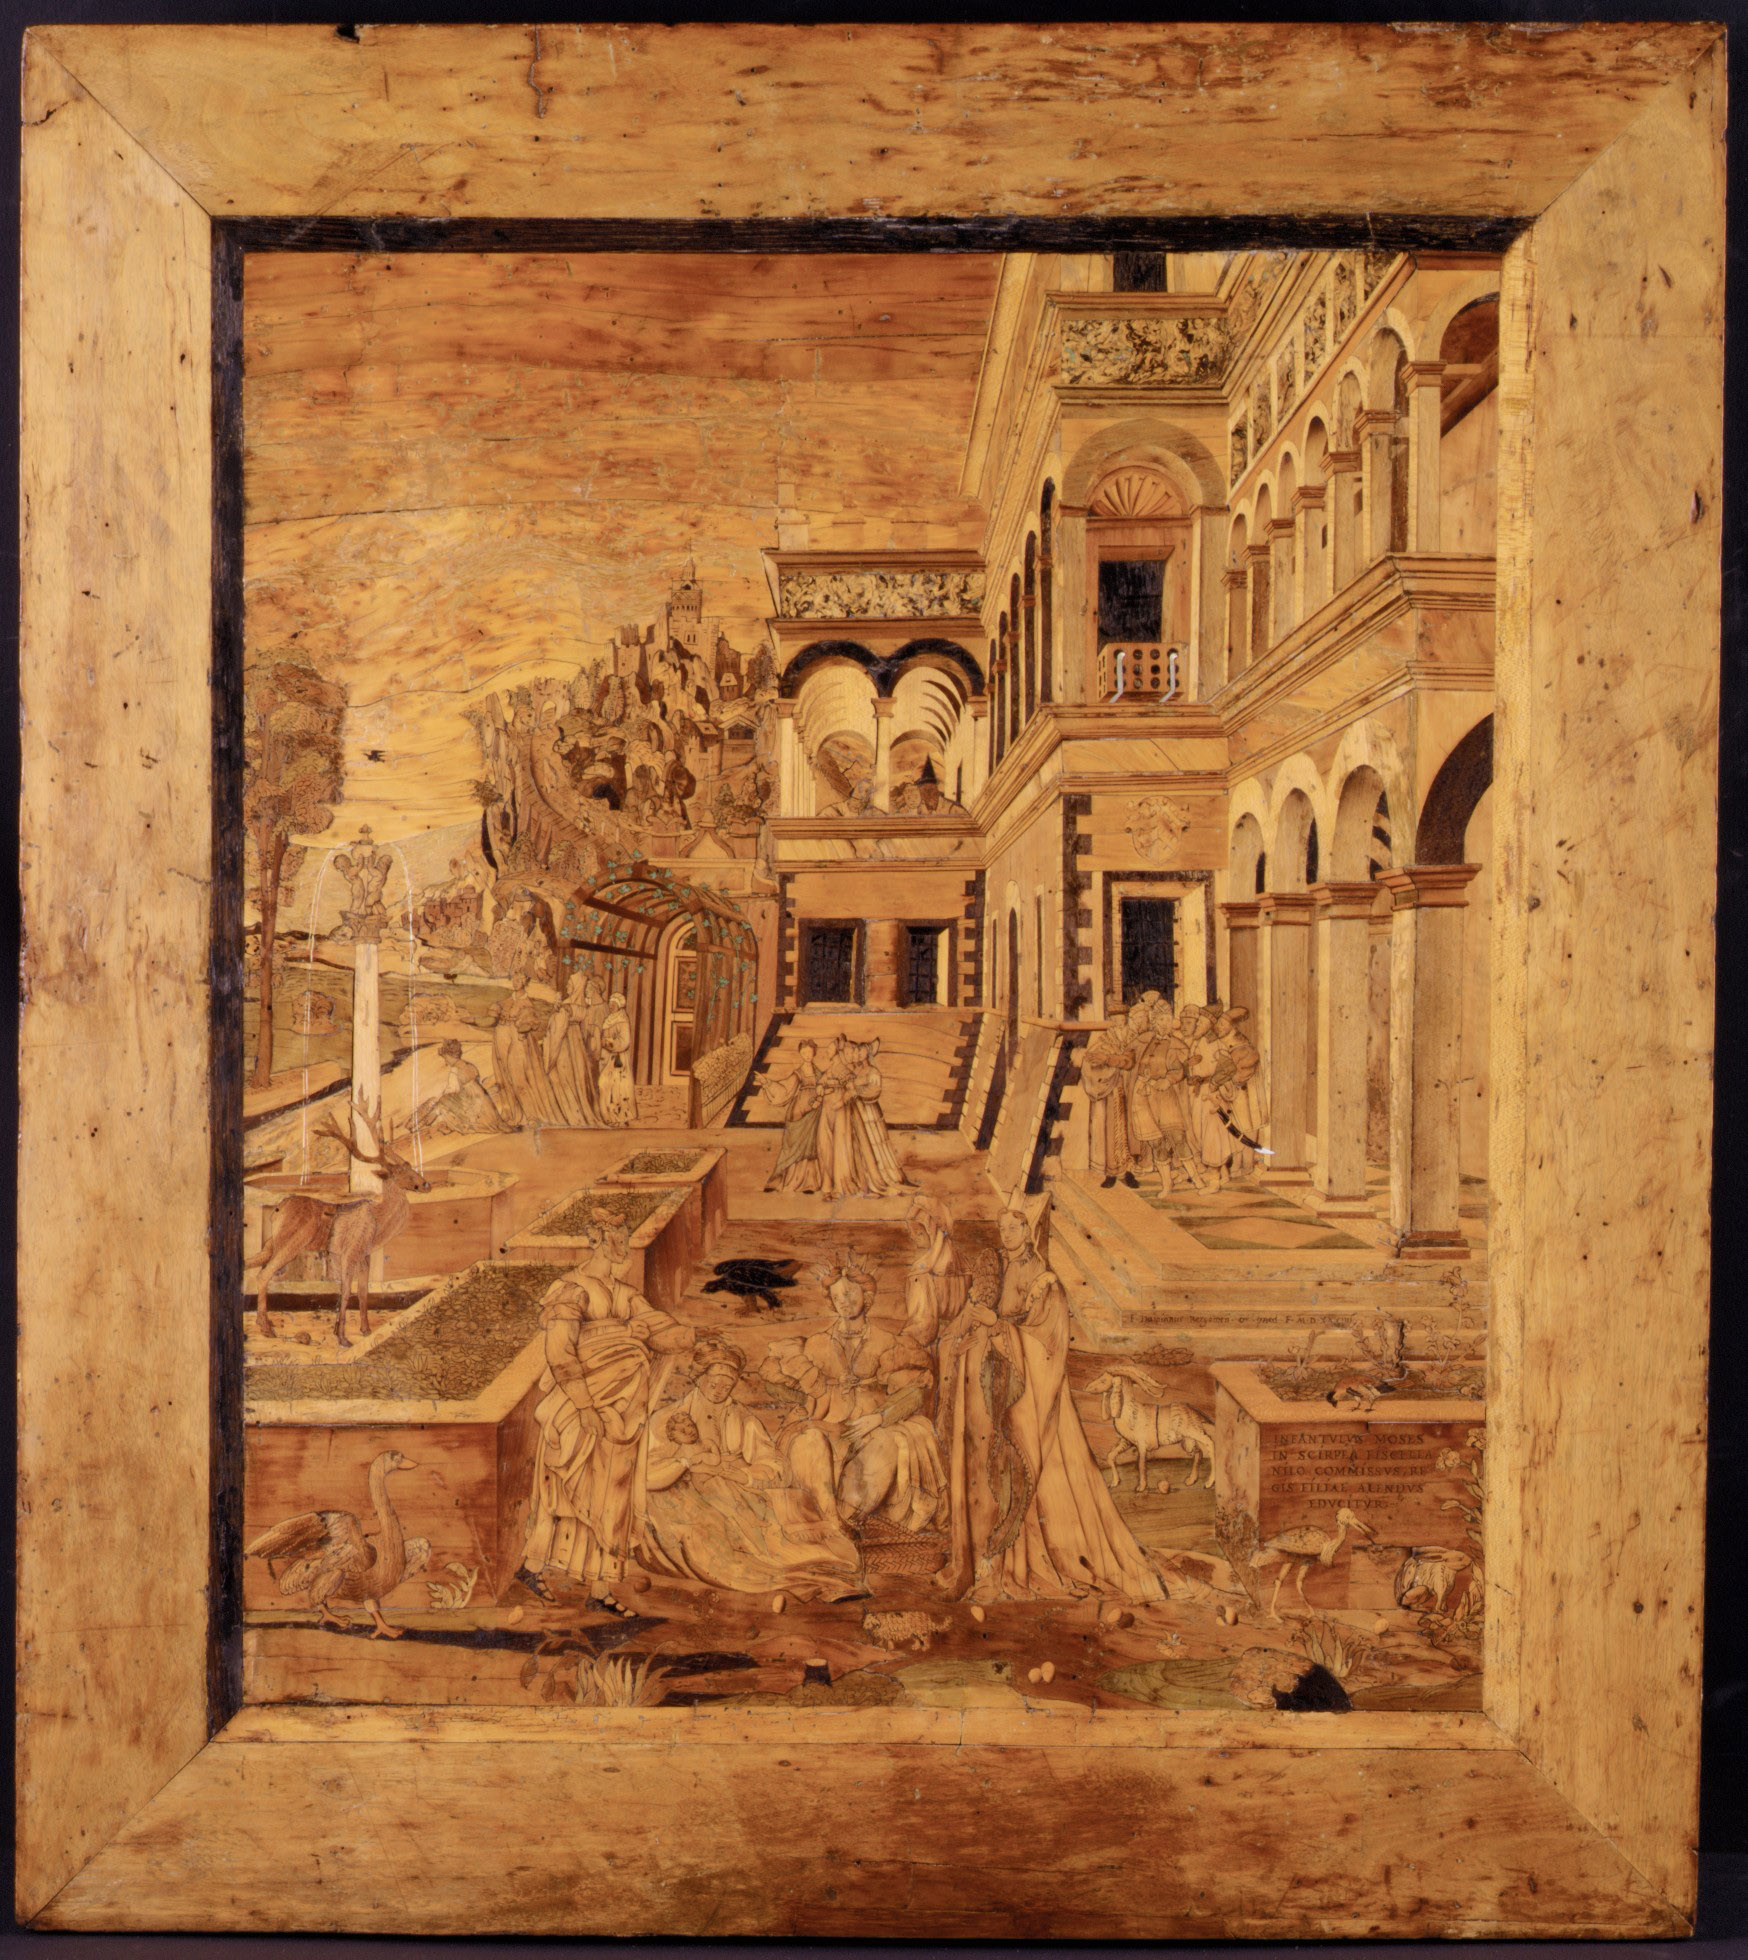
Detail from an intarsia piece by Fra Damiano da Bergamo, early 16th century. Note the subtle dots of greenish-blue in the covered archway — Source.
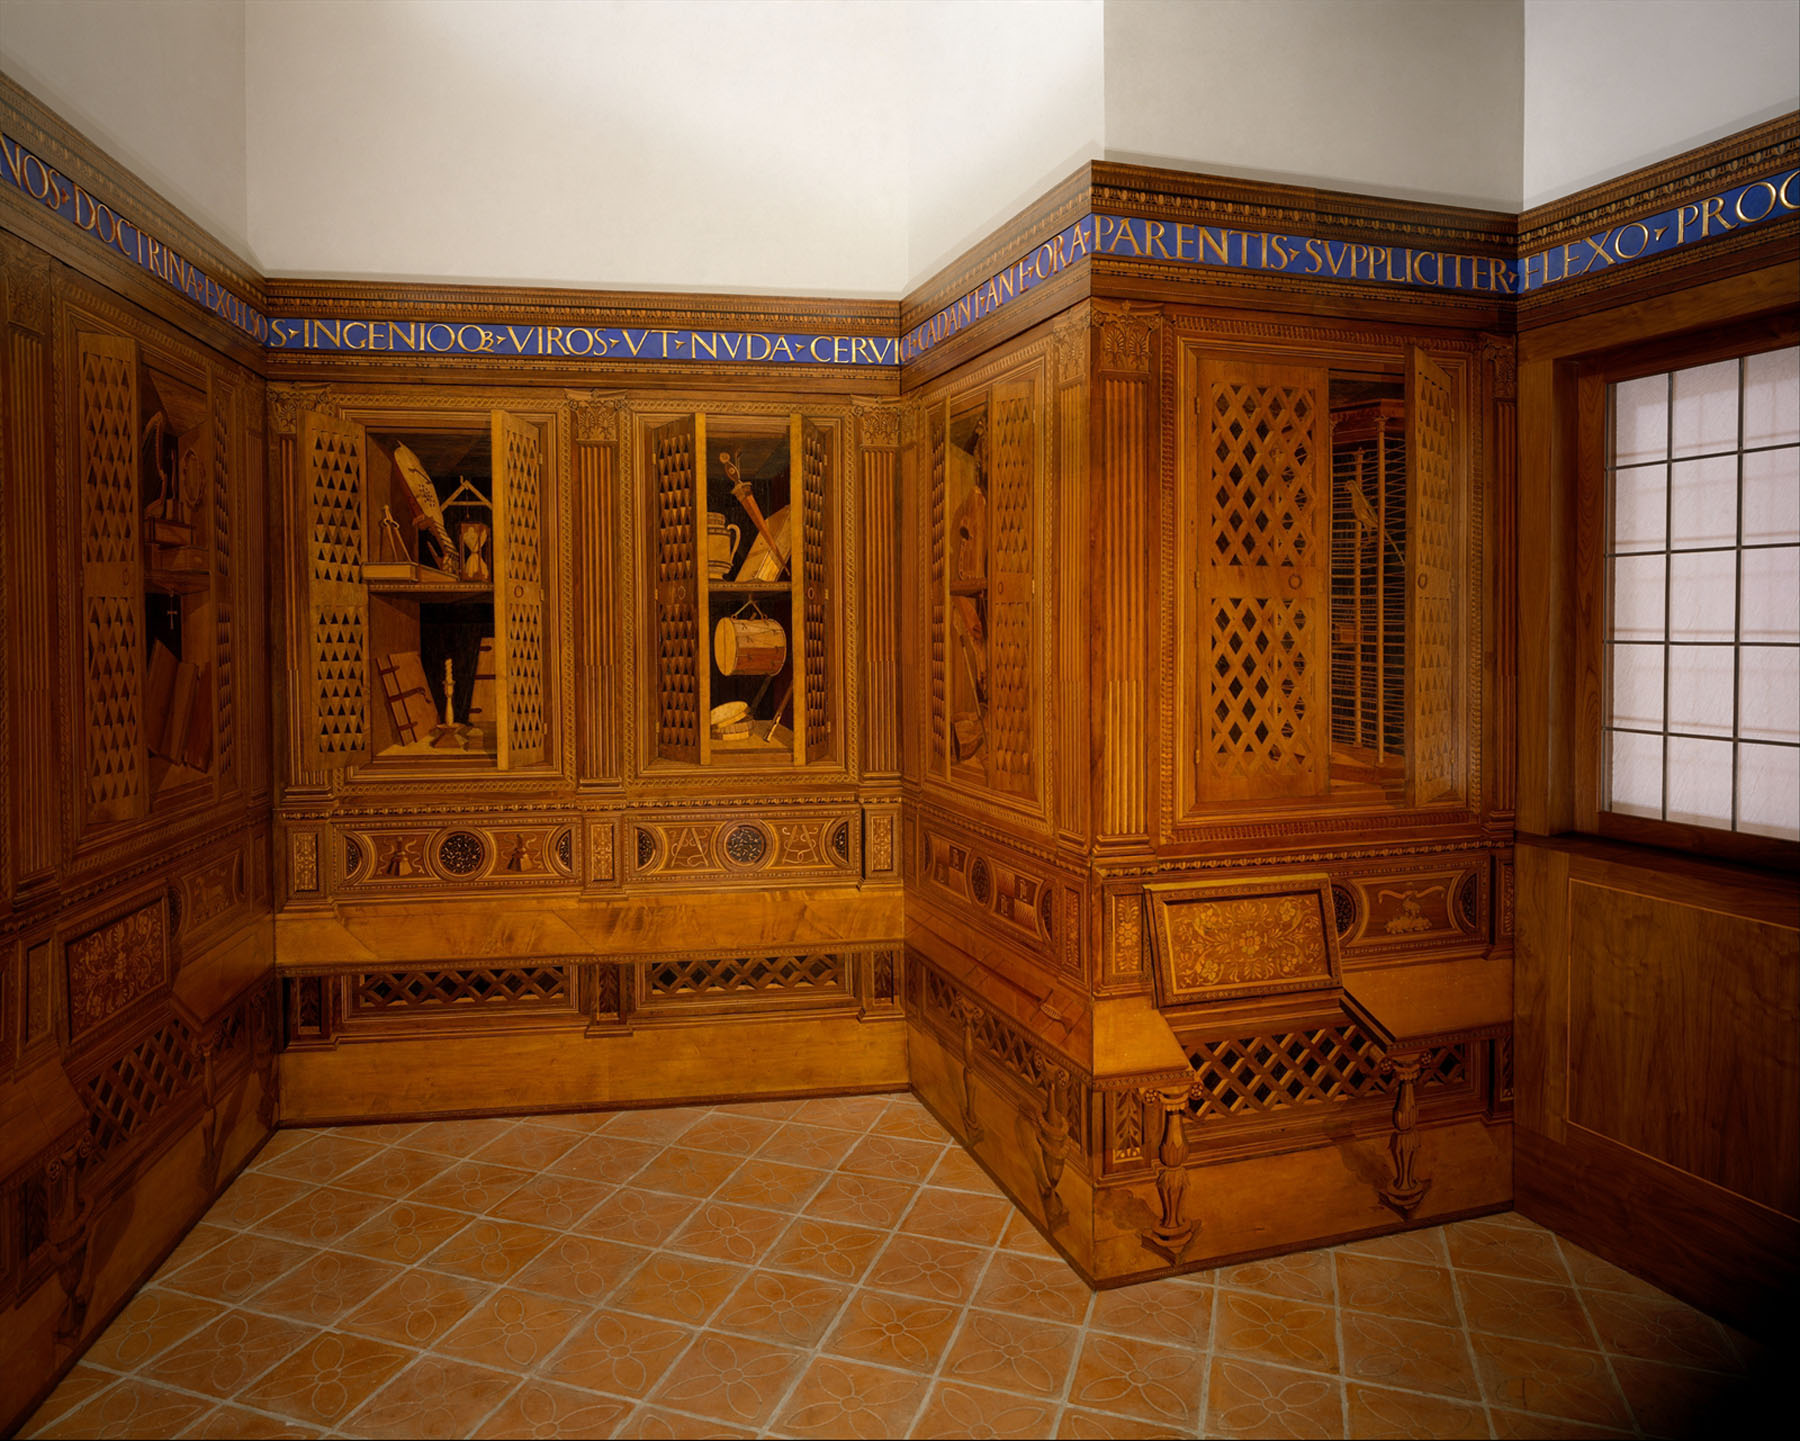
Those “cupboards” are trompe l’oeil! Part of the Studiolo Gubbio as installed in the Metropolitan Museum — Source.
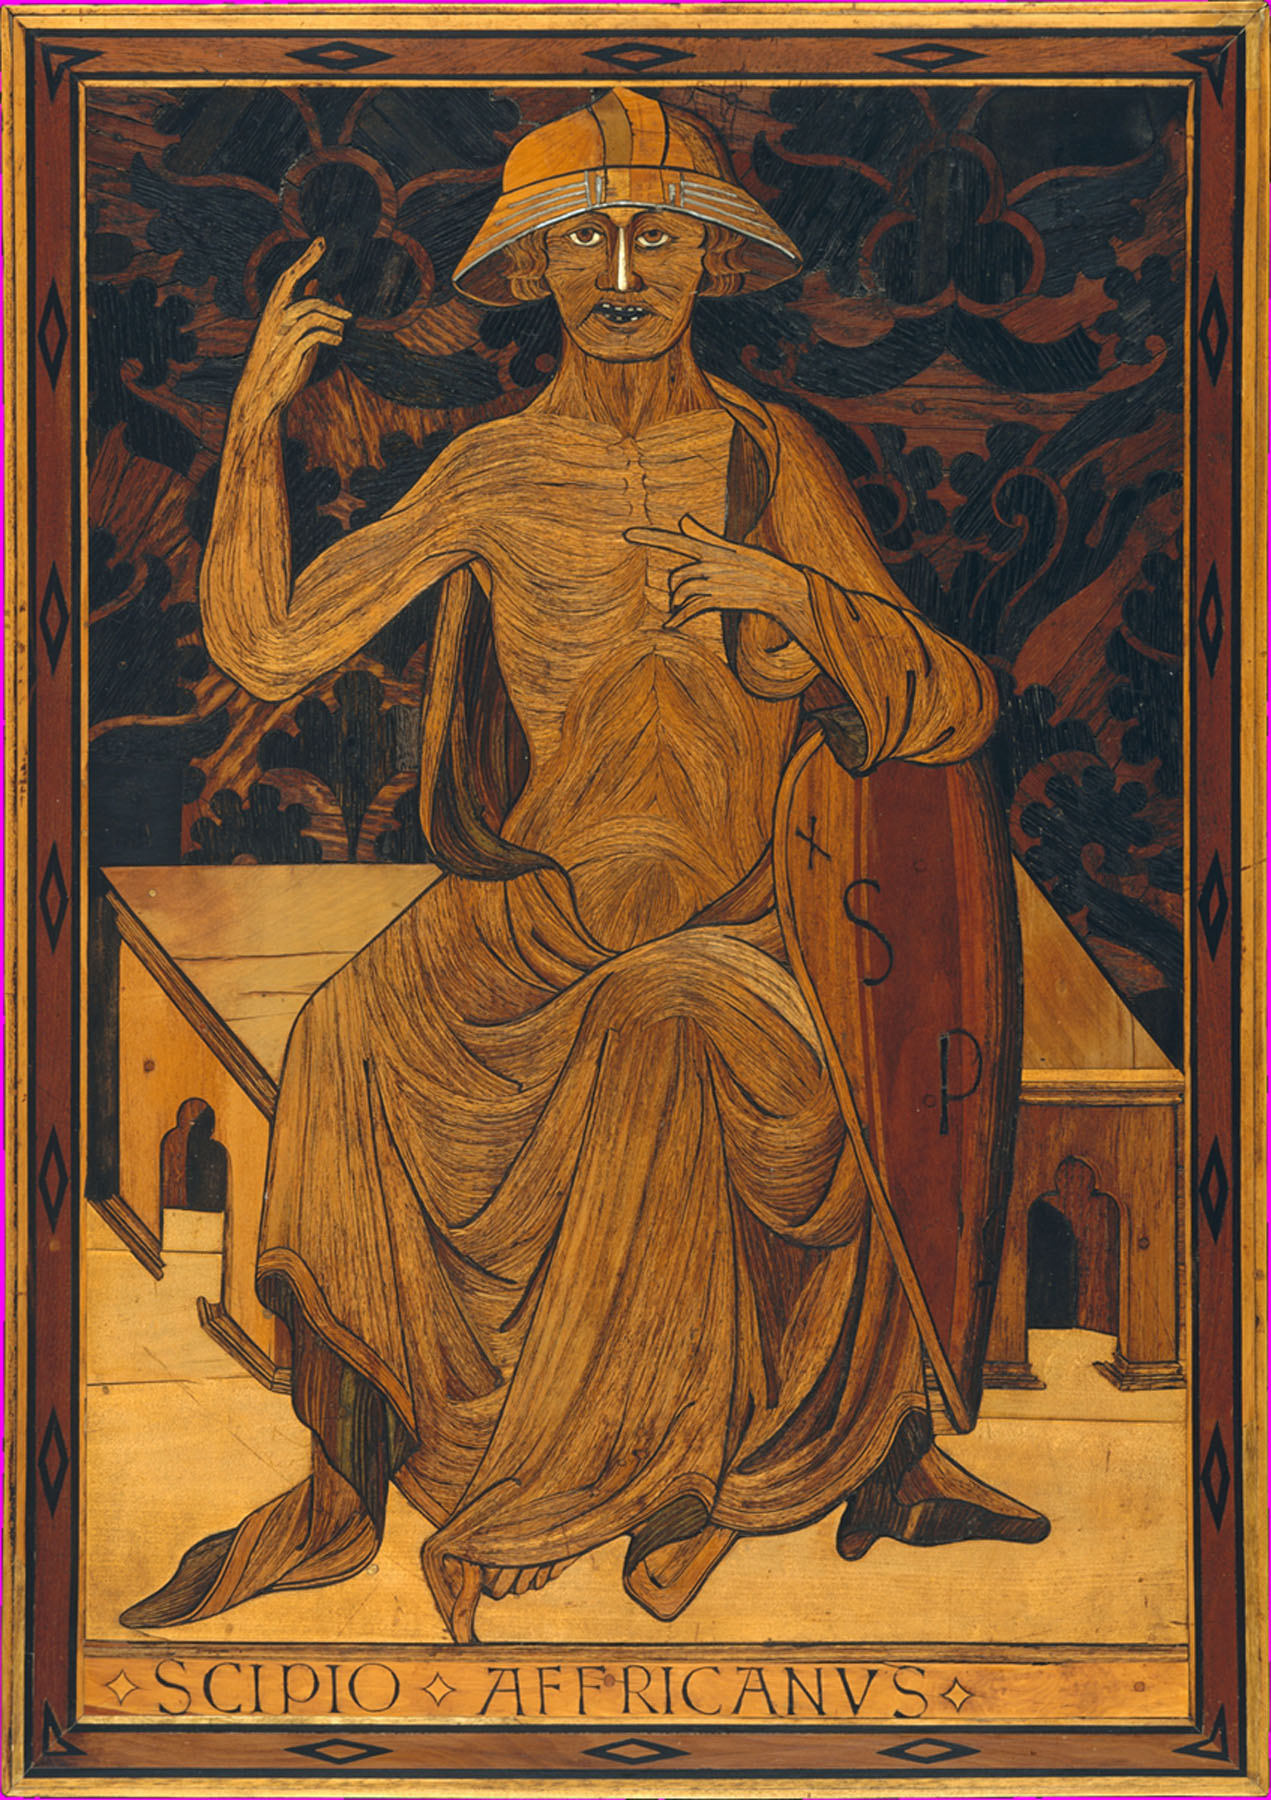
Scipio Africanus (ca. 1425–30), intarsia by Mattia di Nanni di Stefano using poplar, bog oak and other wood inlay, rosewood, tin, bone, traces of green colouring — Source.
Click for full size!
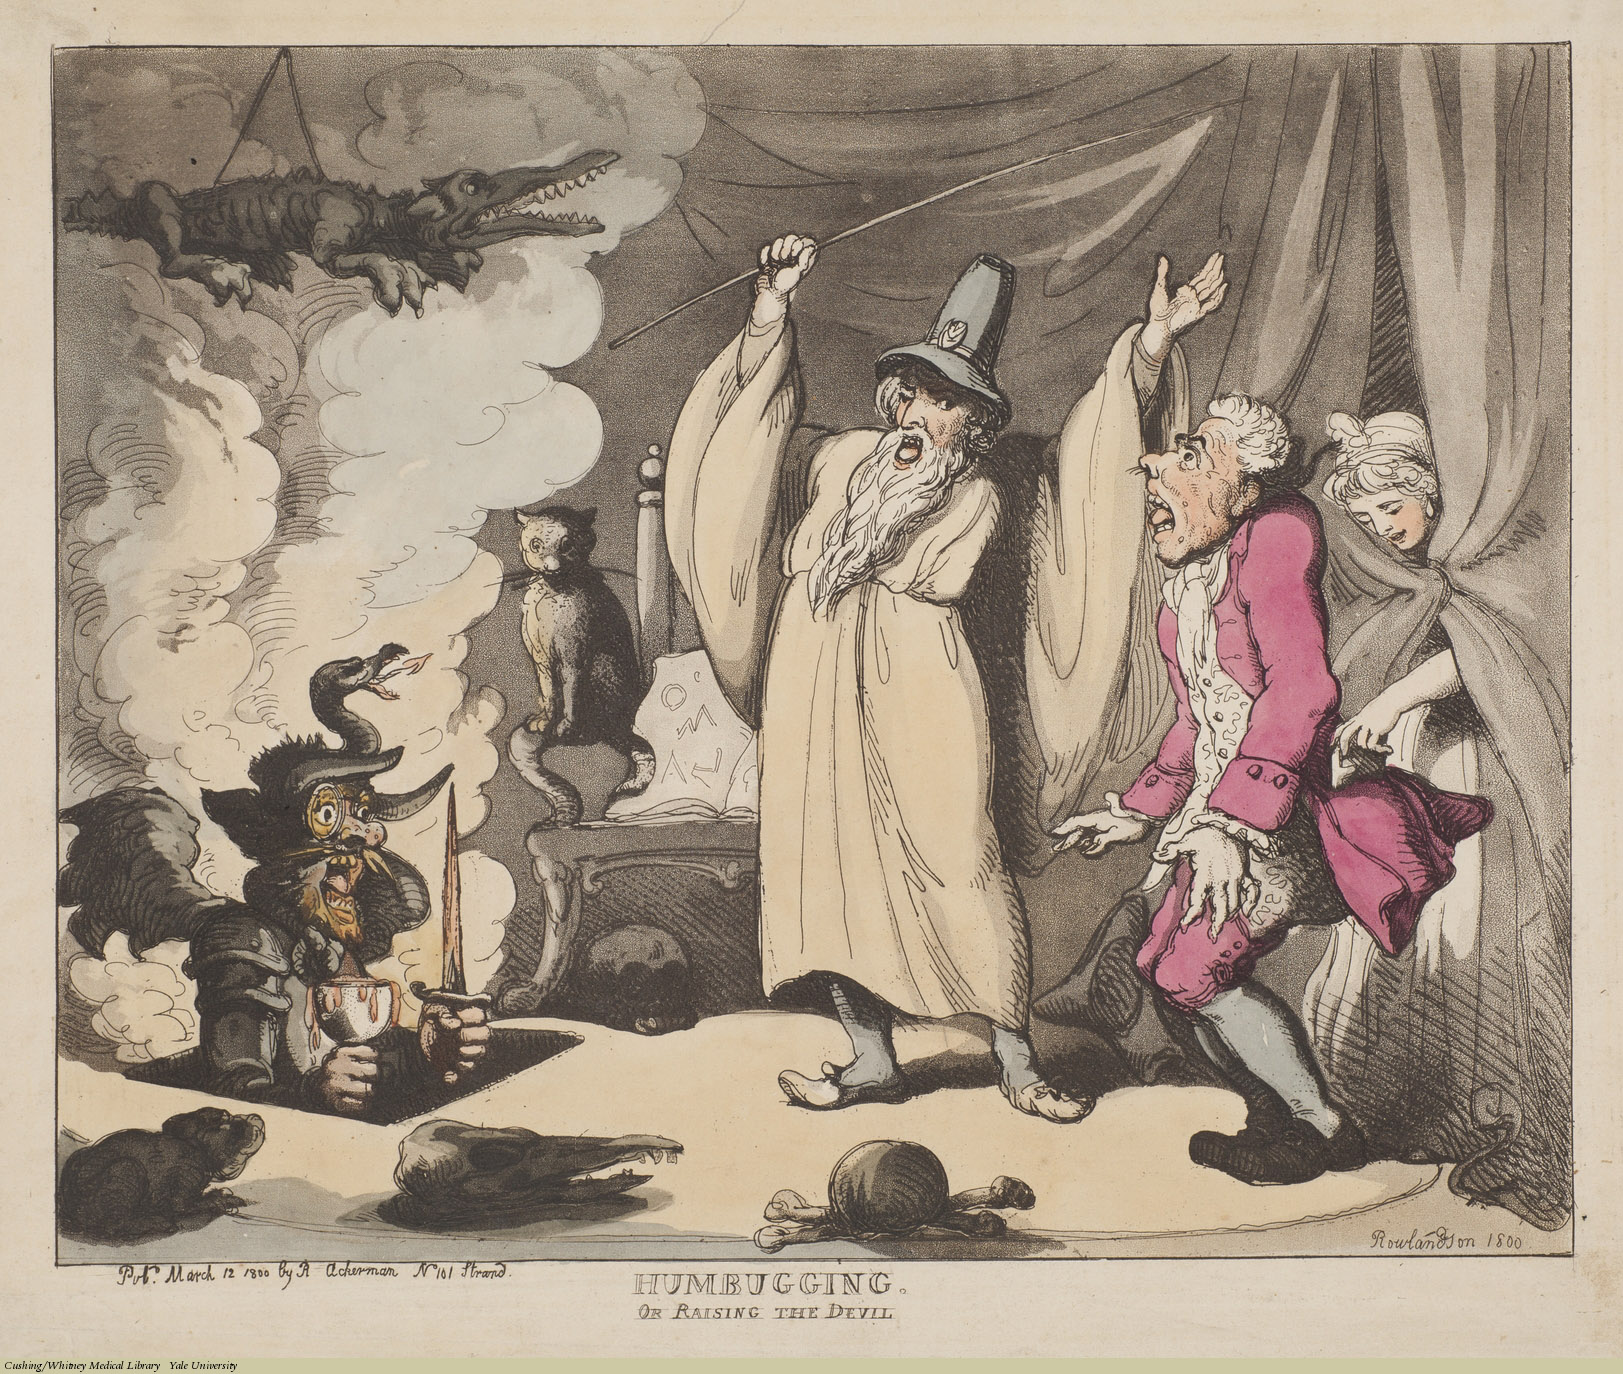
Humbugging. Or Raising The Devil. Thomas Rowlandson, Aquatint coloured, 1800. Subject: Wizards, Confidence Trickster, Pickpocket.

Hocus Pocus Or Searching For The Philosopher’s Stone. Thomas Rowlandson, Aquatint coloured, 1800. Subject: Count Alessandro Cagliostro (Giuseppe Balsamo), Alchemy, Sex.
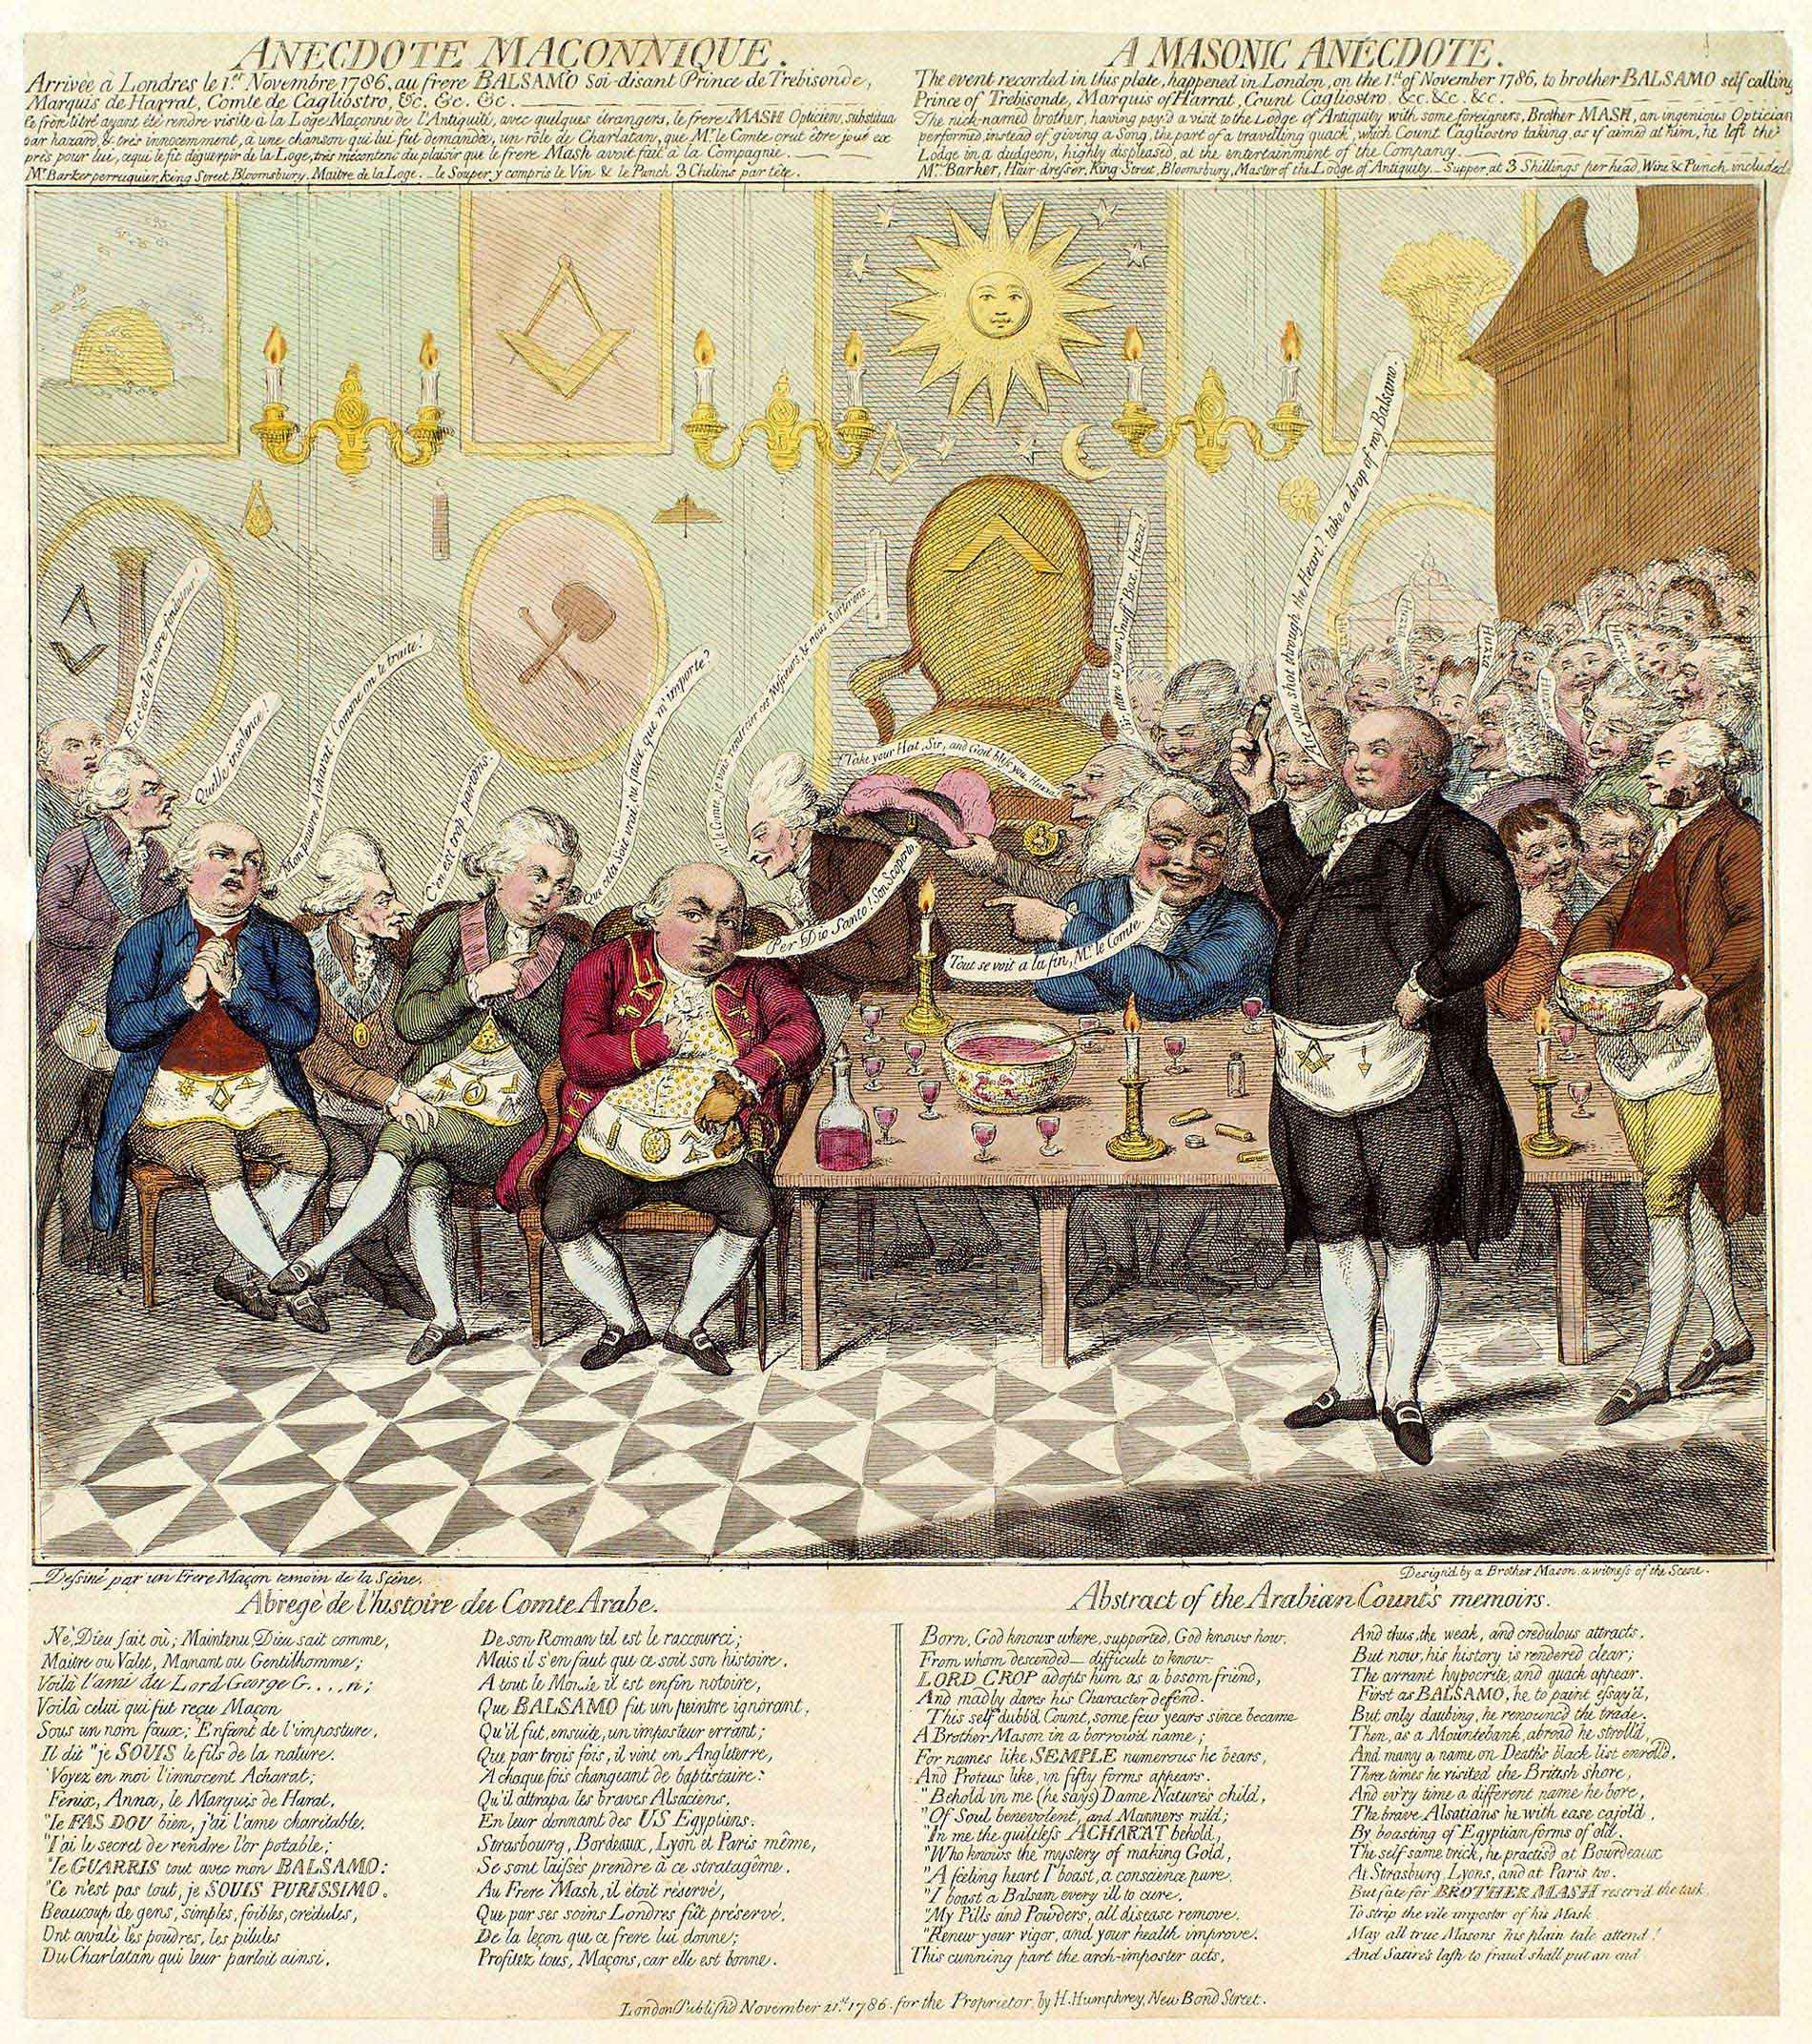
James Gillray did a scathing piece on Cagliostro, click for full size:
I am not done with the polishing yet, since the hardened layer was too thin and I had to start all over again with hardening. This time i made it during the day with controlled temperature. And also a different hardening mixture because the thinness might have been caused by phosphorus in the steel, which inhibits dissolution of carbon. I shall not go into technical details here, maybe another time in another project, but the result is twofold – the dagger has now really, really hard surface, maybe too hard, it eats abrasives. And it has a few discoloured spots, which I was trying to avoid by using charcoal. It is a beautiful blade nevertheless so I had to solve the conundrum how to keep it from scratching. I cannot just lay it on the workbench, because there will always be abrasive grains from angle grinder, sandpaper etc. and highly polished surface gets unseemly scratches in a blink. So I decided to start on the scabbard.
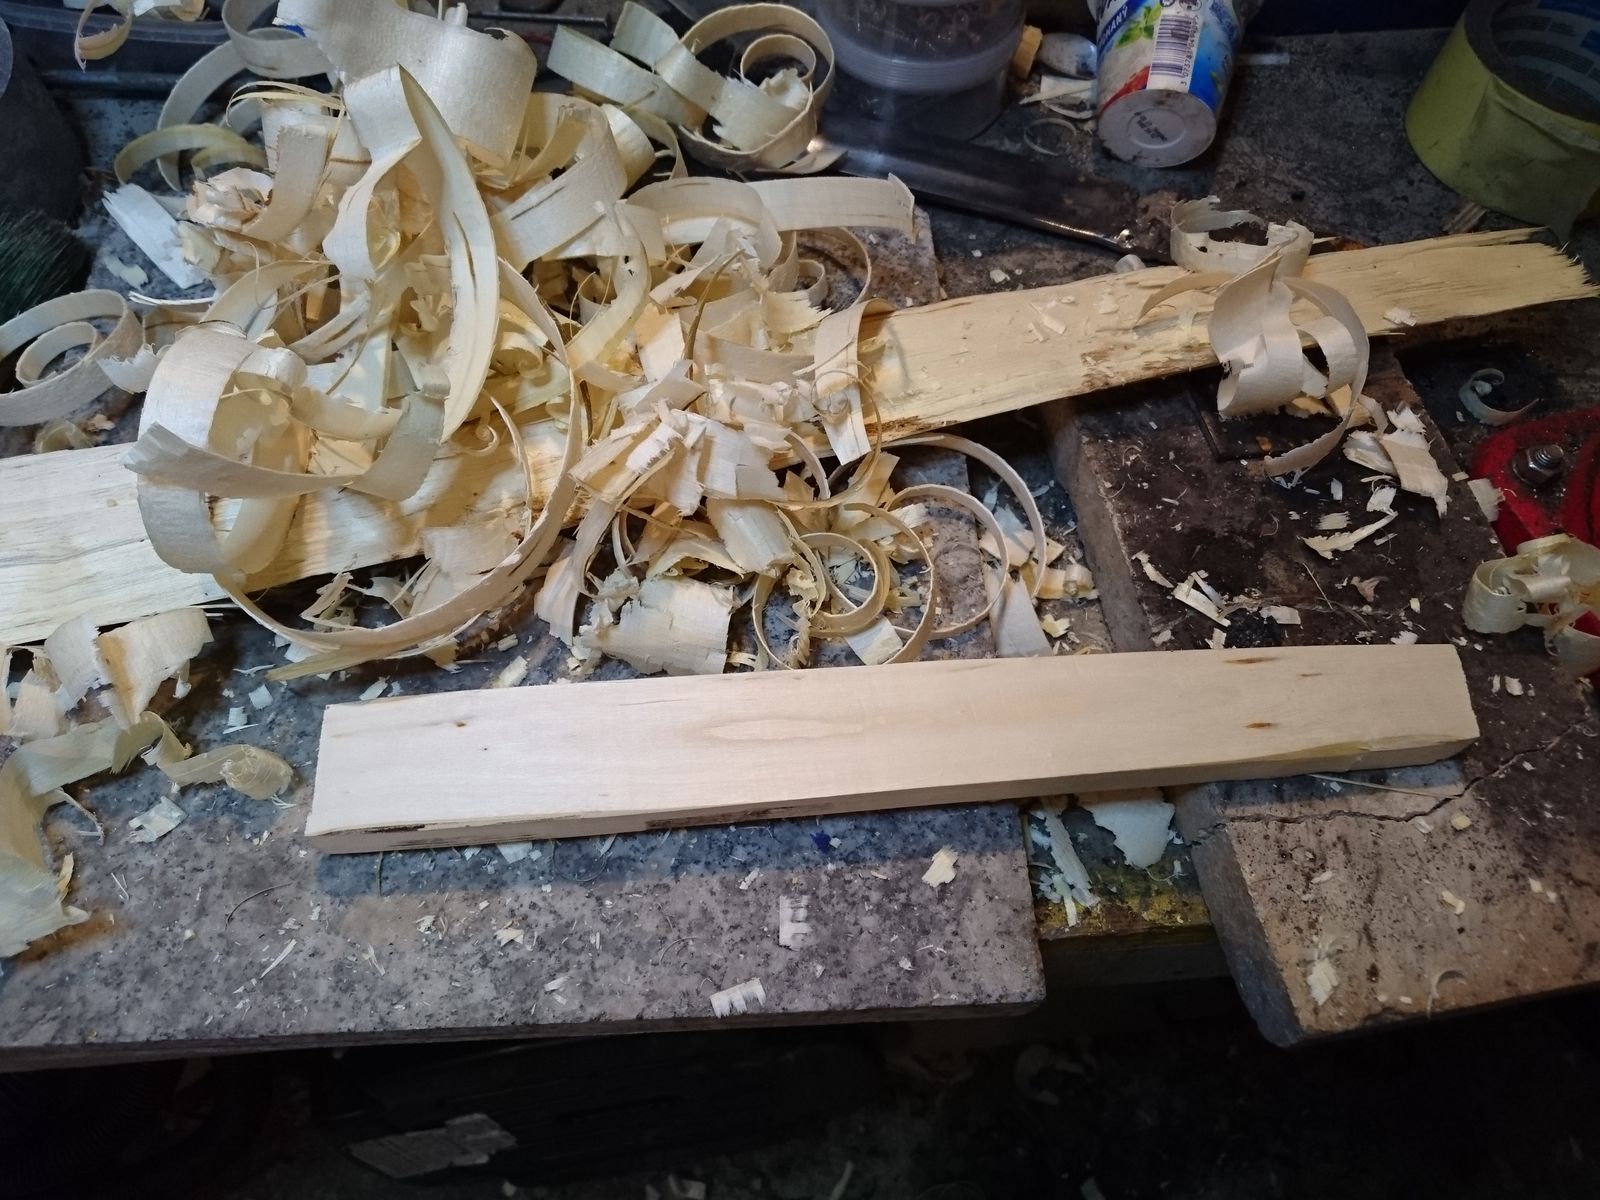
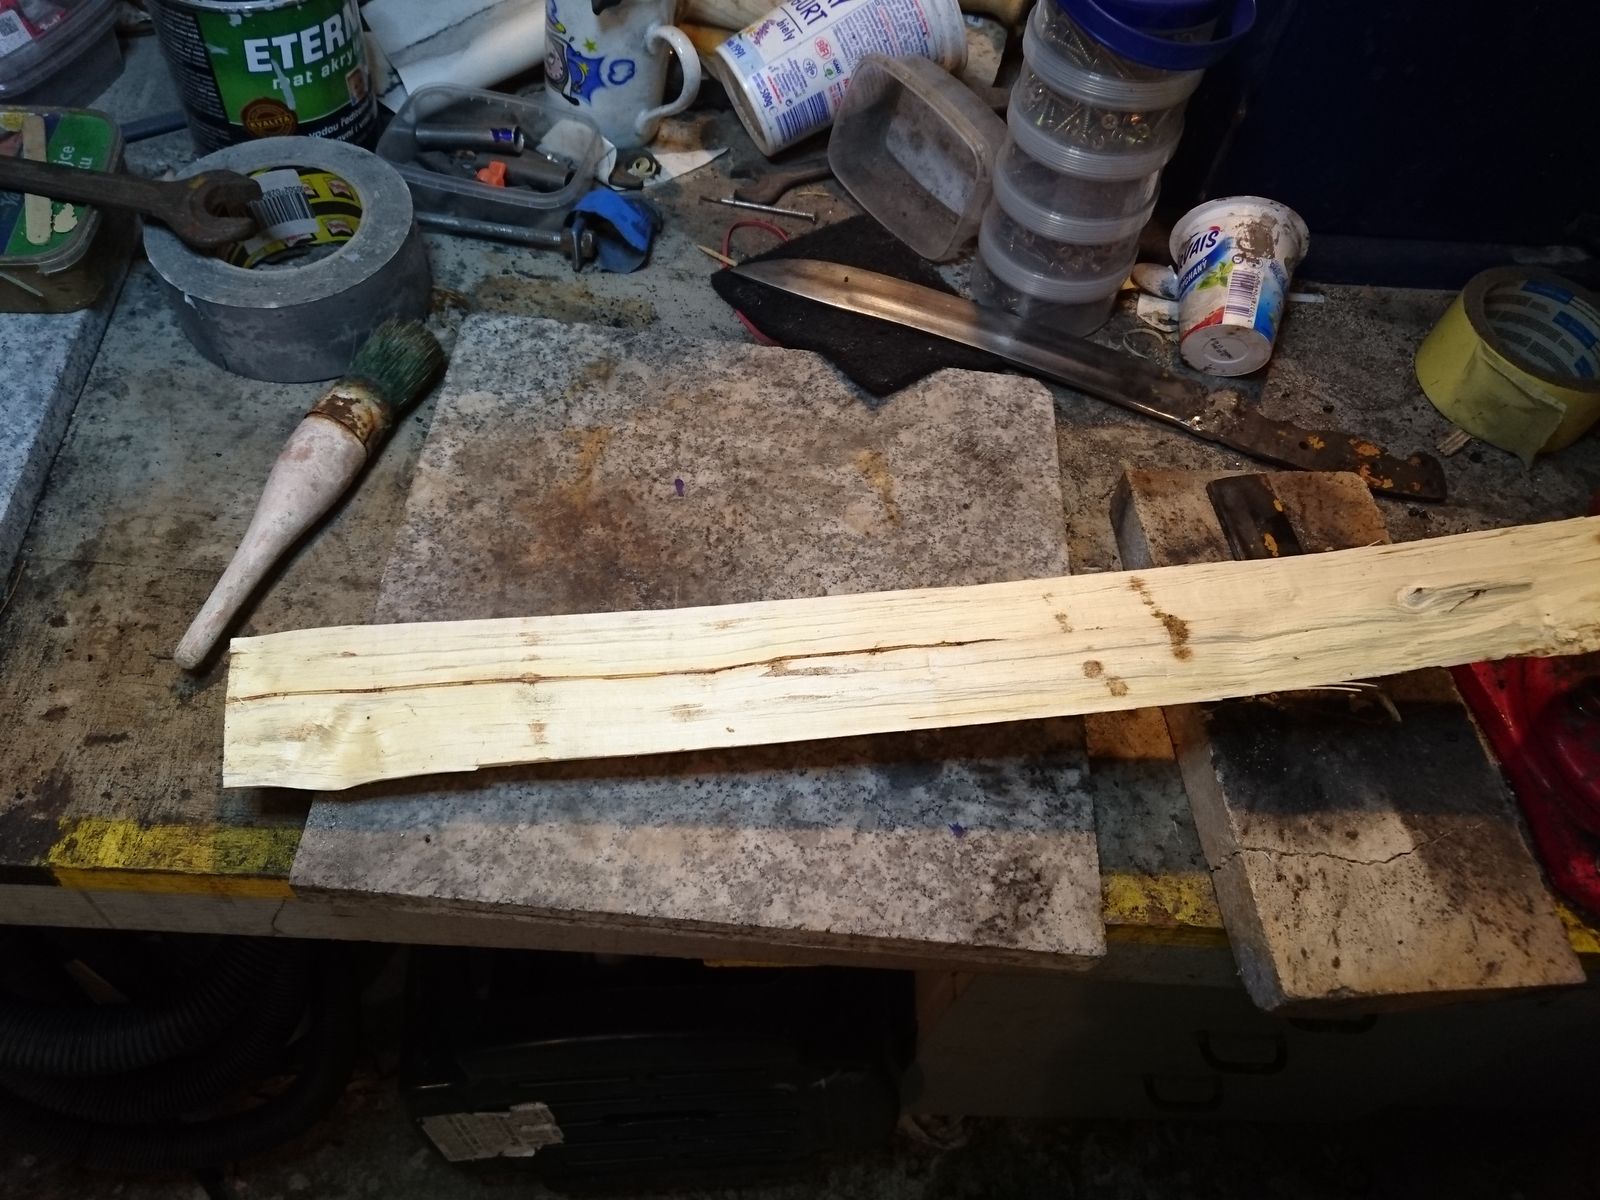 I intend to do proper, wooden scabbard and for this I have set aside a piece of fast growing poplar (Max 4 (Populus maximowiczii x P. nigra)) that I grow in my garden for firewood. It is very light, porous and soft wood, feels in hand like balsa but does not split or break very easily – it tends to keep hanging on threads. That makes it an ideal material for a scabbard. Since it is a modern fast growing hybrid, it is not authentic material, but it is closest to authentic material (P. nigra) I can get my hands on straight away. The piece I have here is from a four year old tree that I harvested this spring.
Cutting a rectangular block with a draw knife and a plane, cutting the block in two halves and facing them, all was a matter of mere minutes. The wood is extremely easy to work with.

A scabbard must be tight enough for the knife not to fall out with its own weight, but not so tight as to make it difficult to pull it out. So I had to cut half-blade grooves in both halves (I also took this opportunity to use my belt grinder to sharpen all my chisels and carving knives, it was long overdue in any rate). For this a bit harder wood would probably be slightly easier to work with, because with wood this soft I had to be really careful not to cut too much. I did however cut a little more than for a perfect fit, because after the grooves were cut, I had to rough the halves with a hacksaw blade for greater surface and therefore better glue adhesion which takes about half a mm off. There is a special type of plane for that, but I do not own it and even if I did, this is too small surface for a plane. The hacksaw blade is an old and tried trick. Only because the blade teeth are asymmetrical it is important to turn the blade around in order to get symmetrical grooves, or check the direction of the teeth and make them match.


Thus prepared wooden halves were then glued using a hide glue that I cooked from sinews a few years back.
 I do not like working with hot hide glue, but not only is it a medieval authentic material, it has one huge advantage over modern glues – it can be redone and repaired with the help of steam over boling water multiple times, so any mistake can be corrected.
Not that I ever make mistakes that must be corrected. The mistake I did not make and therefore did not have to correct this time was forgetting that since the scabbard is hollow, the warm gooey snot gets squeezed not only on the outside, where it is of no consequence, but also on the inside, where it constrains the already tight fit. I also most definitively did not make the scabbard too tight the first time so it was nigh impossible to get the dagger in and out. But after a few days and multiple attempts … What am I saying. After I glued it and clamped it over night it was fit and ready.
Later I left it dry naturally in the sun for a day and I heated it with hot air pistol with the blade inside so the wood forms better around the blade and also to dry it as much as humanly possible. After that all that remained was to cut it to proper length and chamfer the edges. Now I have safe storage for the blade during final polishing and a piece of work done at the same time.
From Giliell, click for full size.


© Giliell, all rights reserved.
Sona Jobarteh – Gambia. The fourth comment at the link provides a translation to English.
Click for full size.


© Ford, all rights reserved.
A lovely White-breasted Nuthatch from Kengi, click for full size!

© Kengi, all rights reserved.

©voyager, all rights reserved
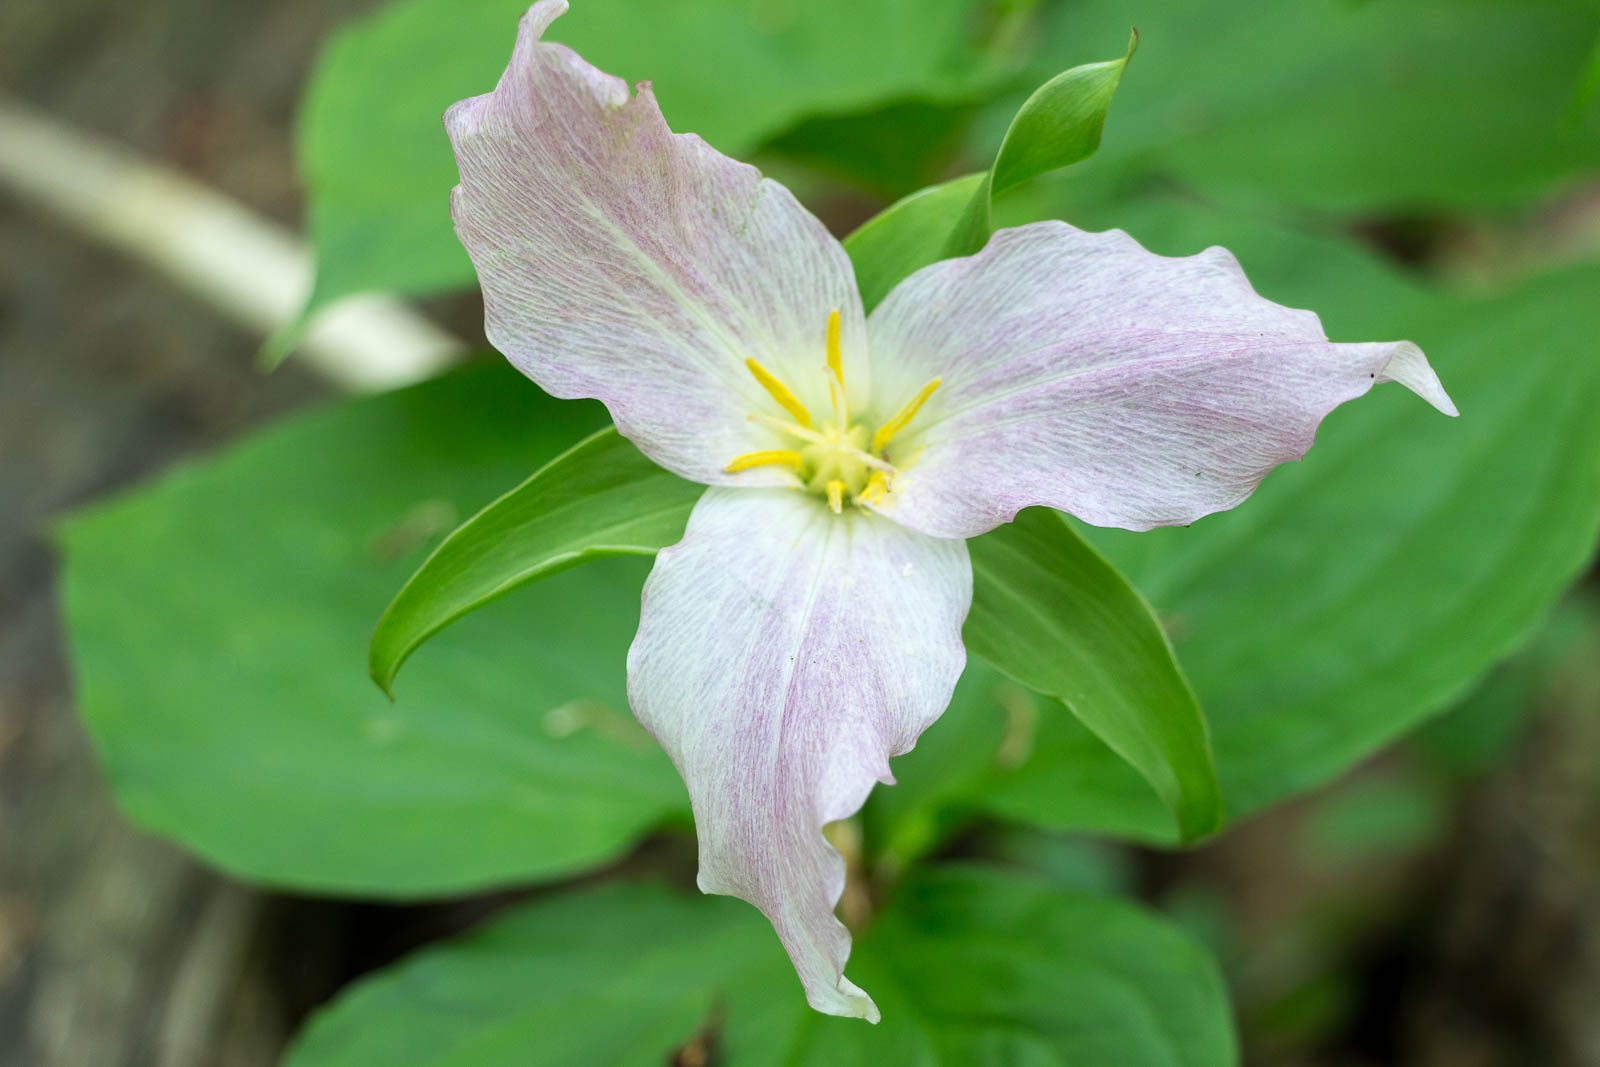
Jack and I walked along our favourite trail in the woods today and found lots of pinkish trilliums. They’re very pretty and look as if they’re a distinct variety of trillium just like the red ones, but they’re not. Pink is simply the colour a white trillium turns as it prepares to finish blooming for the year.