The Finished Little Horse(s)

Kestrel has finished her little horse(s) and I think they’re all fabulous!

I finished my last horse, and in time for the deadline. I’ve already sent in my entries; it’s all over but the crying, as they say.

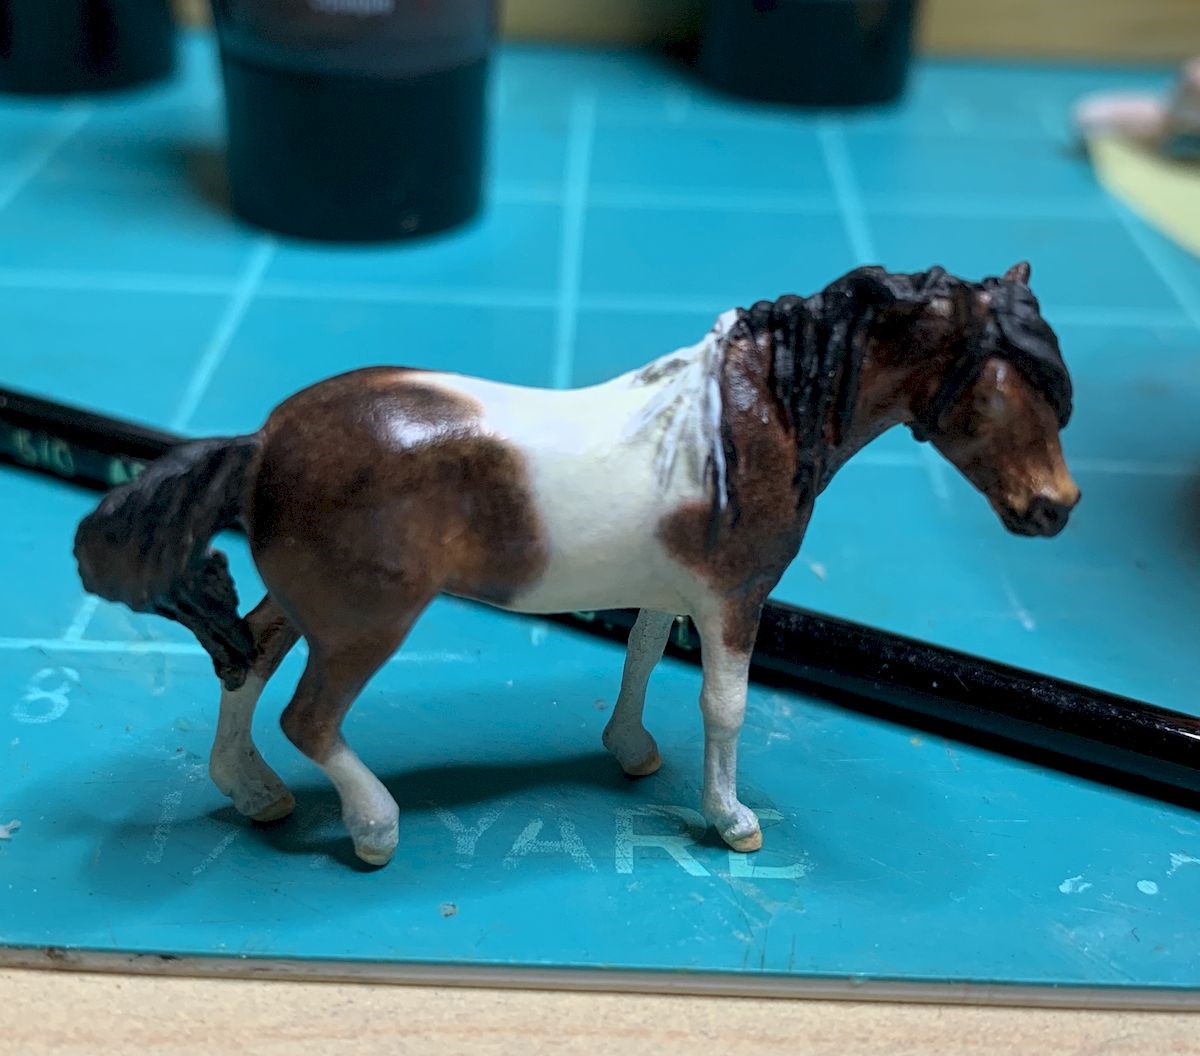
The final work is pretty subtle; the whites have been altered so they are not so stark, there is slight pinking in the area by the elbow where the hair is thinner, and in that second photo, finally, we have eyes!

©kestrel, all rights reserved

©kestrel, all rights reserved

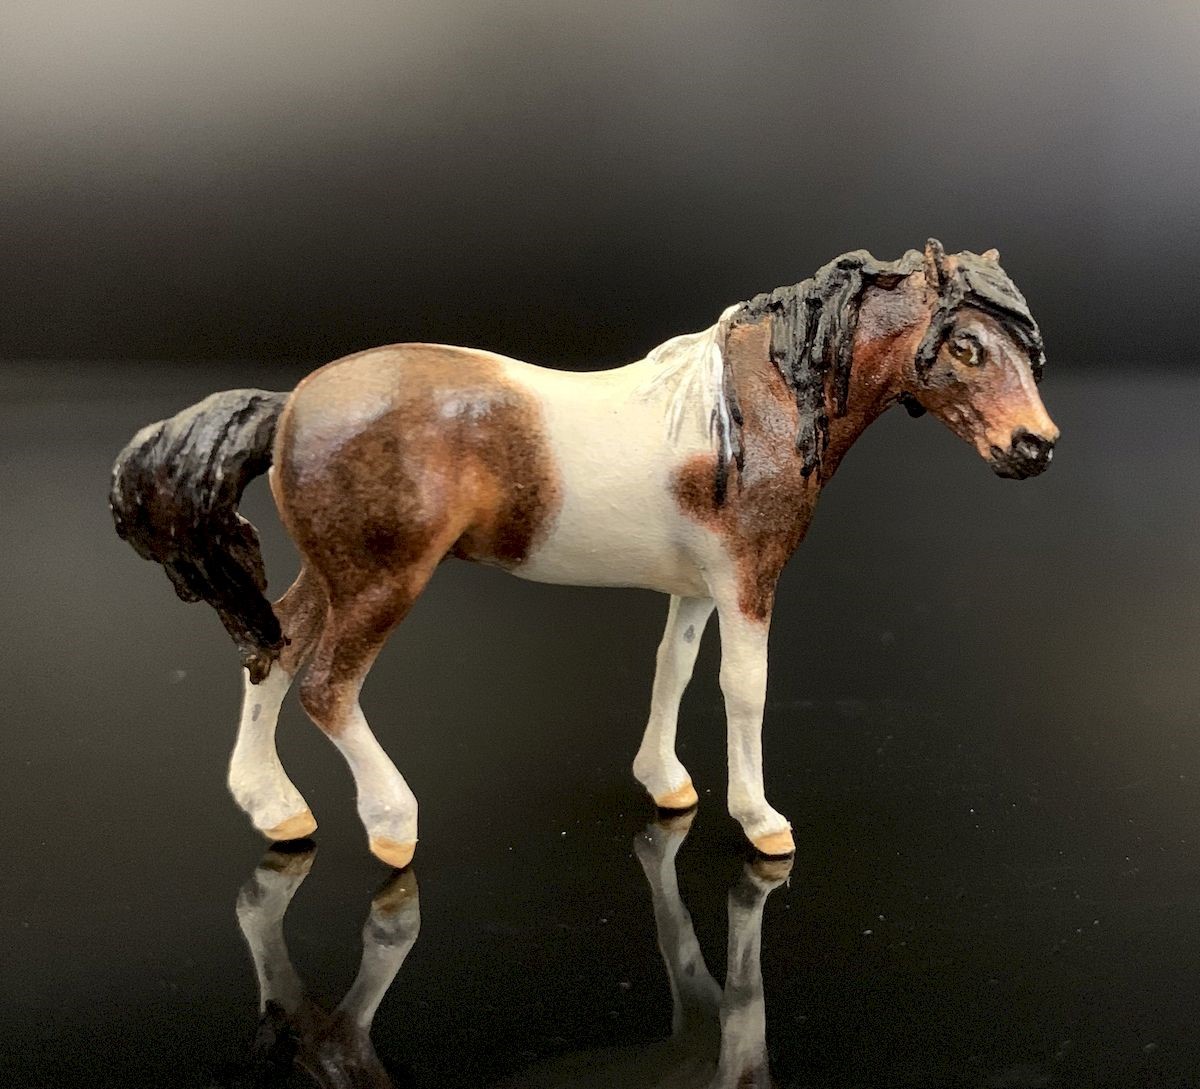
He looks like he’s saying, “Are you lookin’ at me?” In case anyone wonders: those dark dots on the legs are to represent the chestnuts (as they are called) on a living horse. These are the remnants of a toe, because equids were originally 5-toed.

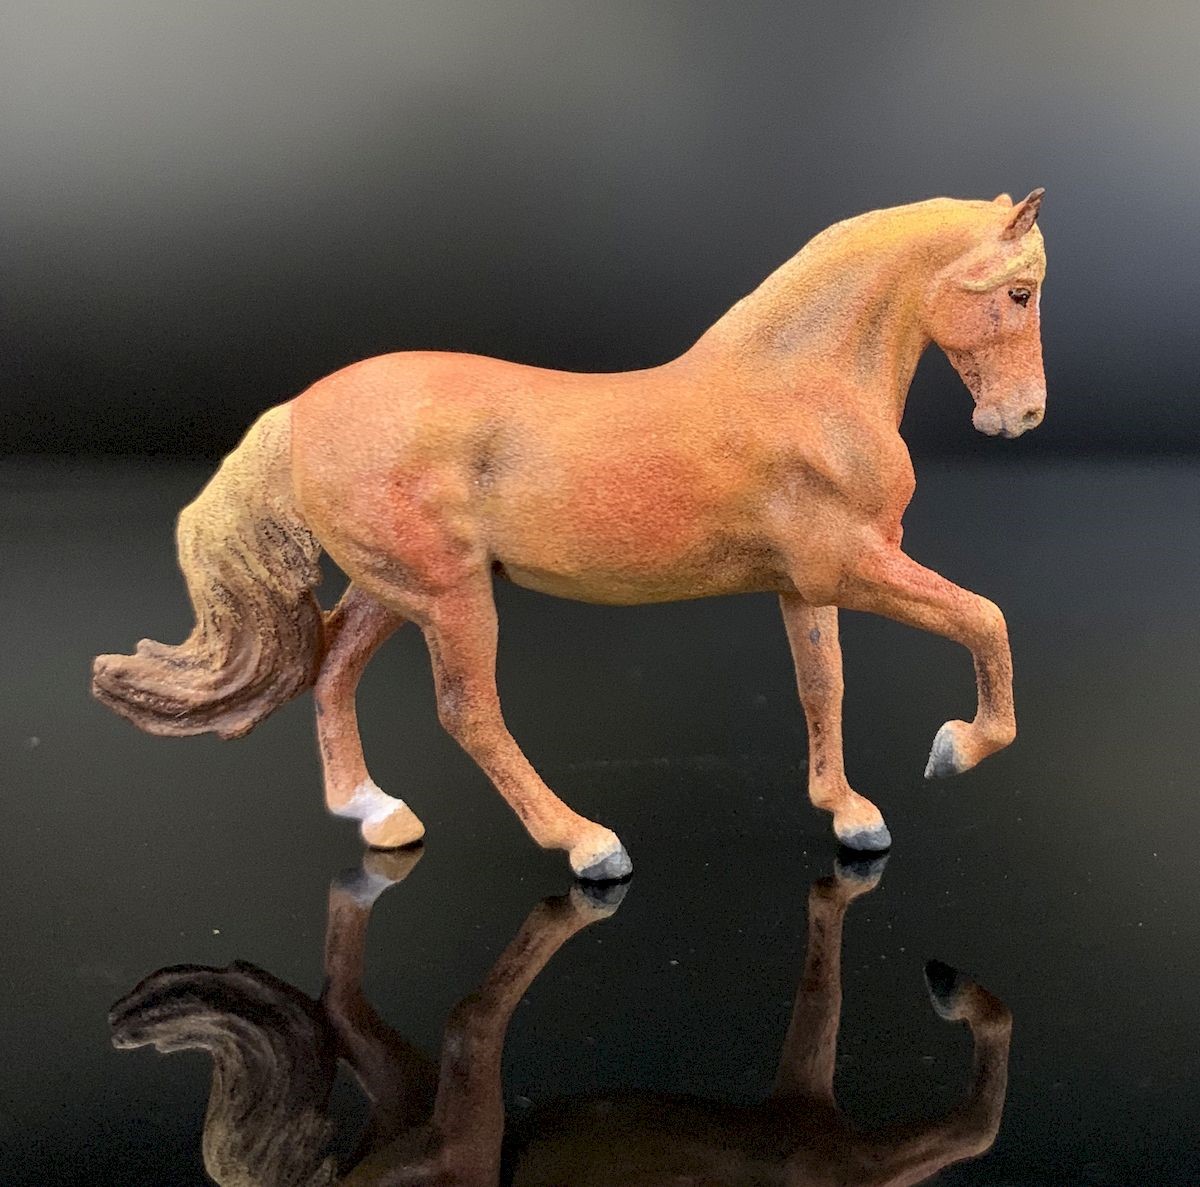
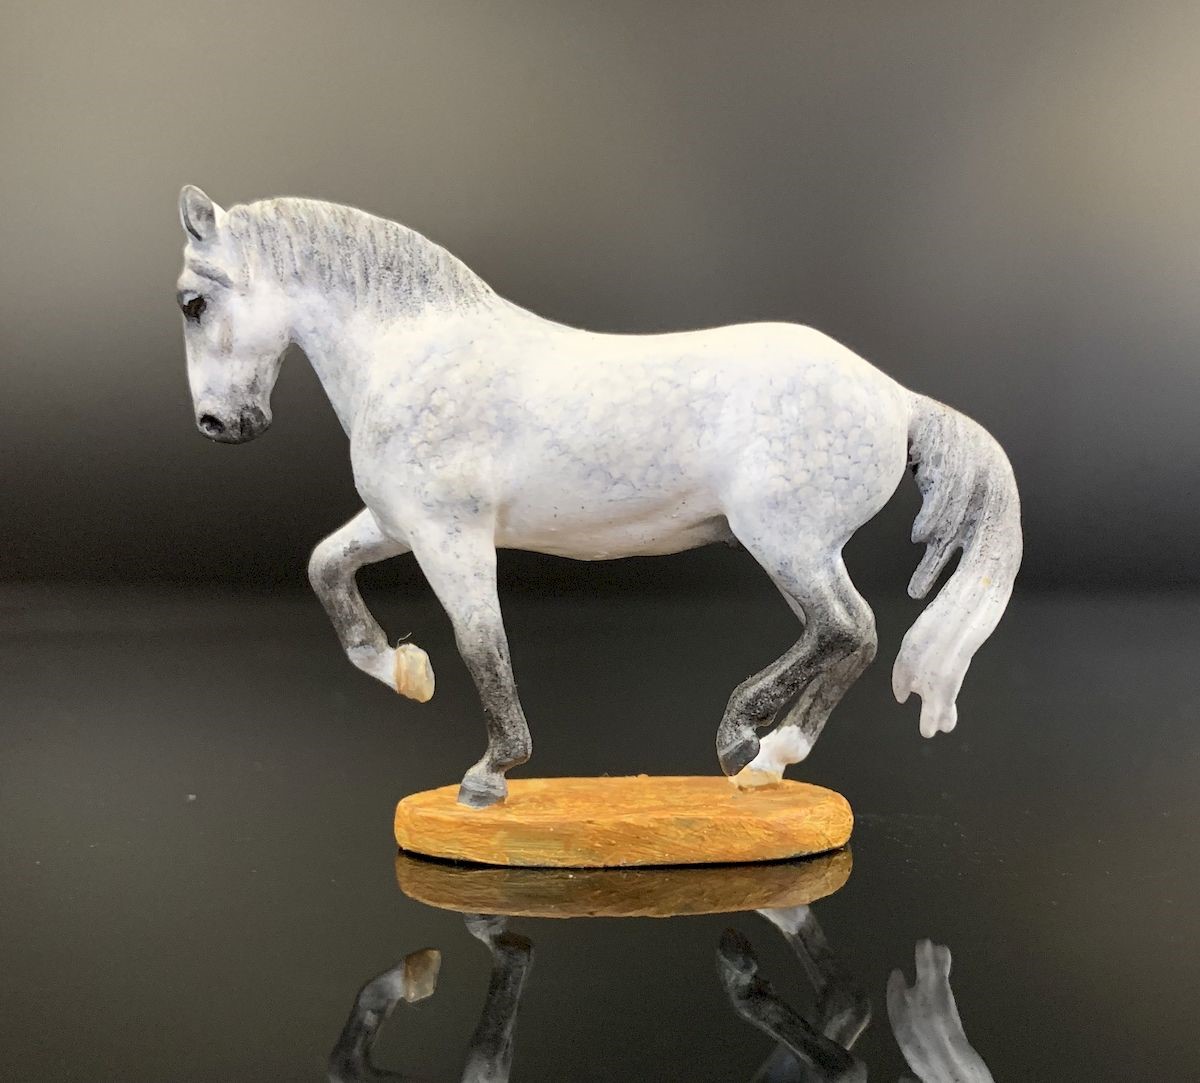
I’m including the photos I sent in for the contest, posted here in order of my painting them – so this sorrel horse is the first one I painted, and the bay pinto I’ve been working on is the last. Taking clear, focused pictures of something this small is pretty difficult, at least for me. When you get it focused right, the photos are brutally honest, and the artist can see every last tiny flaw and mistake. Well, this is to be expected for a novice like myself – I will hopefully learn a lot here and do better in the future. The dapple grey (third photo down) was particularly difficult for me. That color terrified me because I’ve seen so many people get it wrong; but I like a challenge so I tried it. It was, as I thought it would be, really tricky, particularly at this scale.

I’m not sure when the judging will take place but I will try and keep Voyager informed as to the outcome. I hope you’ve enjoyed getting a glimpse into an admittedly very weird hobby!

©kestrel, all rights reserved

©kestrel, all rights reserved

©kestrel, all rights reserved

©kestrel, all rights reserved

TNET 38 – Brooklyn 99

Previous thread.

Thanks to the wisdom of YouTube algorithm, I found out about the show Brooklyn 99 recently, and I have been watching it a lot. As far as LGBTQ representation in media goes, this is the best I have ever seen and I highly recommend it as the ultimate “woke” show. It shows that it is possble to make humor involving LGBTQ people without them being the butt of the jokes.

Open thread, talk whatever you want, just don’t be an a-hole.

Monday Mercurial: Kitty Kitty

This is our neighbour’s cat. She was never on the bright side of things, and she also used to be a very panicky animal. When we first moved in the cat would not notice our presence, walk up close to us, see us, and freak out completely. It was the easiest sneaking up on a cat ever, because you only had to exist.

By now she got used to us, and our neighbour says that apparently with old age she’s forgotten to be afraid of her own shadow, so I could sneak a few pics.

©Giliell, all rights reserved

©Giliell, all rights reserved

Something Silly from the Quarantine

From Avalus,

©Avalus, all rights reserved

Hey there folks,

as I am sitting in quarantine, I remembered a silly fotoshoot I took with a friend of mine a while ago. I really want to share this picture from it.
I hope you all stay safe and keep your friends and relatives safe. For me personally, the pandemic is very serious as four of seven family members fall into more than one risk-category. So reducing the spread really hits home.

Ps: I was thinking about going shopping in this mask and gloves, but that would really not help anyone. So I did not.

Bonsai for Beginners – Part 6 – Where to get your first tree

Previus post.

Where you should get your first tree, and what kind of tree should it be, depends on where you live, where you want to keep it and what experience you have. I am living in a temperate climate and therefore my personal experience is limited to the plants that grow around here plus some subtropical and tropical plants that I grow indoors. I also have very limited – and universally negative – experience with Australian flora, so, unfortunately, I cannot give too much info about that. But whatever I write here should be applicable throughout Eurasia and North America.

So first thing first – where you should get your first tree? If you have indoor plants, you should first look whether you have a suitable plant already that could perhaps be converted to bonsai. There is plenty of commonly grown indoor potted plants that are also suitable bonsai species. Two of my most impressive and valuable trees were converted from 40 years old plants that my mother grew.

If you have a garden and want to have an outdoor bonsai, then I would recommend using local species or some decorative species that you might already have. You can either try and take a twig and plant it – many species take root easily – or look around your garden for a seedling that started to grow where it should not have, perhaps too close to a hedge or similar.

Such plants have a huge advantage over anything that you buy in that you can be reasonably sure that they can prosper in the environment you can provide for them and you might already know how to care for them.

Do not buy anything that has “bonsai” in the name. Neither a good expensive tree nor one of the mass-produced cheap ones in supermarkets. In the first case, you probably would not be able to take proper care of the tree yet, and in the second case you would not be buying a bonsai but a crippled plant that can become one in a few years at the best, or will die soon no matter what you do at worst. The cheapo “bonsai” from supermarkets can be a good source of twig cuttings for your own planting though, sometimes it is the only way to get your hands on certain species. And absolutely never buy “bonsai kit”. There is no such thing as bonsai seeds. Those are ordinary tree seeds in fancy packaging and without proper care will, therefore, grow into ordinary trees – if they germinate at all.

Do not poach trees in the forest or on someone else’s property. There are environmentally friendly and IMO morally OK ways to do it – for example trees that grow near train tracks or roads and are periodically cut down for maintenance because they are a weed – but it is still illegal and you should not do it without the permission of the property owner. And then there is, of course, the morally reprehensible poaching in parks and mountain forests. In Japan poaching of trees for commerce has lead to significant environmental damage in mountainous areas for example. Yup, the Japanese are not above commercializing their heritage and destroying their environment in due course. And to poach a tree without it dying requires a lot of experience, take my word for it.

If you lack suitable species at home and cannot find anything in your garden and therefore must buy something, then buy plants of suitable species at your local gardening store. Look for plants that do not have overtly visible scars from grafting and are healthy and with a bit of luck, you can find a tree that can be converted into a bonsai within one-two years.

And here a very short and incomplete list of species/genera, in three categories. The taxa are listed in no particular order from the top of my head. I only write about species/genera that I have personal experience with or can reasonably extrapolate to from closely related taxa. And because English tree nomenclature is a complete nonsensical mess, I will only use Latin names.

  1. Ideal for a beginner:
    Indoor – Myrthus communis, Hibiscus sp., Laurus nobilis, Fuchsia sp., Crassula ovata, Serissa foetida, Adonium obesum, Punica granatum
    Outdoor – Acer sp., Betula sp., Larix sp.,  Ulmus sp., Taxus sp., Ligustrum sp., Buxus sp., Carpinus sp., Tilia sp.
  2. Not ideal, but still suitable with caveats:
    Indoor – Ficus sp., Euphorbia milli, Portulacaria afra, Olea europaea
    Outdoor – Juniperus sp., Thuja sp. Cupressus sp., Chamaecyparis sp., Thujopsis sp., Pinus sp., Fagus sp. Malus sp., Prunus sp., Illex sp. Cedrus sp., Tamarix sp., Crataegus sp.,
  3. Not suitable for a beginner at all:
    Indoor – Podocarpus sp., Eucalyptus sp., Annona sp., Citrus sp., Camelia sp., Cuphea hissopifolia
    Outdoor – Picea sp., Fraxinus sp., Salix sp., Populus sp. Vitis vinifera, Forsythia sp., Corylus sp., Visteria sp., Calluna vulgaris, Vaccinium sp., Azalea sp., Rhododendron sp., Sambucus sp., Hedera helix

Each of these taxa may get their own extra article in due course. I will start with some of the most suitable ones.

The Art of Book Design: The Springtime of Life, poems of childhood

Algernon Charles Swinburn. Springtide of Life. Illustrated by Arthur Rackham. Philadelphia, J.B. Lippincott: London, W. Heinemann, 1918.

Today’s children’s book is a collection of poetry dedicated to the early life of children by Algernon Swinburn. It was published posthumously, as a collection according to the author’s wishes and was illustrated by one of the era’s most prolific and respected artists, Arthur Rackham. I’ve included all the full-page colour plates, but the book also contains a wealth of line drawings of chubby cherubs and well-fed babies, a minimum of one per poem. I’m very fond of Rackham’s artwork and I hope it brings some pleasure to your day. [Read more…]

Jack’s Walk

This must be where the bluebirds live. ©voyager, all rights reserved

Jack and I occasionally circumnavigate a small wooded area that lies behind our local middle school. It’s an uninviting, snarly sort of place, all tangled with vines and thick with underbrush, so we’ve never ventured past the perimeter, until today, when a do-goodness adventure invited us inside.

“Mommy, you’re going to need a garbage bag,” Jack called out as he ran ahead.
“Right here,” I said, reaching into my pocket for a poop bag.
“That’s gonna be too small, Mummy. We need a big bag to clean up this mess.”
As I got closer, I could see that he was right. The entire area was littered with aluminum cans, discarded water bottles, and bits of paper. I sighed and reached into my inside pocket for a reusable shopping bag.
We began by walking around the woods, and after one pass, my bag was nearly full, and I had that do-good kind of feeling. Next, it was time to work our way into the brush, and I called out,
“Bubba, where is the easiest place for me to go into the brush? Someplace not too tangly. ”
“Over here, follow me,” Jack said as he led me into the little woods. Once inside, we were met with a few surprises. First, we found several well trampled paths and open spaces, none of them visible from the perimeter, So… a hiding place.
Then, there was the stuff we found – beer cans (lots!), 2 empty liquor bottles, cigarette butts, used condoms (ick!) and condom wrappers, a used tampon (again, ick!), a single black sock and a disintegrating striped towel. So… a make-out place.
Jack and I spent the next half hour, picking up trash. I used a poop bag as a glove, and it wasn’t long before we had the place looking spic and span. After that, Jack and I hauled our trash to the school garbage can where we sorted our recyclables and tossed the rest. It took us nearly an hour to manage the job, and my gross meter was maxed out. By the end, I was feeling tired and sore, but positively glowing with do-goodness.

“Mummy, why do people throw things on the ground? The garbage cans are really close, why don’t people use them?”
“Most people do put their trash in the garbage, Bubba. In this case, I think it’s because they were kids doing grown-up things, and they were afraid of being caught.”

“Well, I think that if you’re too young to clean up after yourself, you’re too young to do the grown-up things,” Bubba said as he set out toward home.

“Yep, I agree, Bubbs. I agree.”

A Walnut Collecting Thingamajig

Collecting walnuts is a really unpleasant chore each fall. For a week or so we have to pick up several hundred walnuts each day from the ground and put them into a bucket, putting a big strain on back and legs. Two years ago I have improvised a little thingy that makes this work a lot easier, and this year I have perfected the design and made two pieces.

It © Charly, all rights reserved. Click for full size.

It is nothing complicated, just a ladle with a very, very long handle. The handle should be so long that when you hold it against the ground at a comfortable angle where you can scoop up the walnut, it should be almost balanced at the point where you hold it, just a few cm before your hand. That way it requires almost no strength to manipulate and you can pick up the walnuts from the ground and put them into a bucket with minimal effort. It works so well that even my mother was able to do it even though she cannot walk around without a cane anymore.

The first prototype was made from a tin can and an aluminum pipe for window curtains, the second prototype was an old soup ladle with an old broom handle.

For the final version, I bought two cheap stainless steel ladles with flat handles. Then I took two willow branches, stripped them from bark and let them dry for a few days indoors over the radiator. When they were sufficiently dry, I have scraped and sandpapered them to a smooth surface finish so there are no splinters anywhere.

There are several options on how to fix the ladle to the end of the stick. I have simply cut about 15 cm slit into the thinner end of the sticks it and I also cut a piece of pipe that fits snugly around it. Then I inserted the ladle handle into the pipe, then into the cut in the stick and I hammered the pipe over the stick as a bolster. It does not need to be super strong, just strong enough to hold the ladle in place. Should it ever get loose, it should be possible to fasten it either by hammering the pipe further up the stick or by inserting a wedge.

As a final touch, I have screwed two steel hooks on the end so I can hang it in the shed, and I covered it with linseed oil to protect against moisture.

I have chosen willow, because it is extremely light and porous, dries up quickly and is for me relatively easy to get at appropriate size. But you could also buy shovel handles for this if you decide to make your own. They will be slightly heavier, but they will work. Broom handles would work too, but they are straight, and that is not optimal.

As you can see, these sticks are not straight, they have a slight bend to them, just as a shovel handle does. This helps a bit because the ladle naturally balances to a position where the nut stays in it. So you only need to exert force when picking up something, or tipping it out, not to keep it in. But one of the sticks was not only bent but downright crooked in all kinds of directions. And I did not guess the balance correctly when cutting the groove for the ladle handle on that one. That one tended to twist in the hand, causing it to not function comfortably.

So I had to re-shape it.

In case you ever need to correct a bend in a piece of wood, here is the most minimalist way:

1) Fix the piece of wood to your table or in a vice near the portion where you want to bend it, with one end freely accessible.

2) Hang some weight on the end of the stick and make any adjustments so it bends the stick in the desired direction. Here you can see me using a bucked and two bricks with a rope. That also allows me to regulate the extent to which the wood will bend – when the bucket rests on the ground, bending stops.

© Charly, all rights reserved. Click for full size.

3) Wrap the area where you want to bend the stick with a towel – paper or cloth, does not matter – soaked in water. Really soaked, water should drip from it. Then wrap the towel tightly with tinfoil, but do not squeeze the water out of it.

4) Try and build something around the tinfoil that will help to keep hot air to hold in place there for a bit. Here you can see me improvising with fireclay bricks and a piece of aluminum profile.

5) Heat carefully the tinfoil with either heat gun or propane torch at least until hot water starts boiling and dripping out of it around the edges and then some more. With a heat gun at 550°C it took me about two minutes. The wood gets soft and pliable under the foil and as long as it is hot, it can be bent a lot more than it would normally be without cracking.

6) You can either let it cool wrapped or if you are in a hurry, remove the foil and wet towels without burning yourself. The wood cools quickly and when it does, it will retain most of its new shape.

7) Repeat on different parts of the stick as many times as it takes to get it right.

Corona Crisis Crafting VI: A Dragon Needs a Tower

While the next batch of dragons is drying, I built them a tower to live in, because that’s a natural dragon habitat.

©Giliell, all rights reserved

That first layer of stones needed to be absolutely even, because any differences in height would multiply by the time I got to the top. I filled the middle stone with concrete and anchored it in the ground with some construction steel, because this stone carries most of the weight of the next layers. I used up some left over gravel to fill in the gaps. The stones are set about 10cm into the ground so they aren’t pushed apart by the weight of the stones on top.

©Giliell, all rights reserved

The next two layers. The stones are glued together by construction glue, the kind you can lift a car with. I am very proud to tell you that the second level only had a two mm difference in height on one stone, which is probably due to the stone itself. I let it set over night and finally today the first inhabitants could move in.

©Giliell, all rights reserved

©Giliell, all rights reserved


There’s going to be one more on the left side. The two slightly mishap dragons also move in, lurking behind the bushes.

©Giliell, all rights reserved


I’m also happy (haha) to tell you that my mum is back in her good (haha) old shape. Yesterday I sent her a pic of the finished but unplanted tower. “You are aware that you can’t go to the hospital now if your back hurts, right?”

Today I sent her a pick of the finished tower, with grandkid! “Are you lurking around in hardware stores or what?!”

Yes, mum, I love you, too.