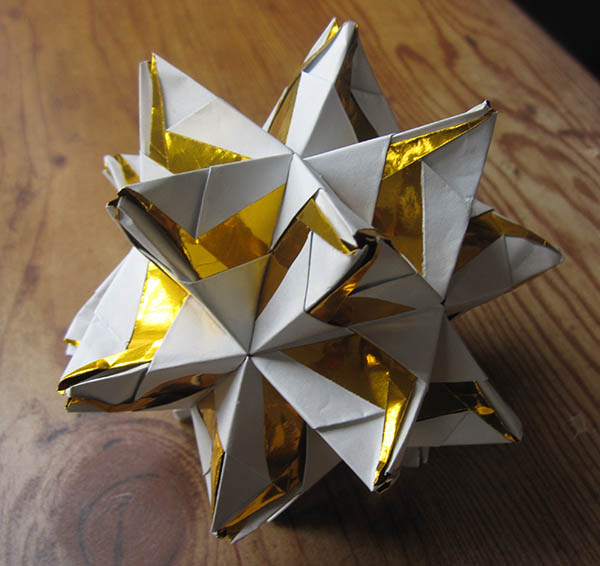
Colorful origami subgroups

This is the second part of a series about symmetry in origami. Here I talk about the role colors play in reducing symmetry.

Let’s return to the ninja star that I showed you last time. I said that it has a symmetry group of order 4, because there are four transformations preserve the shape of the ninja star: rotation by 0, 90, 180, or 270 degrees.

But suppose we want to preserve more than the ninja star’s shape. We also want to preserve its color. The only tranformations that preserve shape and color are rotations by 0 and 180 degrees. So the ninja star actually has two kinds of symmetry groups: the shape symmetry group of order 4, and the color symmetry group of order 2.

The color symmetry group is always a subset of the shape symmetry group. We have a special name for groups which are subsets of other groups, we call them subgroups.

[Read more…]

What is a symmetry group?

This is the first part of a series about symmetry in origami. Here I will explain what a symmetry group is through a series of examples.

An origami heart

This image is sourced from a video with folding instructions.

This heart illustrates one of the most basic forms of symmetry. A symmetry is a transformation that preserves the shape and orientation of the object. In this case, the transformation is a reflection. If you reflect the heart across a vertical line, you get back the same heart. But with further examples, we can see that this is not the only kind of symmetry.

[Read more…]

Origami symmetry masterpost

When I was very young, I remember doing some math problems where I was given a shape, and asked whether there was a line of symmetry. This seemed very basic to me even at the time, and I thought that was all there was to it. But there is, in fact, much more. This has been particularly impressed upon me by my work in modular origami. For example, some of the most basic shapes I can make are the Platonic solids, which are very symmetrical indeed.

Photos of 5 origami models, one for each platonic solid

These are models I’ve folded for each of the platonic solids. From left to right, top to bottom: tetrahedron, octahedron, cube, dodecahedron, icosahedron.

Unfortunately, if you really want to understand the kind of symmetry extant in origami, you might need to take a course in advance mathematics. Specifically, this would be taught in Abstract Algebra, and even more specifically, finite group theory.

I intend to write a series explaining some of the basic concepts behind the symmetry of origami, but in a way that people can understand even without being into math. This isn’t necessary to creating or appreciating symmetrical origami, but you may find it helpful or interesting. For the readers who are into math, I hope you enjoy a more visually-oriented discussion of a topic that is typically discussed in rather abstract terms.

Articles in this series so far:
1. What is a symmetry group?

2. Colorful origami subgroups

3. The impossible symmetry

4. How to make symmetric colorings

5. Tessellation symmetry

Appendix: Proof of the symmetrical coloring theorem

Origami: Pinwheel Dodecahedron

Pinwheel dodecahedron

Pinwheel Dodecahedron, a model by Meenakshi Mukerji

So here’s a really old model, apparently I made it in 2013?  It rounded out my set of platonic solids.  Yep, that’s the good old dodecahedron, with 12 faces, 30 edges, and 20 vertices.  I use one piece of paper per edge, so that’s 30 pieces of paper.

Looking back, I have some disagreements with how I made this model.  I chose to use patterned washi paper, but I should have used solid-colored paper instead.  The model already has patterns in it–the pinwheels, which are created by showing part of the backs of the paper.  The second problem is that I used paper with a bunch of different patterns, rather than sticking to just one or two.  The end result is a bit chaotic.  These days I try to make models with a more focused aesthetic.

Origami: When Rebecca Met Shuzo

Photo of When Rebecca Met Shuzo 1

When Rebecca Met Shuzo 1, by Robert J. Lang

This design is part of a set of 3, and you can find photos and diagrams on Robert J. Lang’s website.  Although his models are 3 inches wide, and mine is only 3 cm wide.

This model caught my eye not just because it looks nice, but because it looked relatively simple to replicate (which is not true of most of Lang’s models).  The biggest difficulty was that the very first step was to fold the paper in 5ths in one direction, and 13ths in the other direction.

To fold paper into 13ths, you could probably just use a ruler, or a printer for that matter.  I am not above such tools.  But if we can do it by origami instead, well wouldn’t that be nice?  So how do we use pure origami to fold paper into 13ths?  Instructions below the fold.

[Read more…]

Origami: Ace WXYZ

Four intersecting triangles, in the colors purple, white, gray, black
Skewed WXYZ, a model designed entirely by me.  It’s about 6 cm (2.5 in) diameter.

There are two things to talk about in this model.  First, the color scheme is taken directly from the ace flag, which feels timely because last week we were just marching in pride parades.  I really like the color scheme of the flag, and also like how easy it is to make these references even in a very abstract art-form like non-representational origami.

Second, there’s the model’s design.  This is an entirely original design, although it’s based on Tung Ken Lam’s WXYZ Triangles.  Folding diagrams, discussion, and mathematics below the cut.

[Read more…]