Simple Finish Knives

I have made twoo puukko. To be honest, I was not a fan of this type of knife at all. I have only decided to make them just as a part of my ongoing knifemaking education. But now I am totally a convert.

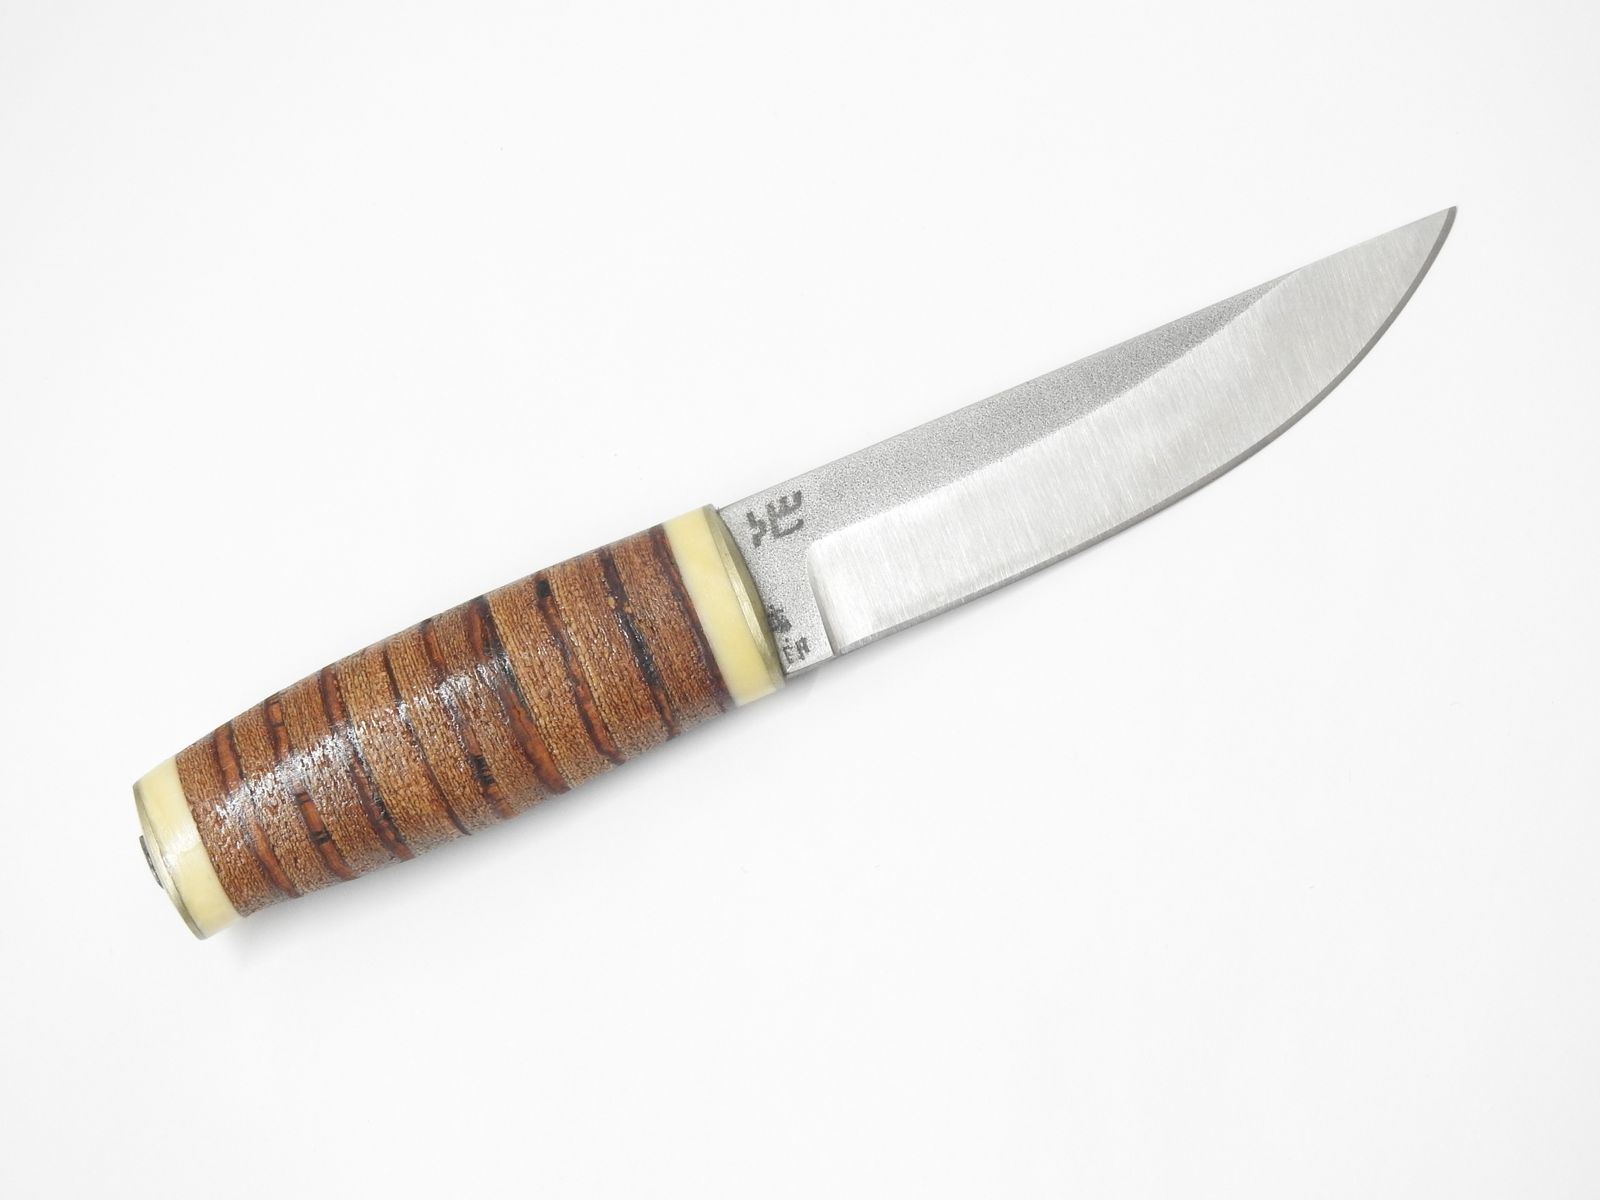
The first one has a handle made from birch bark, cow bone, and white brass. It looks a bit like a stacked leather handle but it feels different in the hand. Birchbark can be flattened by boiling it in hot water and pressing it between two boards to cool and dry off, making it into flat hard sheets. They are slightly more brittle than wood, but they do not have any preferred failure direction, so they do not split and break easily.

© Charly, all rights reserved. Click for full size.

© Charly, all rights reserved. Click for full size.

© Charly, all rights reserved. Click for full size.

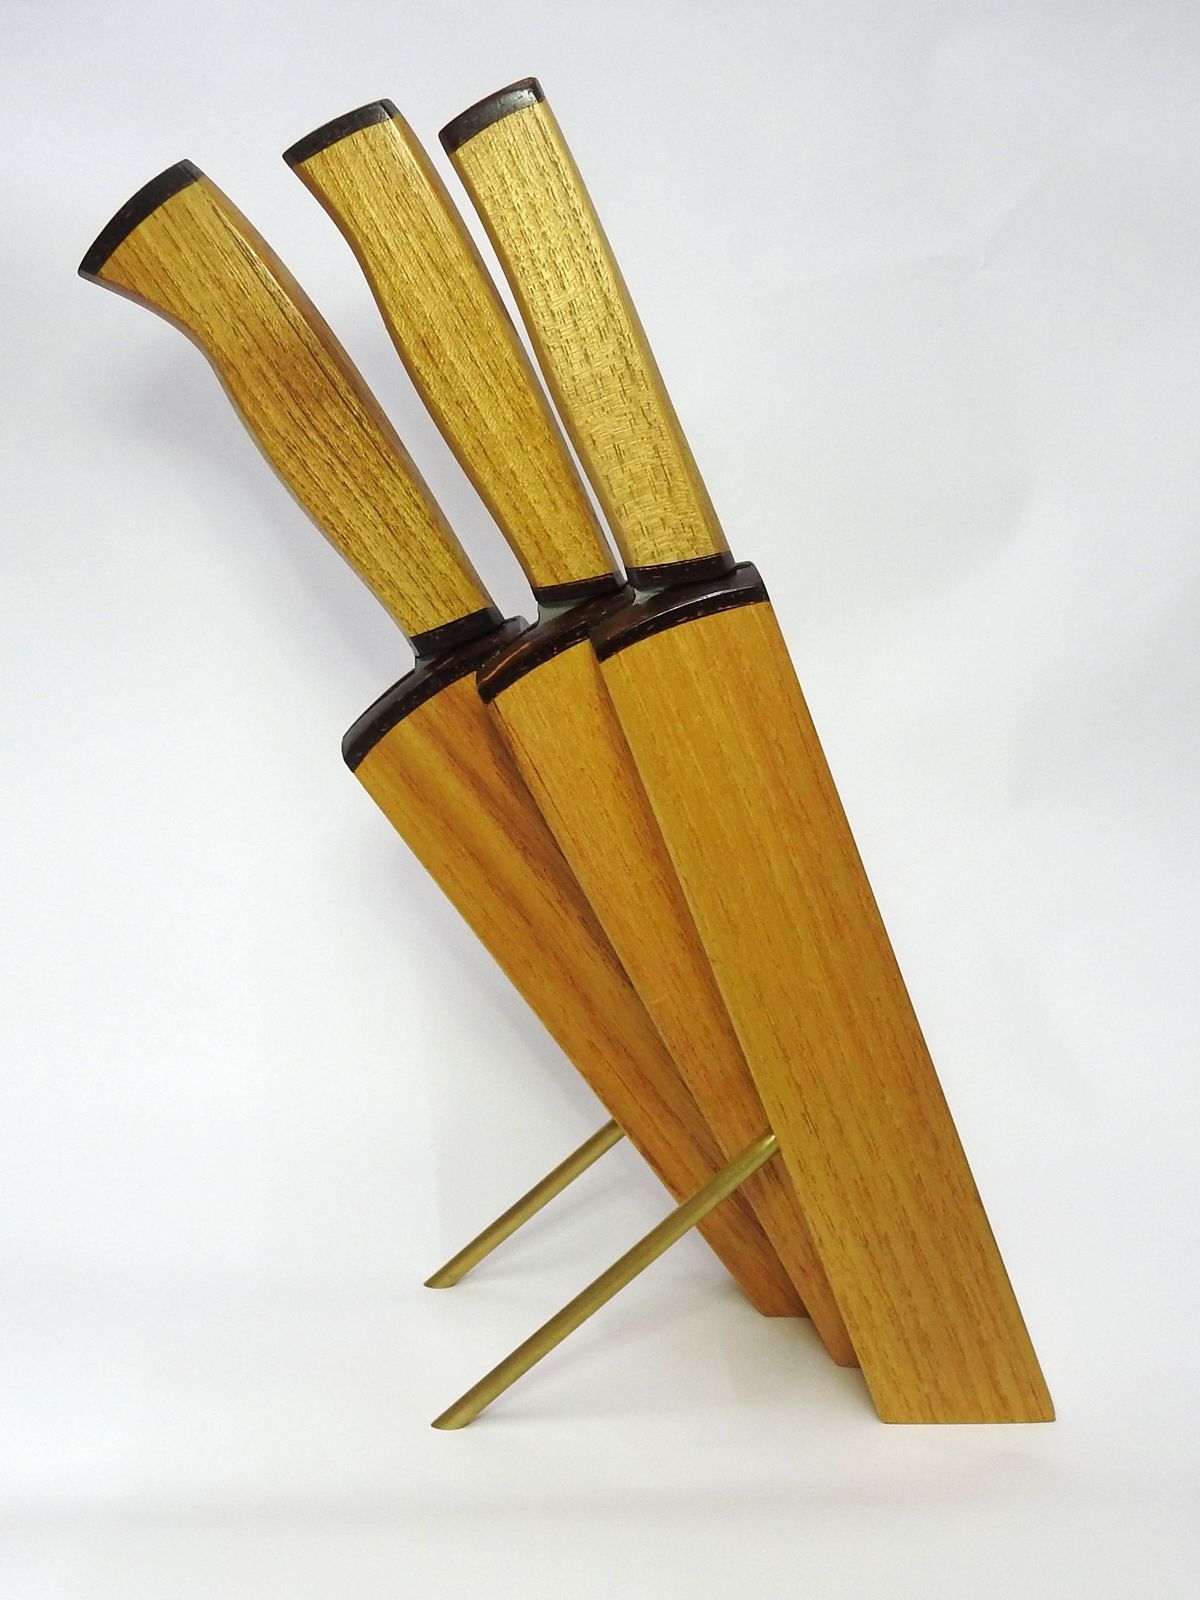
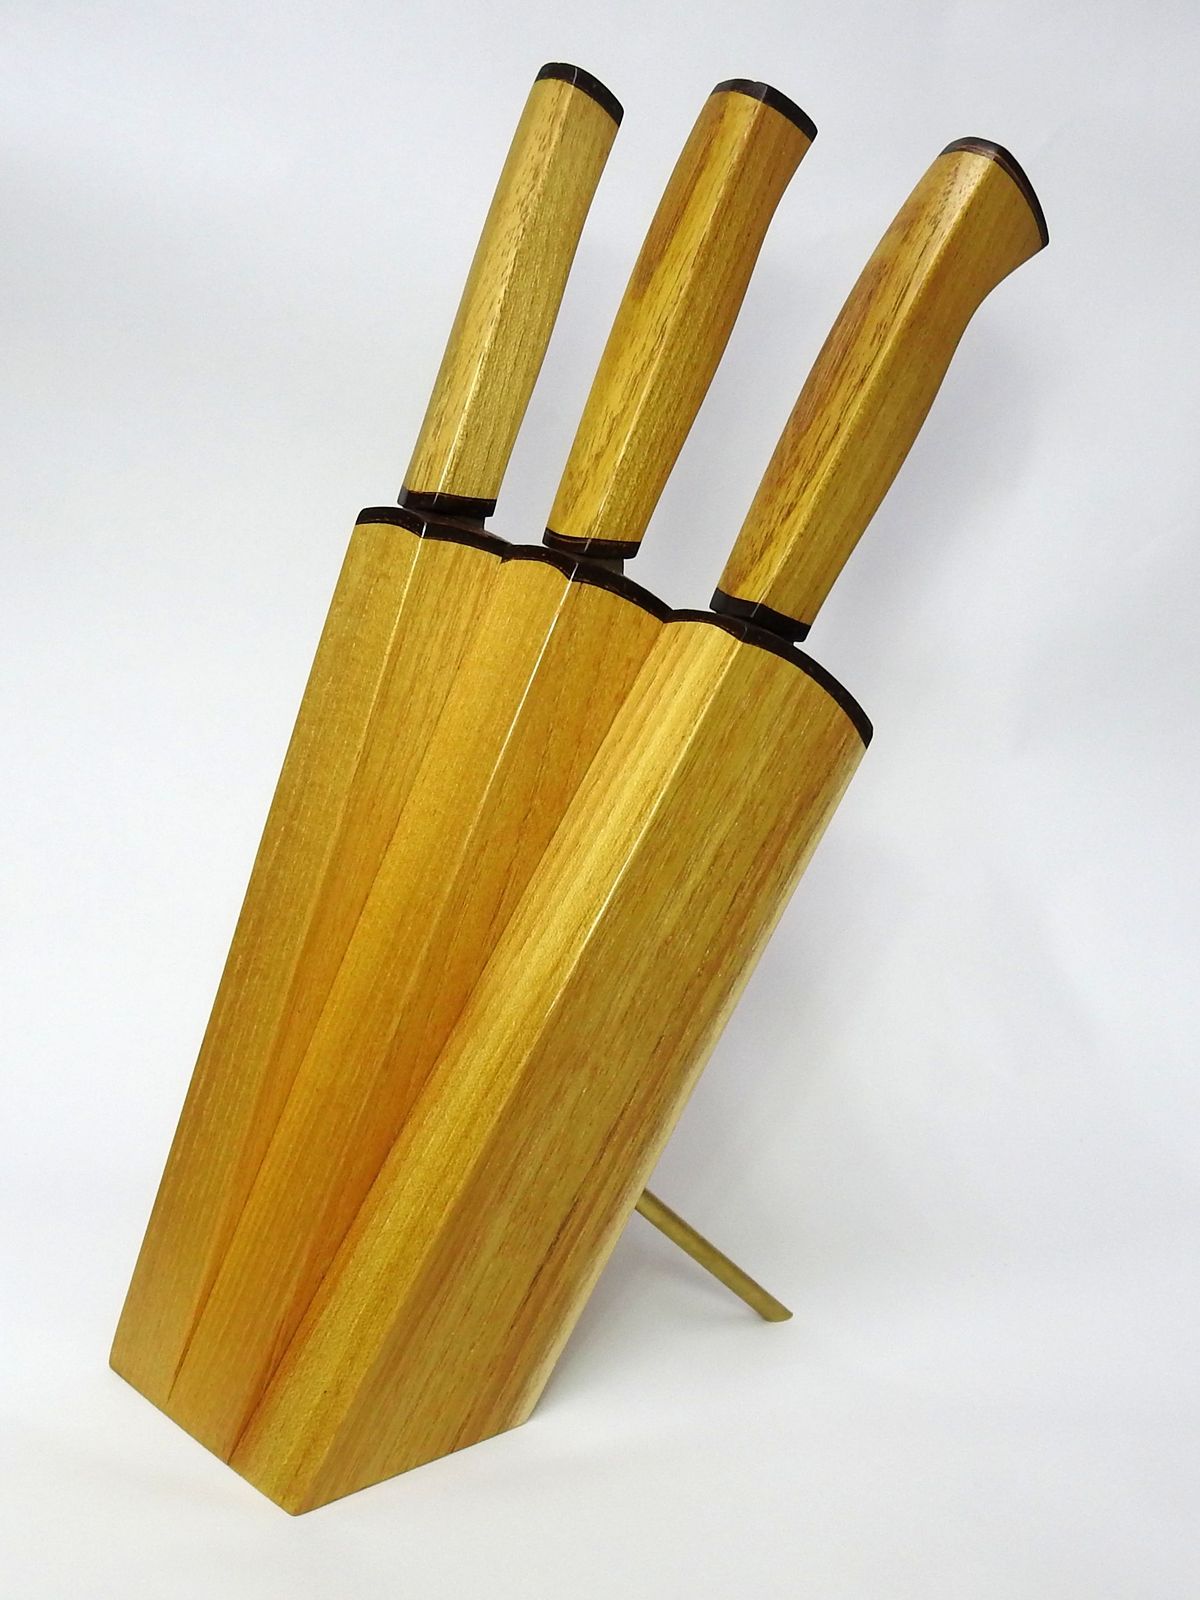
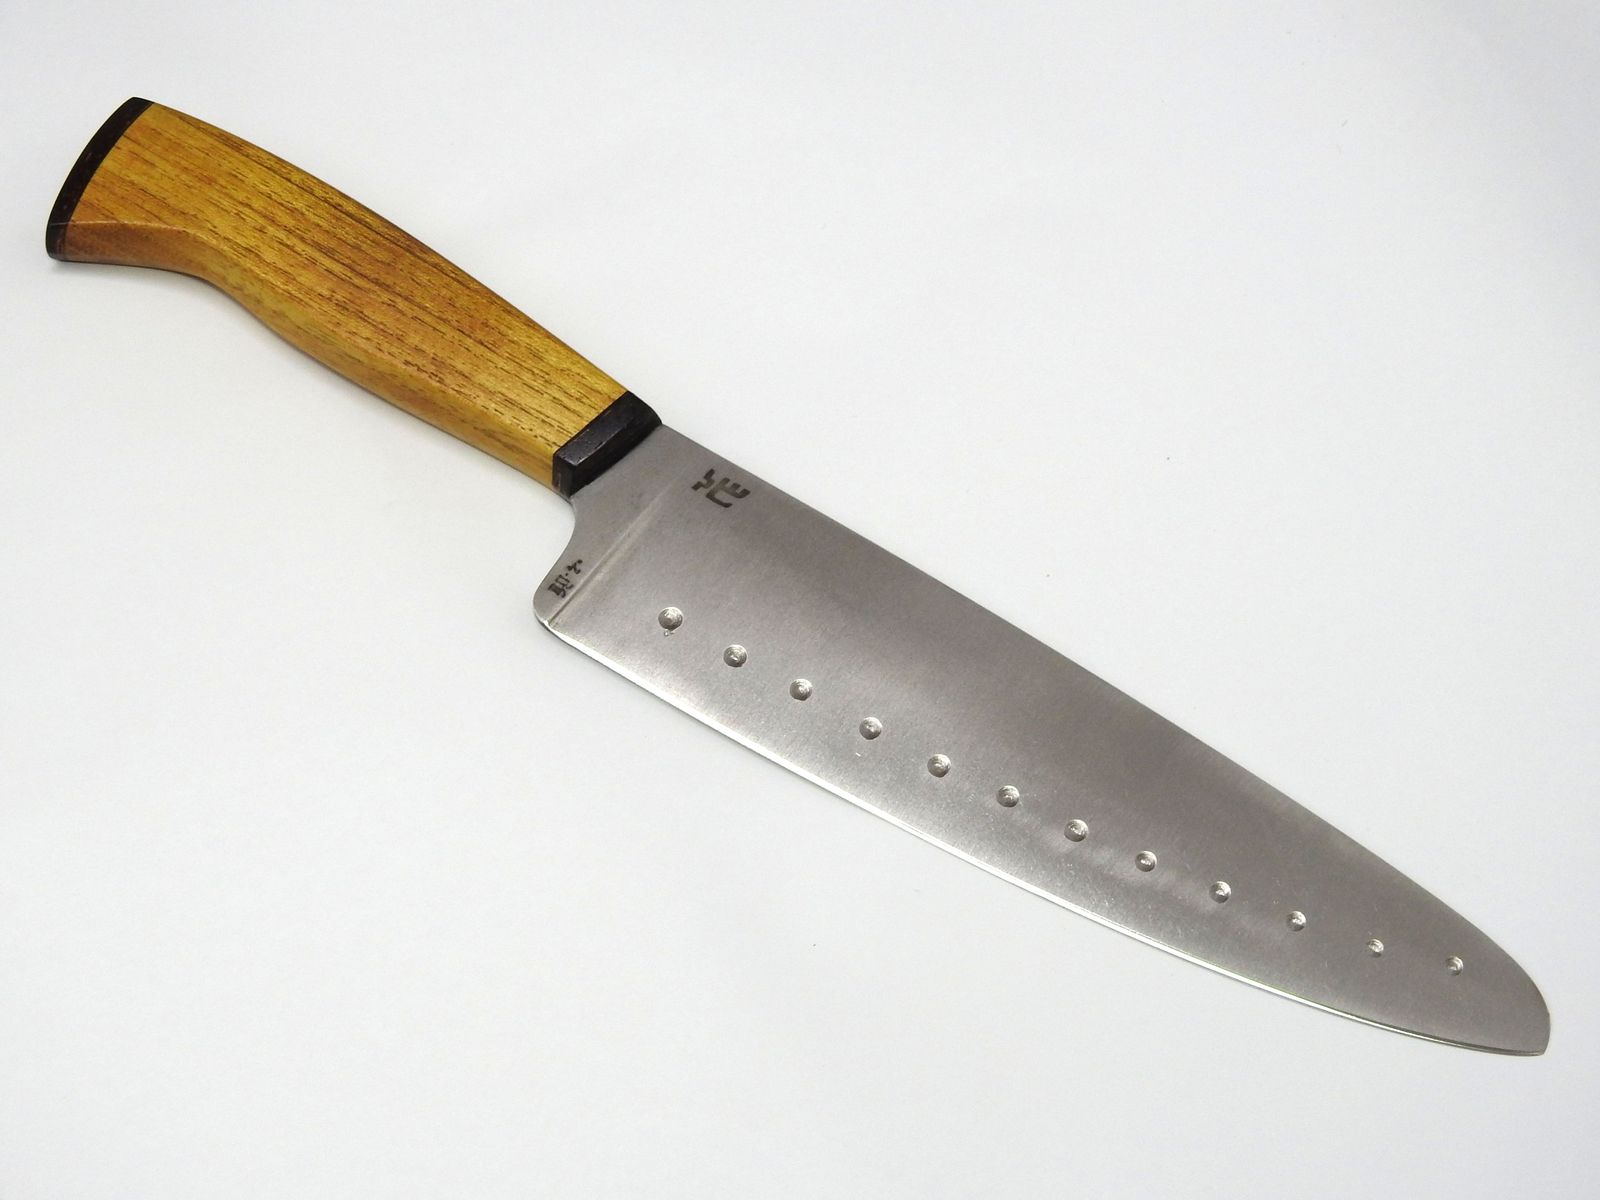
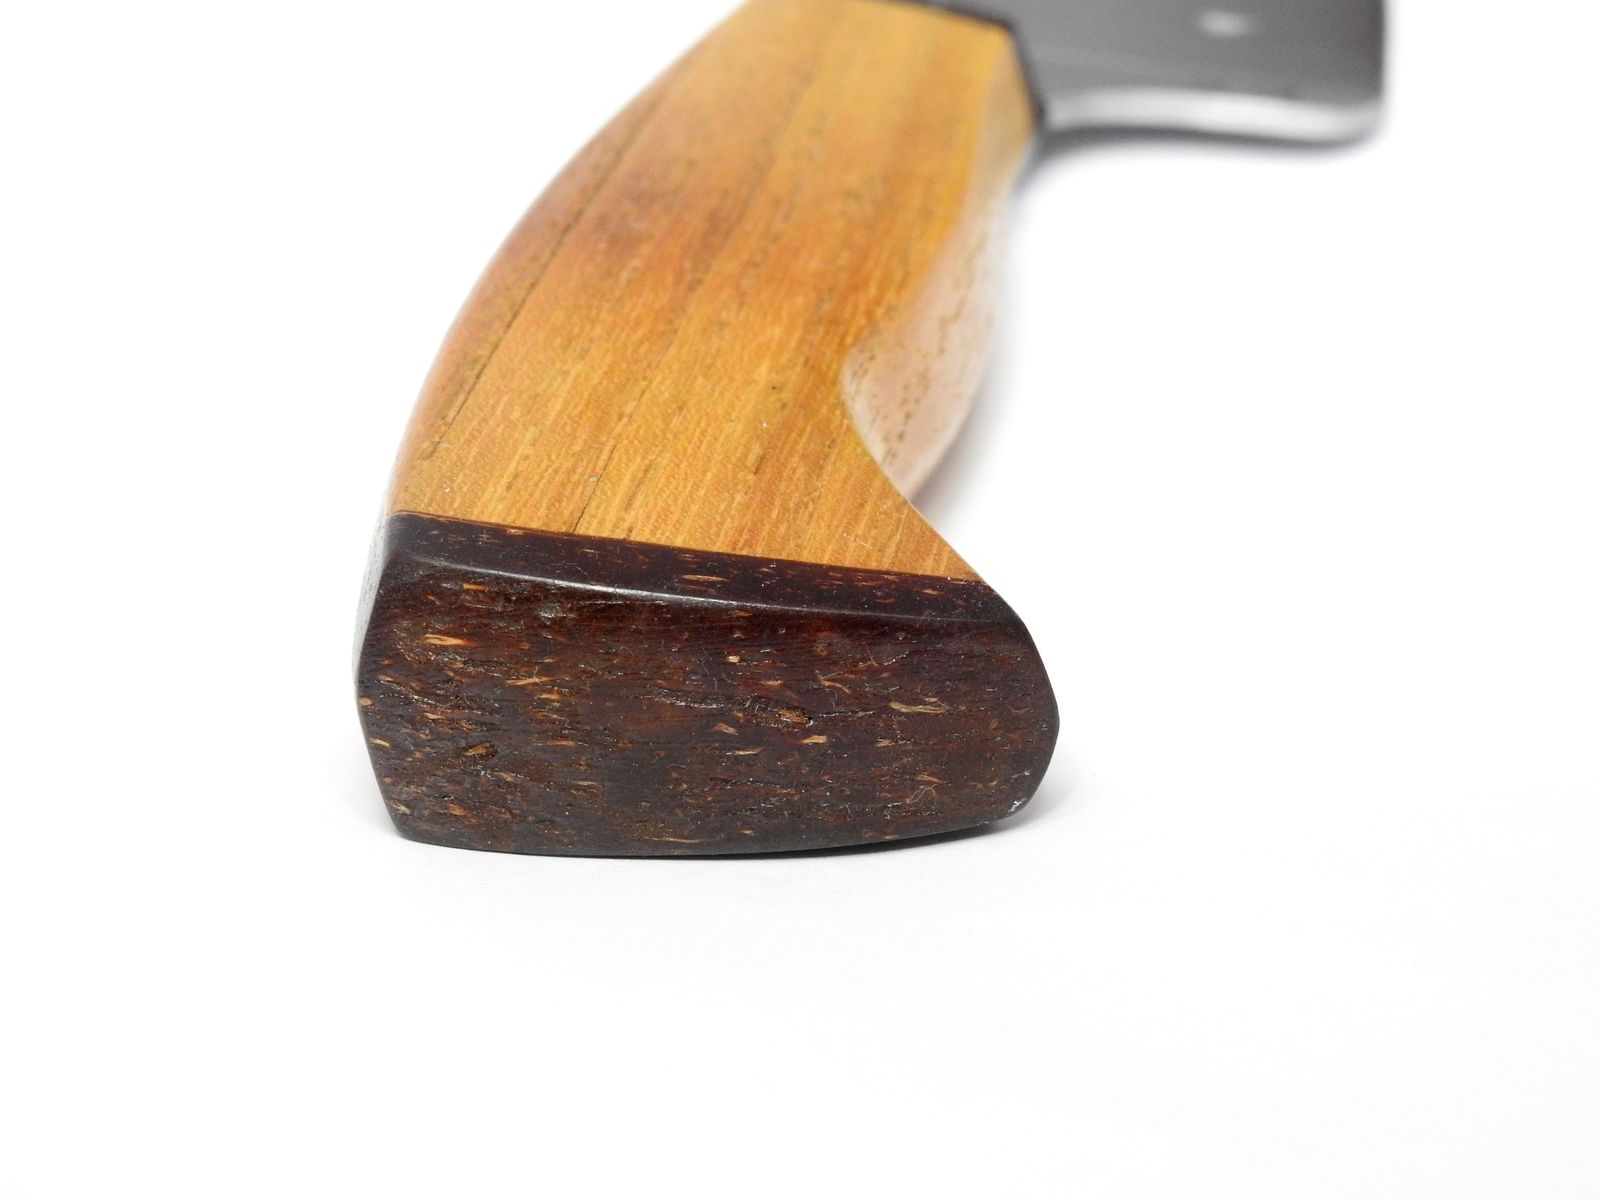
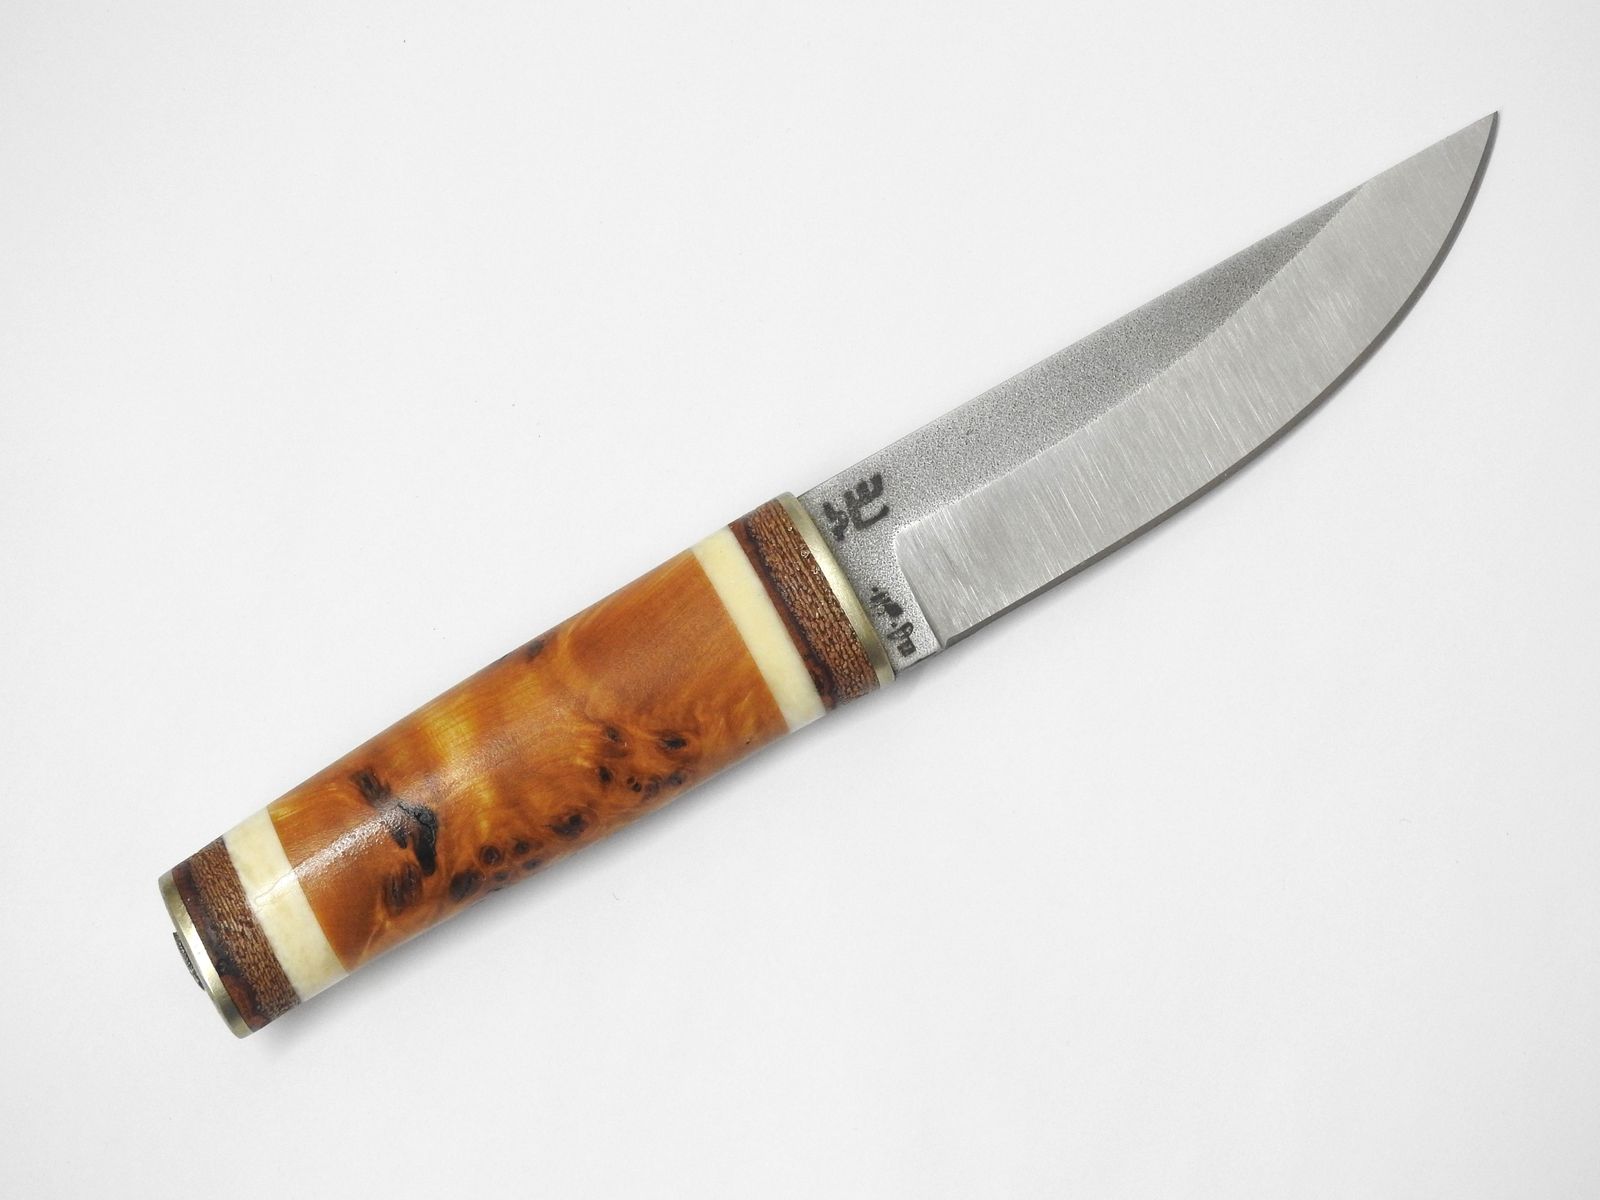
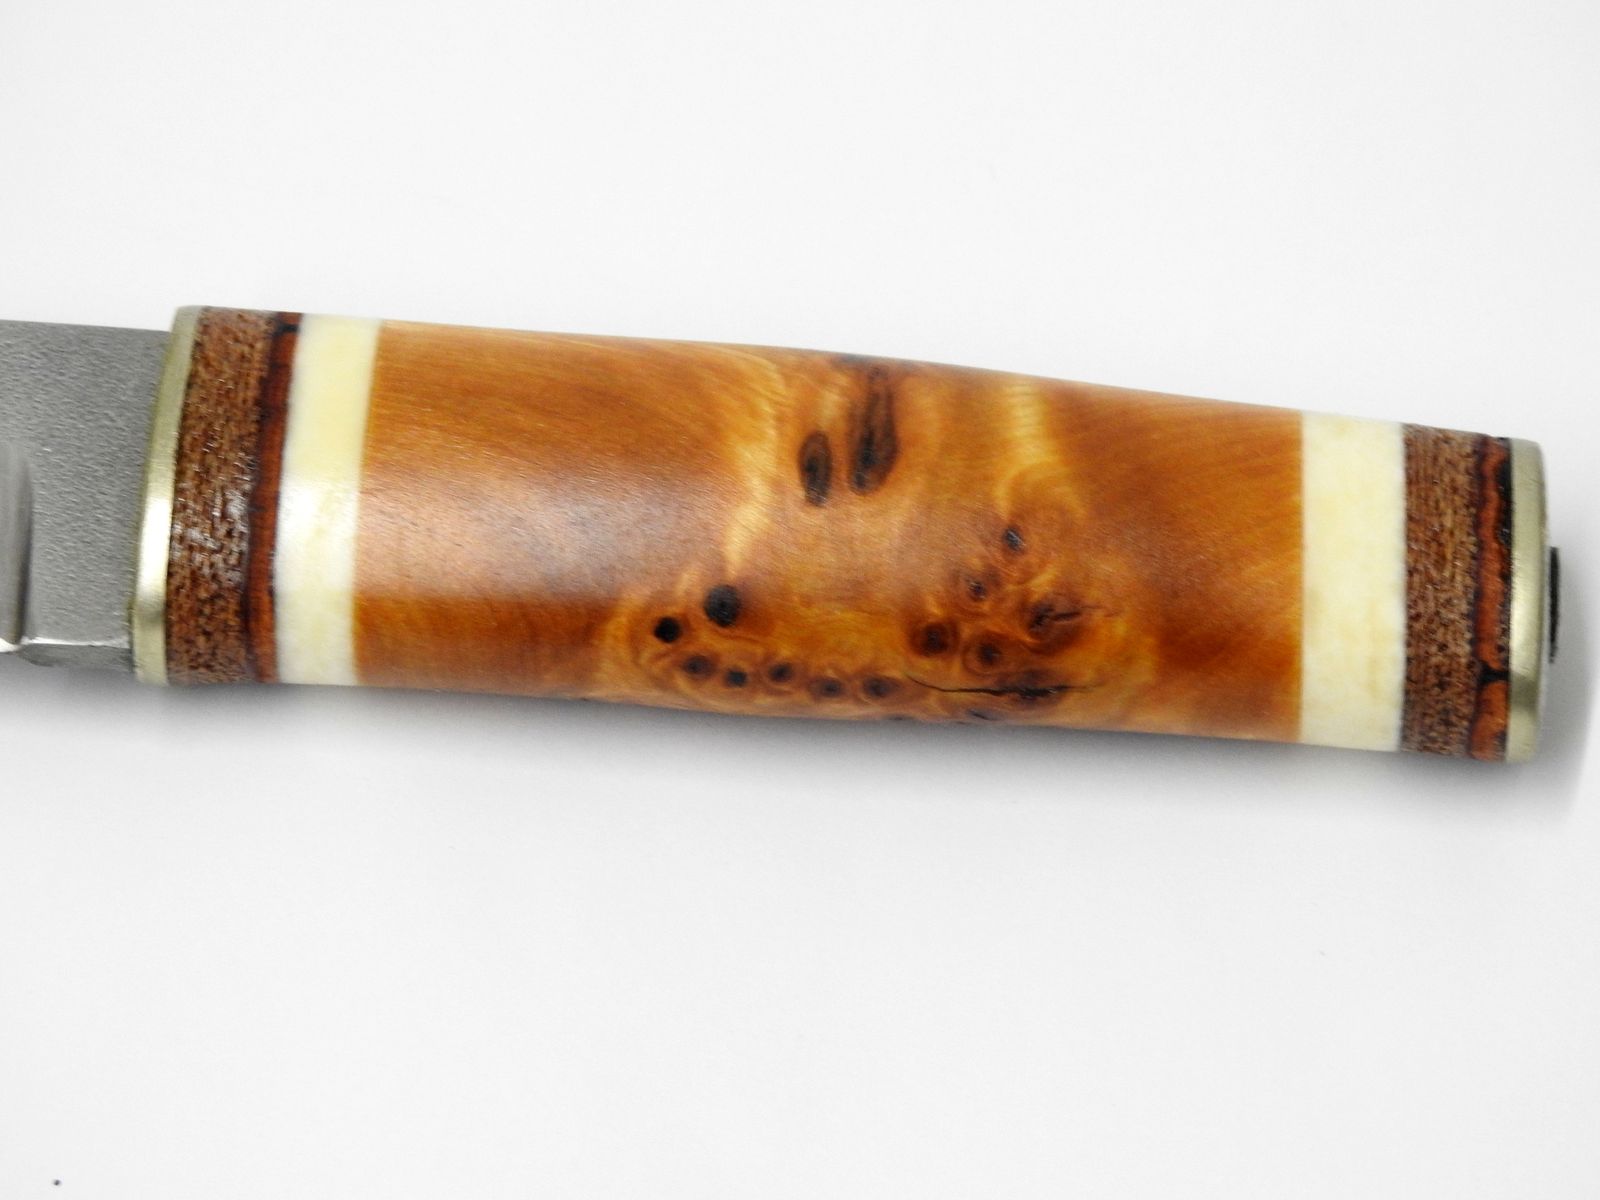
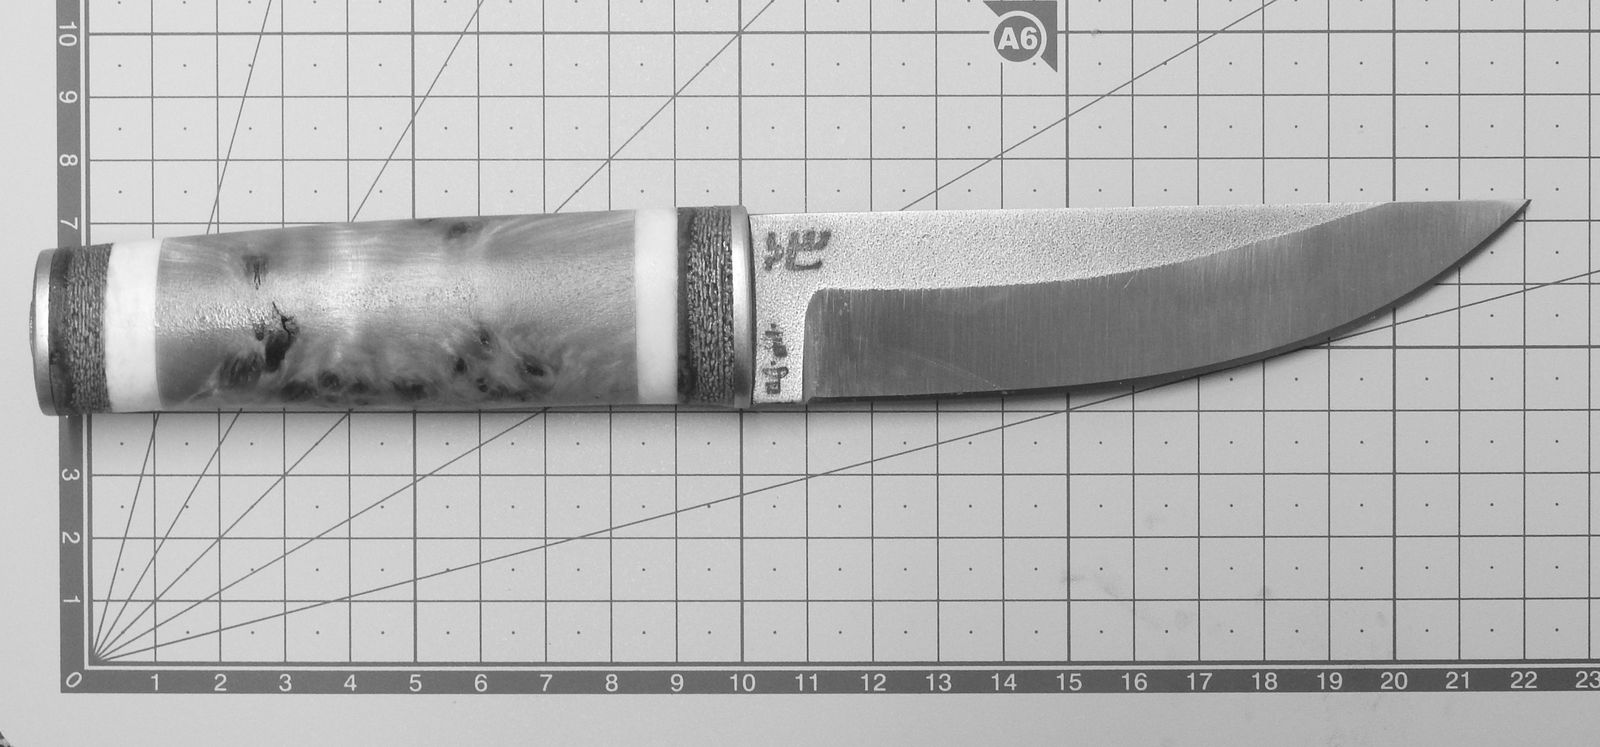
The second one has a handle from birch wood with a small burl in it. It is not proper burlwood, it was just a piece of firewood that I thought will be interesting. I think I was correct in that surmise. The endcap and bolster are from pakfong.

© Charly, all rights reserved. Click for full size.

© Charly, all rights reserved. Click for full size.

© Charly, all rights reserved. Click for full size.

© Charly, all rights reserved. Click for full size.

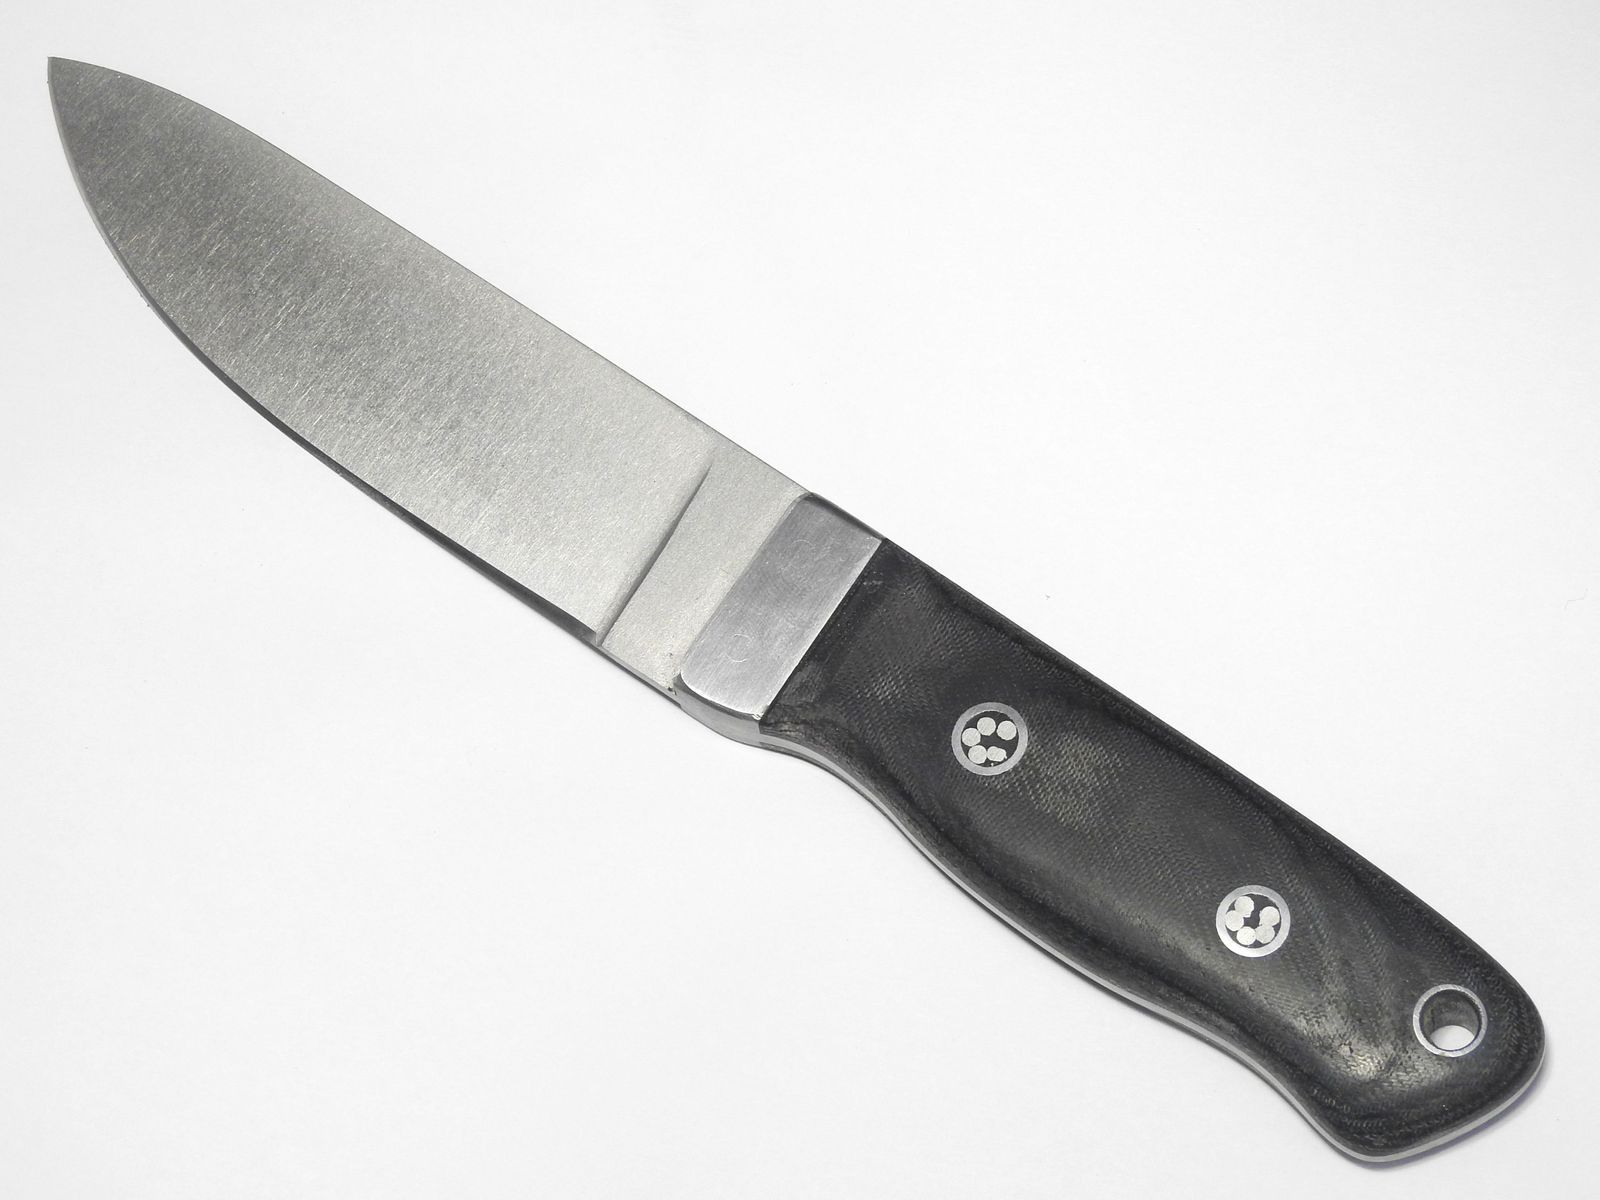
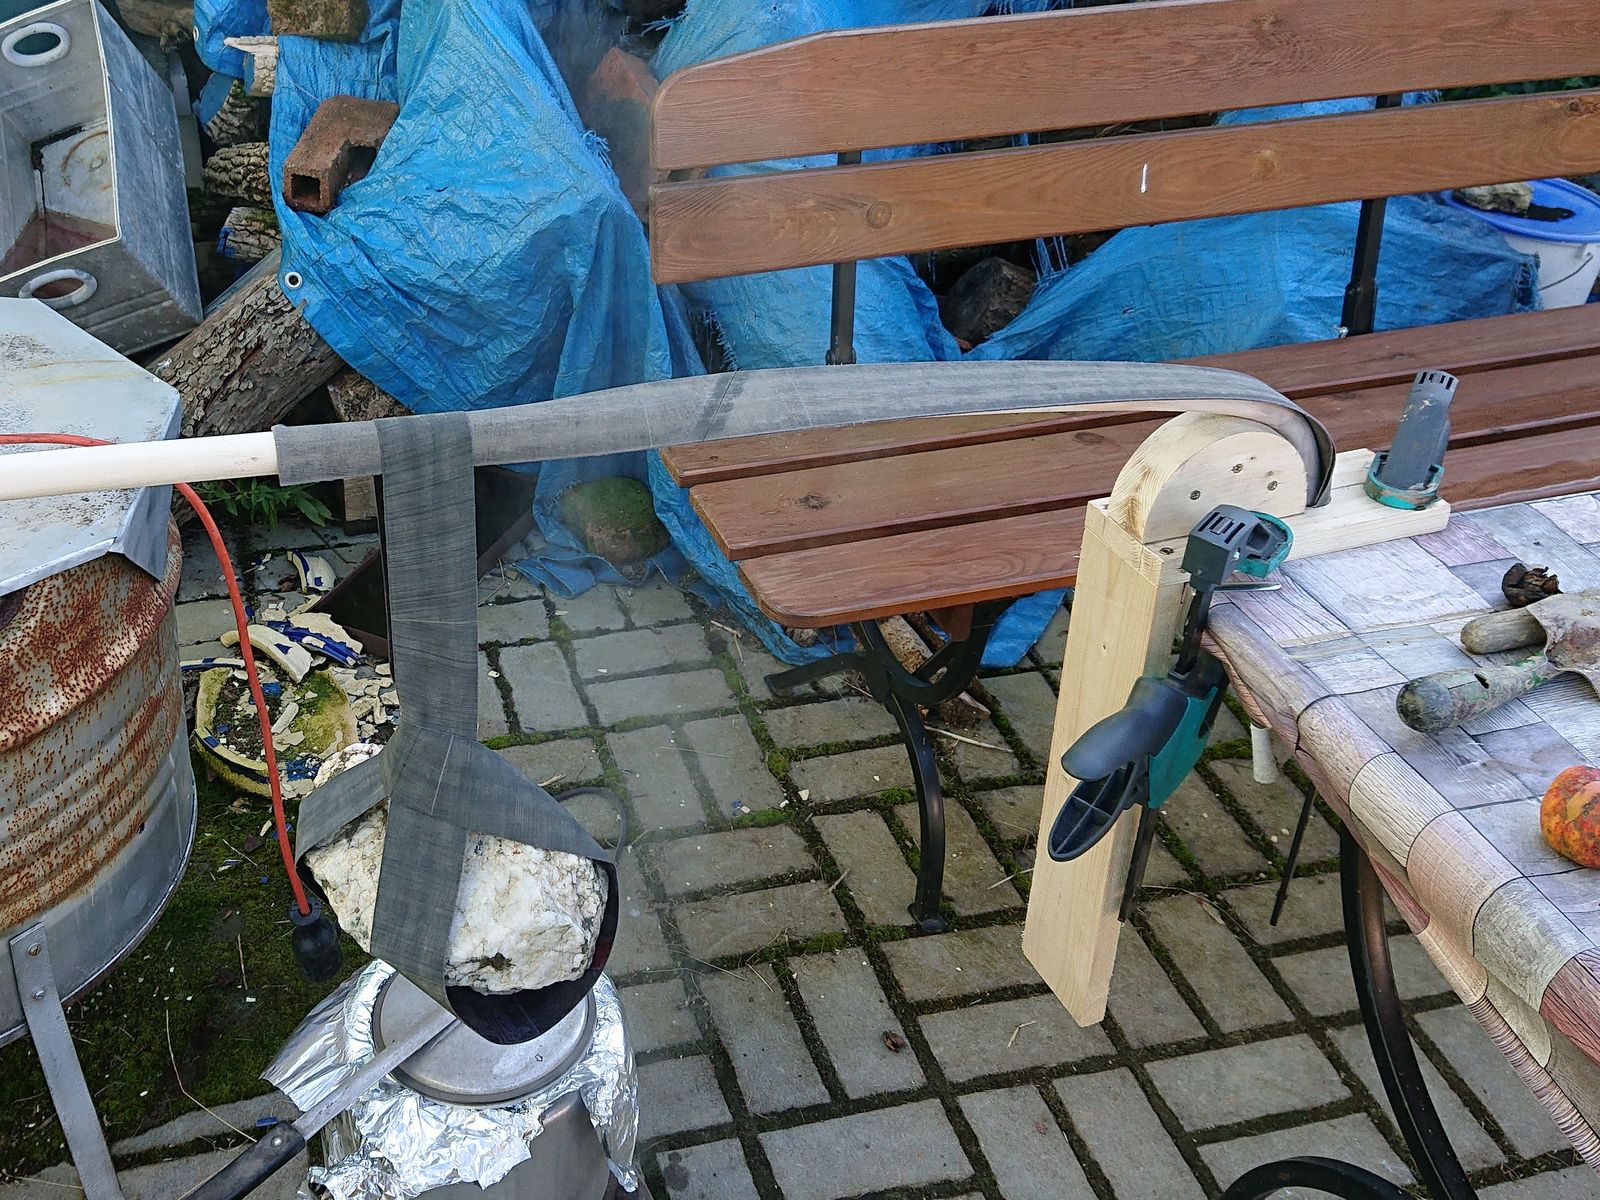
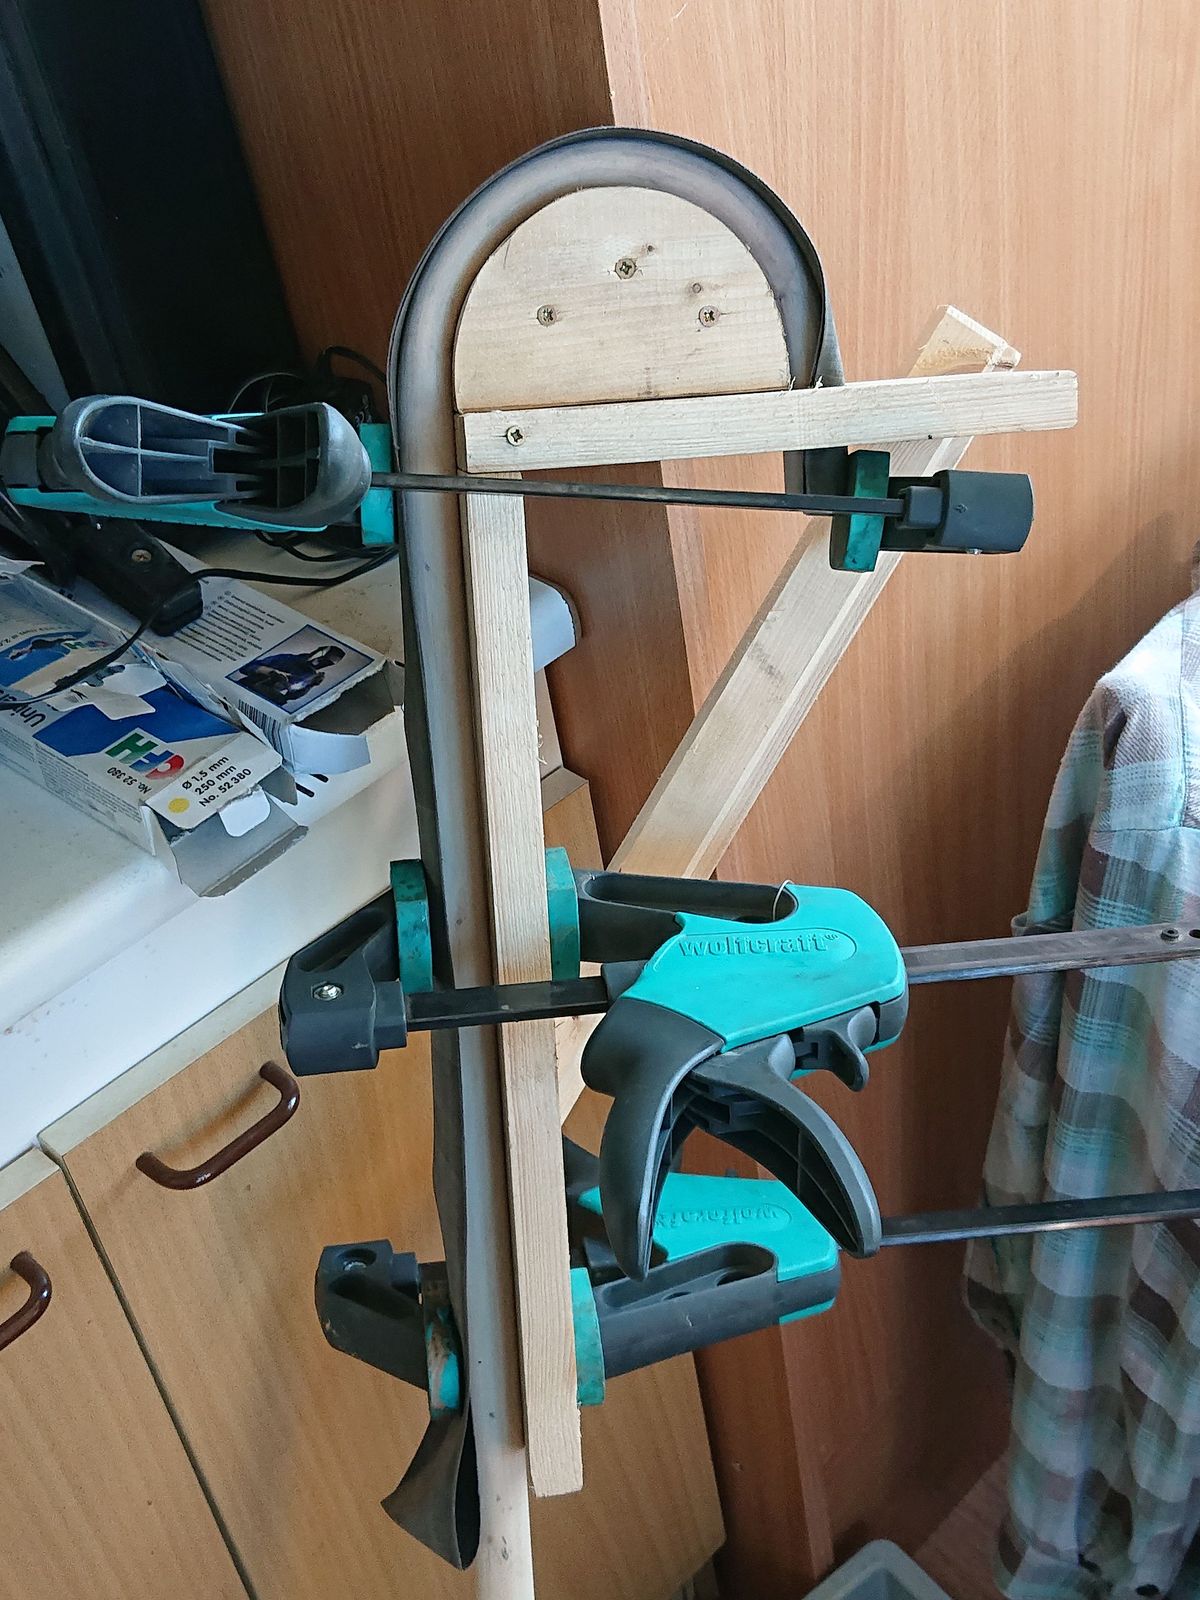
Both of these knives have just a simple finish to them. The blades’ primary bevels were ground only up to 120 grit and then tumbled after quenching in sand as long as it took to take all the scale off. Bolsters and end caps are not highly polished, as well as the handles. In fact, I took a steel brush to them to roughen the surfaces a bit. And the finish is just several layers of ordinary boiled linseed oil.

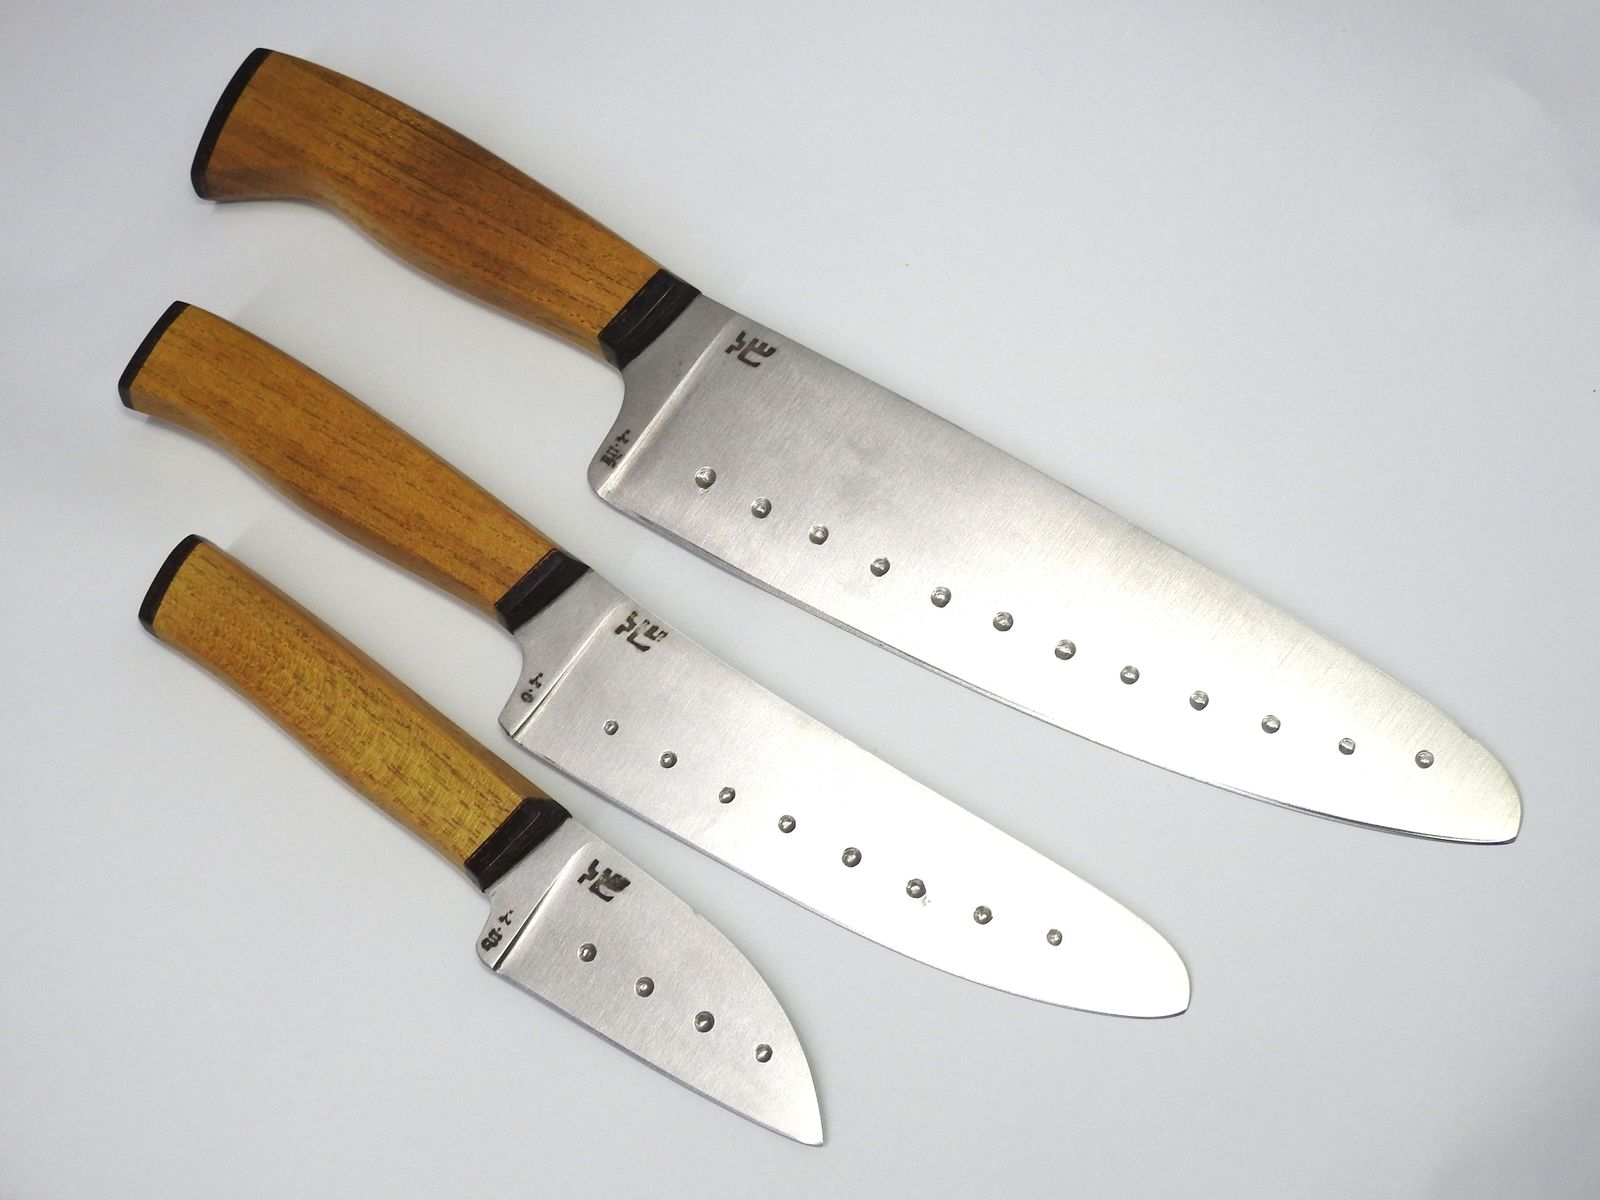
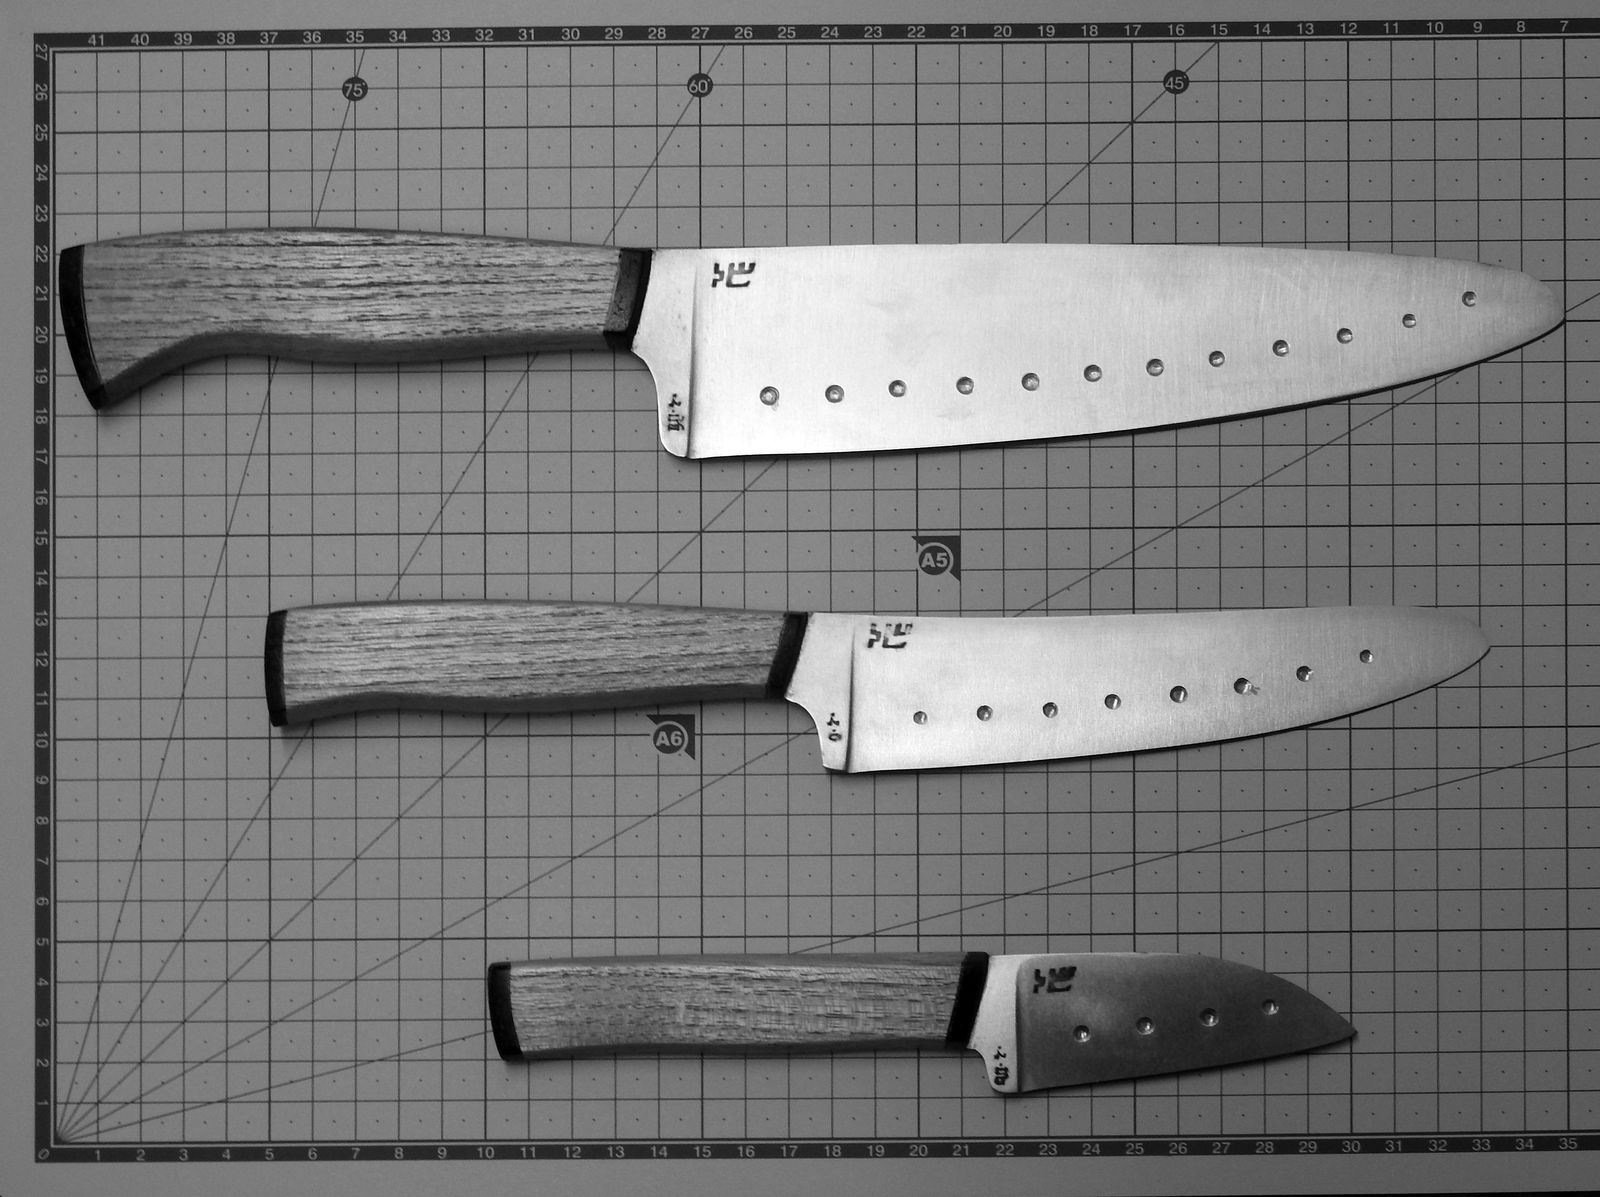
I was aiming for a simple, rough-looking sturdy knife as well as a simple, easy-ish manufacturing process. I think I have managed both. I really like these knives and I will make at least somewhat fancy sheaths for them. And I will definitively make more puukko in the future. I also think that this design is ideal for recycling old files into knives, so I will probably do some of that too.

Accidentally Tacticool?

I have designed this knife with a focus on ease of manufacture. It is meant to be a simple design that would allow me to utilize micarta made when impregnating wooden handles with epoxy. The metal bolsters are not exactly easy to make, but micarta would allow me to forgo them completely if I ever decide to do so. I do not like knives without bolsters, thou.

© Charly, all rights reserved. Click for full size.

© Charly, all rights reserved. Click for full size.

© Charly, all rights reserved. Click for full size.

The ornamental pins came out more asymmetrical than I hoped for, I will have to use another method to get them more consistent. And the black micarta, made from old jeans, looks tacticool, which is not entirely intended. The knife is a small outdoor knife, suitable for example for mushroom picking. In fact, my father immediately said it would be a knife ideal for mushroom picking upon seeing it, which made me happy because that was my intent.

Then I have also made a badger knife with a handle from micarta. But this time it was not micarta made from stacked layers of fabric but from smaller cuts of different colors crumpled together in the resin.

© Charly, all rights reserved. Click for full size.

© Charly, all rights reserved. Click for full size.

© Charly, all rights reserved. Click for full size.

It is hard to take a photo of, but the crumpled fabric does give the micarta a black&grey camo look, which is again more tacticool than I intended. I will probably start making micarta with bright colors because those are more suitable for a forest walk IMO – if you lose them, you have better chances of finding them than these. Although the stainless steel would, of course, gleam like a naked bum amongst the undergrowth.

I will probably furnish both of these with simple black sheaths. These knives are meant to be simple.

Frosty Morning Walk – Part 6 – Frosty Leaves

And one cobweb. Frost is very beautiful. It would be more beautiful if it were pleasantly warm, but one cannot have everything.

© avalus, all rights reserved. Click for full size.

© avalus, all rights reserved. Click for full size.

© avalus, all rights reserved. Click for full size.

© avalus, all rights reserved. Click for full size.

© avalus, all rights reserved. Click for full size.

An Experimental Kitchen Knives Set

This set is numbered, but I won’t be selling it. I have tried several new things whilst making it and it was designed in part with a focus on ease of manufacture, except the experimental dimples in the blades.

© Charly, all rights reserved. Click for full size.

© Charly, all rights reserved. Click for full size.

The stand is made from three slabs of massive black locust wood and the front of the knife stand, the bolsters, and the end caps on knife handles are made from a coconut shell. Fitting the curved coconut shell perfectly to a piece of wood is of course not possible, and I have solved that problem quite successfully by dyeing the epoxy glue dark brown.

© Charly, all rights reserved. Click for full size.

© Charly, all rights reserved. Click for full size.

© Charly, all rights reserved. Click for full size.

The finish is simply drying oil (commercial “Teak oil” which is a mixture of various oils) applied in several layers daily for over a week. It is still a bit tacky to the touch, but that should solve itself in time and with use. The surfaces are not overly polished – I did not go above 330 grit for both the metal and the wooden parts. Black locust wood has big pores in its growth rings, so polishing it very highly makes little sense anyway. I have, in fact, brushed the wood with a steel brush to accentuate the pores.

© Charly, all rights reserved. Click for full size.

I tried to make divots in the blades to make them less sticky to food, but it did not work out, they have too small a diameter to have any noticeable effect (I think). I will either have to build a tool to make these divots wider or to make very shallow fullers reliably and reproducibly. Neither of those two tasks is easy and I do not currently have any ideas.

© Charly, all rights reserved. Click for full size.

© Charly, all rights reserved. Click for full size.

The handles are not of an overly complicated shape, they have simply hexagonal profiles with some curvature to the facets and smoothed edges. They are reasonably easy to make and comfortable in the hand. The tang is held not only with glue but also with a nut on the end, which is covered by the coconut shell endcap.

© Charly, all rights reserved. Click for full size.

© Charly, all rights reserved. Click for full size.

© Charly, all rights reserved. Click for full size.

I think these three knives should cover just about any task that an ordinary home cook needs to do in their kitchen. I hope. I have given the set now to my mother to test and I have forbidden her to use any other knife for the time being under the serious threat of confiscating her other knives. She has got instructions to use and abuse them to test them thoroughly. If they pass the test, I will make multiple sets (without the divots in the blades) for sale.

I have also been thinking of adding this kind of picture in the future to my blades when I offer them for sale on the interwebs, to save myself the trouble of having to write the sizes in words for each piece. What do you think about that idea?

© Charly, all rights reserved. Click for full size.


One Santoku, Two Santoku, Three Santoku…

Today was finishing day – I finished six knives, three of which are Japanese-style santoku kitchen knives.

Three santoku knives. © Charly, all rights reserved. Click for full size

Japanese knives are not my forte. I know a bit about them, but not much. I do not intend to make them in significant numbers. Not only because I am not Japanese, but also because some of them are highly specialized tools optimized for one specific task and most people here in Europe would have no clue whatsoever how to use them or care for them and those who do would probably prefer to buy them from actual Japanese craftsmen. But I had three offcuts that just lent themselves for this type of blade and I am all for making the most with the least amount of waste.

Where I (afaik) differ most significantly from Japanese blades is the round-heeled ricasso. And the knives are glued together with epoxy.

Olive wood handle. © Charly, all rights reserved. Click for full size.

This one has a handle from olive wood, cow bone, and buffalo horn. The handle is asymmetrical – the bone piece is not flat but rounded. Fitting the wood, bone, and horn together was thus a bit of work, but I have managed to fit them together fairly well, albeit not perfectly. The handle has a D profile, with a flat-ish top and rounded belly.

Olive wood is extremely beautiful and I should have probably saved the piece for a worthier blade. But it stinks to the heavens when worked and is somewhat greasy so it tends to clog up abrasives something awful. Due to the greasiness of the wood, I have finished the handle with tung oil, five layers over two weeks. And when I was at it, I used the same finish for the other two as well.

Santos mahogany handle. © Charly, all rights reserved. Click for full size.

This is just a simple two-piece handle, bone bolster, and Santos mahogany wood. This wood works reasonably well and is very dry, the exact opposite of Olive. It does not gum up the tools, but it makes a lot of dust that likes to float around. I think it is a neat knife. The handle has a rounded belly and a faceted back.

Cherry handle. © Charly, all rights reserved. Click for full size.

And last a knife with a handle from my late cherry tree, cow bone, and buffalo horn. The handle is faceted, probably the closest to a true Japanese-style knife.

They are all 160-170 mm long blades, with handles 110-130 mm. I am not planning to make more unless I get suitable offcuts again.,

Frosty Morning Walk – Part 3 – An Orange Flower

Just like avalus, I have no clue whatsoever what flower this is. And I also agree that it is beautiful, both with the ice crystals as well when covered with tiny water droplets after they melt.

© avalus, all rights reserved. Click for full size.

© avalus, all rights reserved. Click for full size.

© avalus, all rights reserved. Click for full size.

Fosty Morning Walk – Part 1

Avalus went on a walk one frosty morning and he was kind enough to take his camera and make some beautiful pictures. So let’s begin with some moody shots of colorful fall landscapes.

© avalus, all rights reserved. Click for full size.

© avalus, all rights reserved. Click for full size.

© avalus, all rights reserved. Click for full size.

Sunflower Residence – Butterflies Finale

This is the last post of this series this year. I was saving up something special – Aglais io, the peacock butterfly. These butterflies are so ridiculously beautiful that some of the pictures look fake.

© Charly, all rights reserved. Click for full size.

© Charly, all rights reserved. Click for full size.

© Charly, all rights reserved. Click for full size.

© Charly, all rights reserved. Click for full size.

© Charly, all rights reserved. Click for full size.

Oy! Geroffmylawnyadamnkids!

My father’s knees are not what they used to be and he also has unstable blood pressure. So he needs a walking stick for support. He has a nice pair of aluminum sticks for nordic walking which he uses when he goes to town, but those are not entirely practical for when he goes into the garden and needs to, for example, carry a tool or a bucket in one free hand. Or hang the stick on the fence when he fills the bird feeder.

Thus I have decided to make him an old-fashioned walking cane to shake at clouds and kids stealing apples etcetera. It was a fun little project for a few days with me gathering walnuts in between its steps.

© Charly, all rights reserved. Click for full size.

I have started with approx 25 mm thick and just under 150 cm long hazel branch fully dried offer the last few years in the attic. I have shaved off most of the bark with a drawknife and then I have straightened all those small bends it had using the same method that served me well when making my walnut collectors.

Then came some more work with a drawknife and a plane, until I had a straight-ish and round-ish stick approx 20 mm in thickness.

© Charly, all rights reserved. Click for full size.

I have cobbled together a template for the bend and after boiling the end of the stick in water for circa 15 minutes, I have put it in and bend it about half the way.

© Charly, all rights reserved. Click for full size.

Old trizact grinding belts are soft and pliable, whilst being very strong. so I have used one as a backing to prevent raising splinters. Unfortunately, I did do a mistake in subsequent bends so I have raised splinters eventually that has led to a loss of circa 2-3 mm of wood on the outer curve, but hey, I have never bent wood this much before, so I was still learning, despite having some prior knowledge and experience.

© Charly, all rights reserved. Click for full size.

With a succession of several heats where I have been bending the stick more and more, I have gotten to a stage when it was fully wrapped around the template. Then I have put it aside to dry for a few days.

© Charly, all rights reserved. Click for full size.

When the wood was completely dry, I took it off the template, sanded the whole thing to 320 grit (although definitively not as thoroughly as I would a knife handle) and I scorched the wood with a propane torch. Scorching serves several purposes – it makes the surface of the wood a bit harder, it gives the wood nice dark color and it makes the surface more resistant to rot.

I have also added a piece of steel pipe to the bottom of the stick to give it a better purchase on the soft garden ground, to prevent the wood from splitting, mushrooming, and abrasion.

After that, I have spent several weeks applying several layers of linseed oil by wiping it on-off every two to three days until the surface was sealed but not too shiny.

The last step, finished yesterday, was to add paracord wrap around the handle. It bulks the skinny handle a bit, compensating for the loss of material during incompetent bending. It has a lanyard loop so my father does not need to drop it whenever he needs both hands for short time. And the bright color makes it easy to spot when – not whether – he forgest it somewhere in the hedge or near the garden patch.

I have positioned the lanyard near the straight bend to force my father to use the stick with the hook end protruding between the thumb and index finger and the supporting stick being aligned with the ulna. There are many people who use these walking sticks the other way around, but in my opinion that puts more strain on the wrist and is actually less safe. I do not have scientific data on this, so I might be ronk. But this stick is ever so slightly bendy and when I test it, it seems to be more rigid this way than the other way around.


And what I have learned? First that I can do this. Second that I should make the template in such a way that the bend is drop-shaped, not semi-circle-shaped because the wood springs a bit back after taking it off the template. If I ever need to do this again, I shall do better. I can make snazzy walking sticks now is what I am trying to say.