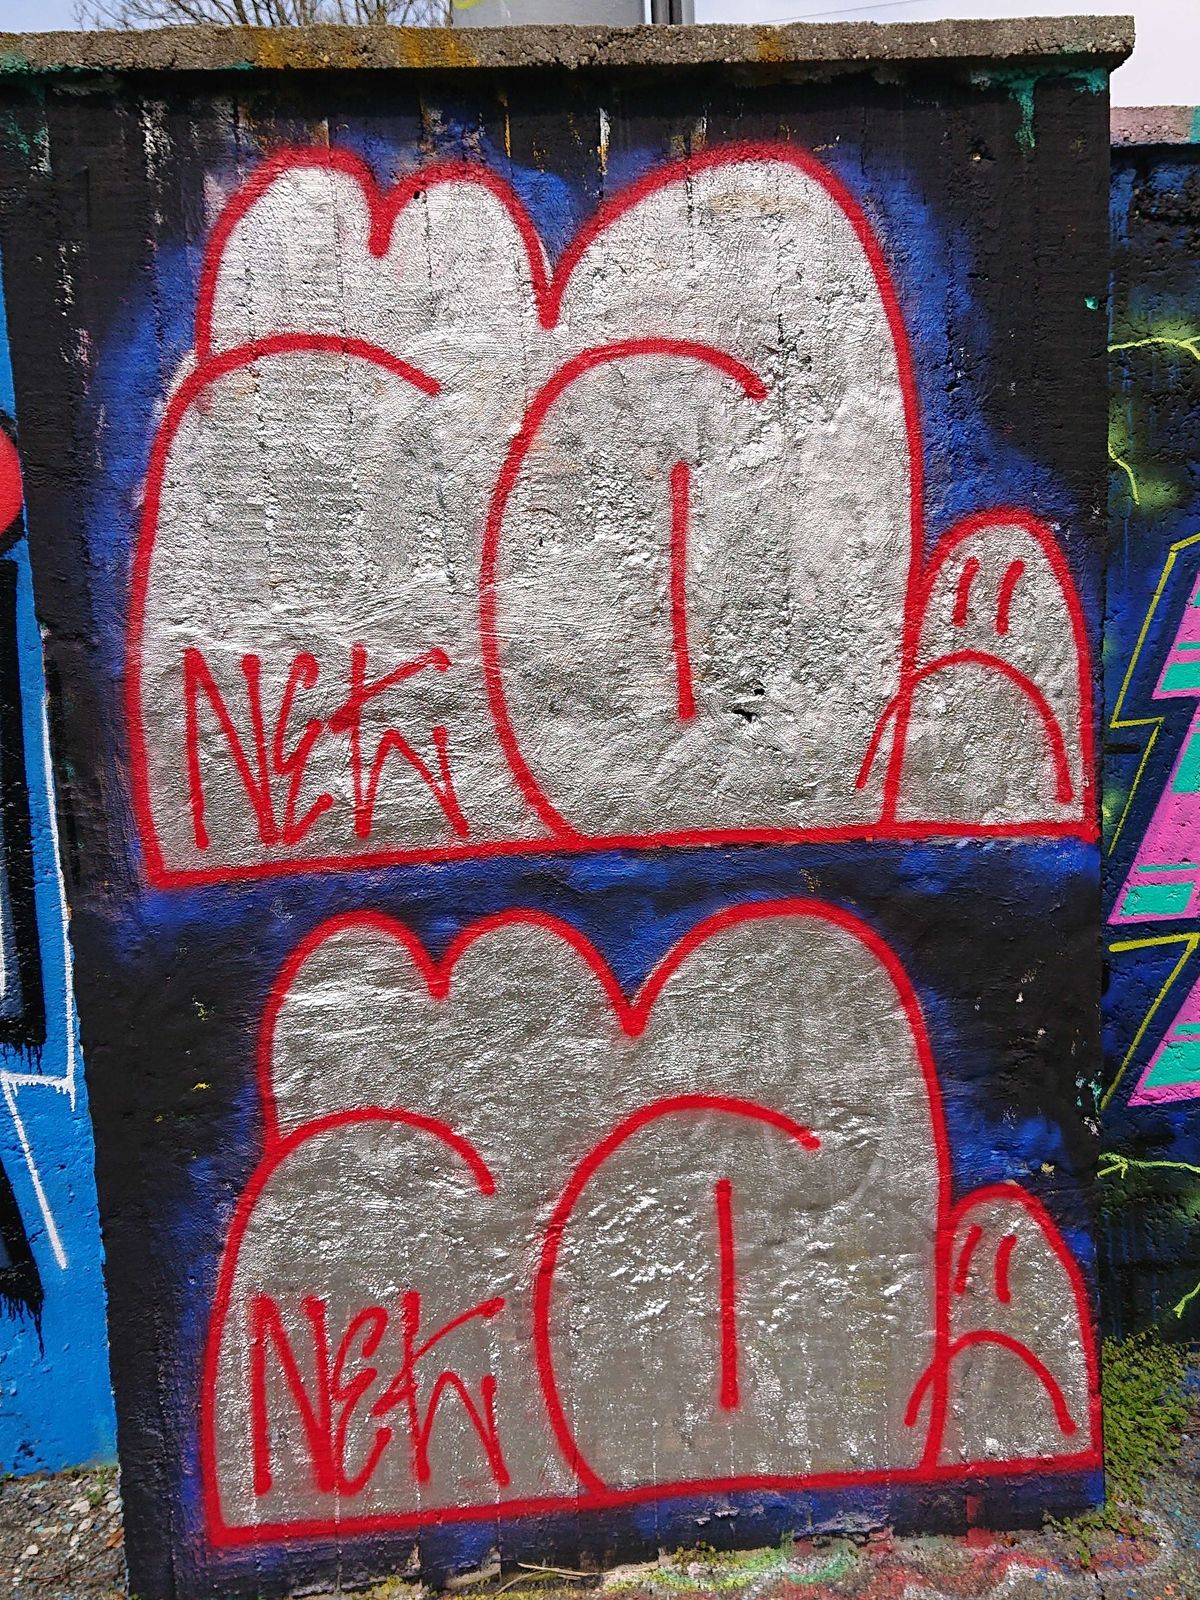
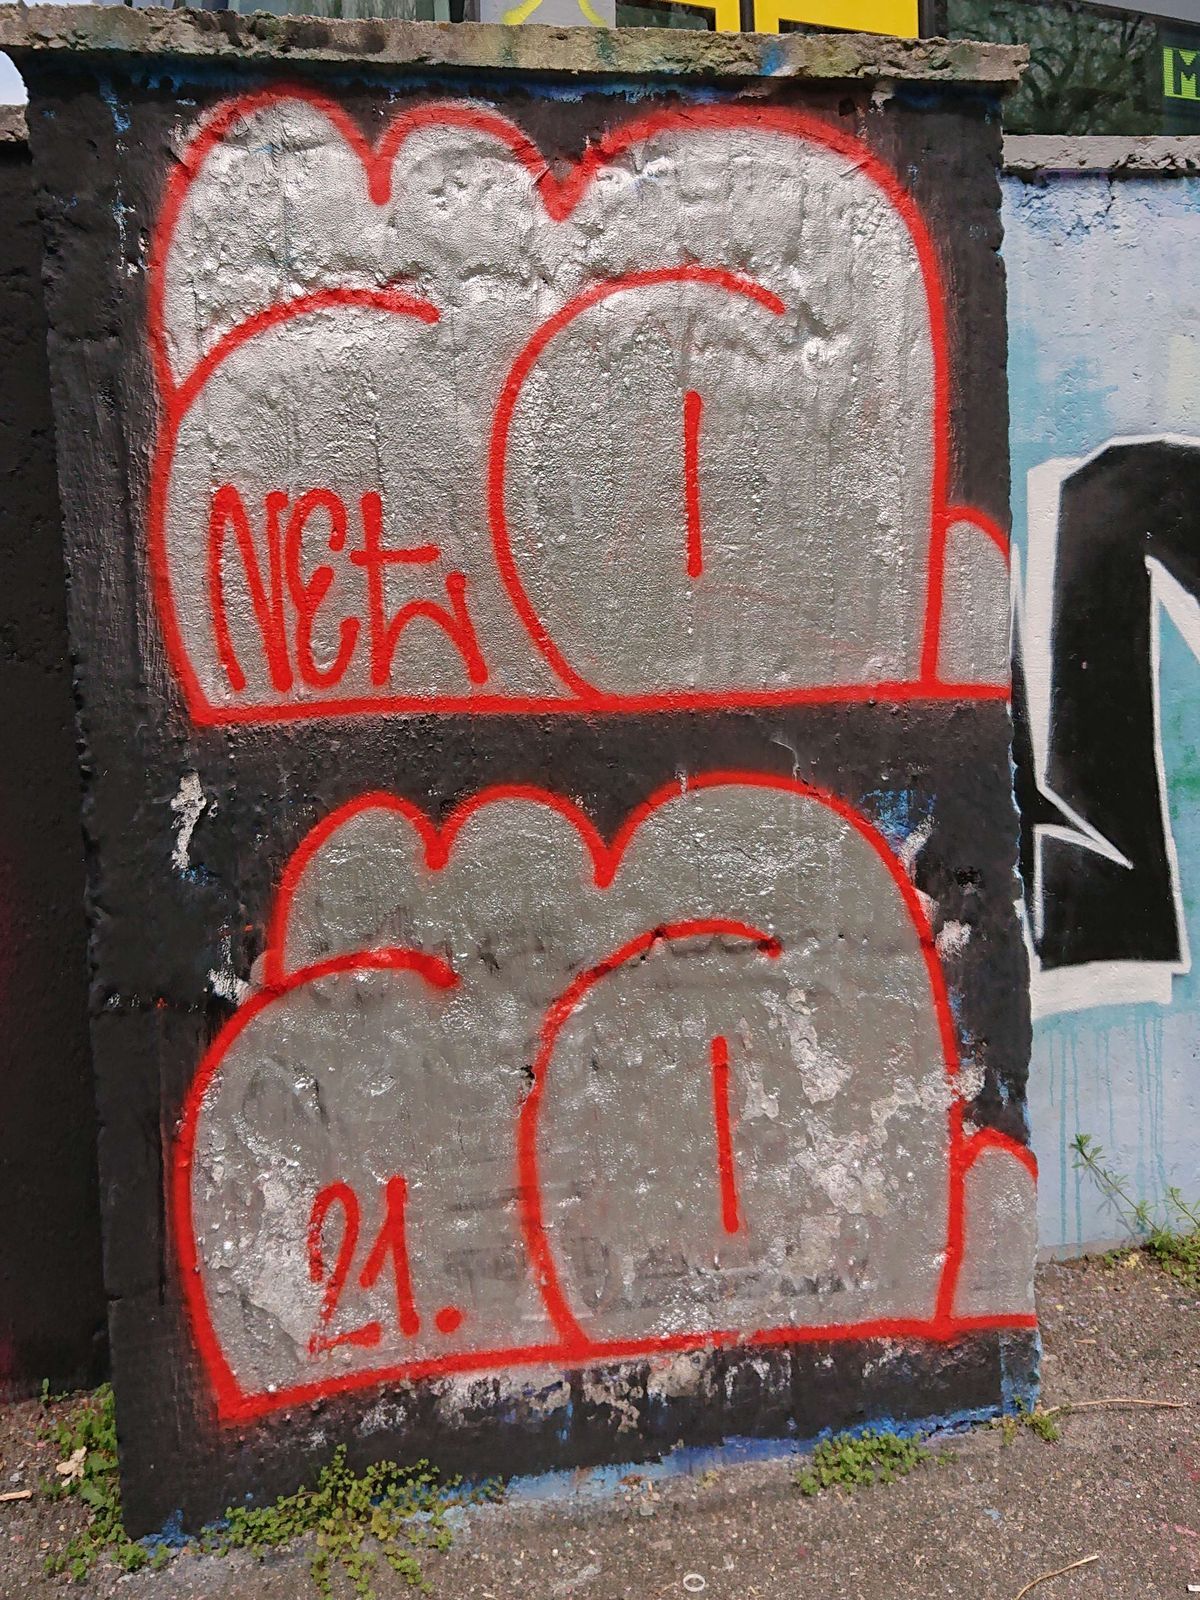
Teacher’s Corner: Liar, liar, pants on fire

You know, I can deal with a lot of things. My colleagues declare that I have the patience of a Saint. I am extremely understanding. I don’t expect kids to be prefect and rule abiding. I would be a fucking hypocrite if I did, because while I was always a straight A student, I was never docile. My popularity with teachers therefore depended on whether they expected me to obey, or whether they expected me to learn.

So when a kid fucks up, I don’t take it personally. There’s just one thing that I absolutely cannot tolerate : bold faced lying.

Today I was a bit latish, though still on time. I see two of my 8th graders, let’s call them A and B, walk away from the school gate instead of inside, so I inform their tutor.

We also quickly change plans and I get to teach their class for the first two lessons. I start with a whole 6 kids. The tutor is pissed, another kid says “yeah, I saw them, and C, D and E, too”.

Again, I can deal with it. It’s not like I didn’t occasionally skip lessons, especially when I knew that the actual teacher was sick. But at least I did it somewhat smarter. Like, WTF? You all got smartphones. When I was your age the Enterprise didn’t even have smartphones. Go hang out where I don’t have to see you.

But that’s not the worst. As I said, I did shit, too. But when I got caught, I knew I was in trouble and that I was going to suffer the consequences of my actions. Today, the merry troop shuffled in one after the other. I told them that we’d talk later. Near the end of the lesson their tutor came to inform them that they’d have to make up the missed time. One kid, C, exploded. He gets aggressive quick. That it wasn’t his fault! He’d missed the bus! He’d just came by bus, together with B! Yes, the attentive reader will have noticed a little problem here. I calmly asked him “Just yes or no, you say that at half past you were on a bus to school with B?” He indignantly informed me that yes, of course he was, I can ask B!

See, this is where I get angry. The lying, with indignation, with rage, with an aura of an innocent person suffering some terrible wrongs. B tried to back him up, claiming that no, I couldn’t have seen him, it wasn’t him! I said that well, all we need then was A telling us who it was I saw him with, but A had at least the good sense to shut up.

The real problem is that I already know that at least half the parents will choose believing their kids over the words of the teacher and a couple of classmates. In the end, I pity the kids, since none of them have the socioeconomic background to be a successful liar.

DIY Buffing Compound

I am going away for a few days, after that there will be several more posts from my Auntie’s garden and some knives. I wanted to pre-write a few posts, but I do not have enuff time, unfortunately. But I have enough time to finally give you a functioning recipe for a DIY buffing/stropping compound.

It starts with a bucket full of old nails and other rusty steel scraps. It is outdoors, filled with water and a little solar-powered aerator to help the corrosive process a little.

© Charly, all rights reserved. Click for full size.

Once in a while I sift through it and collect the mud that gathers on the bottom of the bucket, I put it in another bucket, let the water settle, skim it, and leave it dry a bit if possible.

© Charly, all rights reserved. Click for full size.

Final drying is done on the stove in the shop. When it is completely dry, the final product is de-facto ochre.

© Charly, all rights reserved. Click for full size.

I put the ochre in an old paint can and put it directly into the fire in the oven or in a pot on a charcoal fire in a BBQ pit o anneal it. I do not have any pictures of that, unfortunately, I forgot to take some when I was at that step. The final product of this step is a hematite powder/sand.

The powder needs to be crushed and sifted. The best method that I have devised is to put a piece of nylon stocking over a bucket, put in it a bit of the powder and gently agitate it with a spoon, put it in the mortar to crush it, put it back in the stocking, rinse, and repeat. That achieves two things – the finely crushed powder does not float around the shop and make everything pink and it is very finely sieved indeed. I have no idea about the exact grain size, but I do not think it is that important right now.

© Charly, all rights reserved. Click for full size.

Next step I have started to make a teensy-tiny batch of dubbin. First I heated up 8 g of olive oil, then I added 8 g of bone marrow fat and as the last step, I added 8 g of beeswax. This is the substance that I am using to treat my handmade leather goods.

© Charly, all rights reserved. Click for full size.

I poured approximately two-thirds aside into two samples to give to my most recent customers who bought knives with leather sheaths. Then I mixed the powdered hematite into the rest until it started to thicken slightly when stirred. I guess I did not anneal the hematite enough because I got a chocolate brown color. Finely crushed and sifted hematite powder is the true, original jeweler’s rouge and I sort of expected it to be, well, rouge colored. I will do a better job annealing, maybe with a gas torch and we will see with another batch. At least it is a pleasant and not disgusting brown.

© Charly, all rights reserved. Click for full size.

After it all cooled I have weighed it all to guesstimate the ingredient proportions for the final product and there they are:

1 part of olive oil, 1 part of beeswax, 1 part of tallow, and 4.8 parts of abrasive powder.

The final product has about the right consistency that I need so I think I do not need to tinker with the recipe further. It is hard so it does not smear very easily, but not so hard that it could not be used for manual buffing. I have used it in two ways and it works for both of them well.

The first was to use it to prime a hard leather strop to buff blade edges. It worked marvelously, getting the edge to shaving sharp like no bee’s knees. I am definititutitevely going to use it for that.

The second use was to put it on a piece of cloth and buff the pakfong and bronze on my latest knife to remove the patina. And it worked like a marvel, much better than all the commercial compounds that I have tested in this way in the past because those usually require much faster movement.

So I do call it a success, I have made a usable compound for manual buffing of blade edges and small metal parts. I will continue with the experimentation and perhaps make even bigger batches. I also plan to try my hand at making sharpening stones, I do have a bit of experience with that already.

Art: Combining resin and beads

It was just a matter of time, wasn’t it? And with the installation of actual working lights in our cellar, I had not just enough illumination, but also work space again to do some resin work.

Now, in between the last time I did this and now I invested into two things:

1: sanding paper up to 200 grit for the small disk sander that I have

2: A small bench grinder to polish the pieces.

Between the two of them, it saves probably 70% of the annoying work. Instead of having to start hand sanding at about 200 grit, I started at 2000. Now, there is even finer sanding paper for the machine, but that wouldn’t be very helpful, since the sander is, of course, a flat surface and I want the pieces round, so a few, really just a few minutes of hand sanding with the paper on a soft sponge are needed. Then polishing is a treat (provided I hold tight on the pieces and don’t have them shot into orbit).

With the resin done it’s always a question of how to turn them into pendants. When they come out of standard moulds, they fit standard bezels, but these here don’t. Wire wrapping is an option, but being no good at it the results are often not satisfying. It also takes the focus away from the resin pieces I think. Now with the beads bringing me so much fun, why not combine?

Round resin piece with a beaded bezel. The resin piece is brown and blue, like continents and the ocean

©Giliell, all rights reserved

This is one of those “sea and land pieces” that I love so much, even though I’m not completely happy with it. I shouldn’t have added the metallic pigment, because there was a layer of flitter that settled somewhere in the middle that makes it slightly opaque. The bezel is made from seed beads in two different sizes and some small crystals.

Round resin pendant in a blue beaded bezel. The resin piece resembles mountains with a sky

©Giliell, all rights reserved

This one is gorgeous, and I can’t decide which side I love better. I think I’ll try something similar again with the attempt at creating northern lights. This started out rectangular, btw.

Round resin pendant in a blue beaded bezel. The resin piece resembles mountains with a sky

©Giliell, all rights reserved

The last piece defied my attempts at beading, because the curve gets too narrow at the top.

Tear shaped resin pendant with brown on the outside and blue within

©Giliell, all rights reserved

It has the same issue as the first one, but look at that shine!

My Auntie’s Garden – Part 3 – Pansies

The Czech name for these beauties is “maceška” which is a diminutive form of the word “macecha” (stepmother). Don’t ask me why, I have no clue. These were not grown in the rock garden itself, they are in old ceramics throughs near the steps into the house.

© Charly, all rights reserved. Click for full size.

© Charly, all rights reserved. Click for full size.

© Charly, all rights reserved. Click for full size.

My Auntie’s Garden – Part 2 – Tulips

Not the biggest collection imaginable, but the strategically put tulips here and there resulted in quite a few various pictures.

© Charly, all rights reserved. Click for full size.

© Charly, all rights reserved. Click for full size.

© Charly, all rights reserved. Click for full size.

© Charly, all rights reserved. Click for full size.

© Charly, all rights reserved. Click for full size.

© Charly, all rights reserved. Click for full size.

© Charly, all rights reserved. Click for full size.

© Charly, all rights reserved. Click for full size.

© Charly, all rights reserved. Click for full size.

Eye Finished a Comishun

I got a commission for a knife, which did make me happy a bit. Making a commission has one huge advantage over making a knife just so – the existential dread questions “Will somebody want this?” and “Will they be able to afford this?” are both answered in the affirmative. And the requests were not unreasonable – a big camping knife with a striker and a ferrocerium rod. Handle from black locust wood, leather sheath with some black-locust ornament, if possible bark-like surface. Black locust has some personal significance to the customer, I did not ask what it is. And they have chosen one of my already finished blades, so I could go right ahead.

© Charly, all rights reserved. Click for full size.

I gave them a choice of three types of black locust wood – untreated, treated with ammonia, and a very expensive piece of burl that I bought some time ago and did not deem worthy of a blade yet. They chose the expensive burl, and I must say it does look very fancy. I infused the handle with resin, although it is impossible to get a complete soak on wood as hard as black locust. But a few mm is just fine. The bolster and pommel are stamped 1 mm bronze. Not polished, just brushed with a steel brush and allowed to build up patina. Cow bone spacers for contrast.

© Charly, all rights reserved. Click for full size.

It is the same design as the “not a masterpiece” knife, but the blade is from oak bark blackened spring steel. For some reason the blackening reacts differently with the unquenched steel at the spine, making this funny light triangle on it. I would very much like to know the reason for this different reaction – the chemical composition of the steel is identical throughout, it is the crystalline structure that changes. Yet, evidently, various chemicals react differently with hardened and unhardened steel.

© Charly, all rights reserved. Click for full size.

Google yielded no usable results for putting tree bark texture on leather, maybe nobody managed it yet. So I had to improvise a bit. I ended up with finding several pieces of sharp basalt gravel and pressing the ragged edges into the leather. It does look tree-bark-ish, I think. On the sketch, it looked a bit empty though, so we agreed to put a black locust leaf in there too. With a bit more refinement the texture would probably look even more like tree bark, but I had to end the experimentation at some point, otherwise, I would not be done on time. The tip of the leather sheath is darker, I have applied patina shading there. Now that I think of it in the photos it looks a tad peculiar.  It looks better hanging tip down. Lesson learned – photograph sheaths and knives in them tip-down. Next time, the lesson will be promptly forgotten.

© Charly, all rights reserved. Click for full size.

I could not buy bronze tubes for the striker and rod handles, it would seem nobody in CZ sells them. I have bought rods, but drilling a rod concentrically without a lathe has proven to be an impossible task so far. So I made the handles from brass and I coated them with a thin bronze layer electrolytically.  The patina has built up almost immediately, which is nice. It took several days for it to build up on the knife bolster and pommel.

© Charly, all rights reserved. Click for full size.

© Charly, all rights reserved. Click for full size.

It is a big, heavy-duty knife weighing 224 g alone, 447 g with the sheath and accessories. Blade 4 mm thick at the base, tapering towards the tip. Fullered, flat grind. Point of balance at index finger right behind the bolster for a comfortable grip and control when cutting food. When the long grip is held towards the pommel, it gives the knife a nice heft for chopping, for example, when making splinters for starting a fire.

The knife will be given to its owner next weekend. I do hope they will be happy with it and get some use out of it.

Degupdate: Candy is back, and this time she brought reinforcements!

After our sweet Estelle passed away, it was clear to us that since we didn’t want to give up Candy, we would need new friends for her quick. Thankfully our breeder agreed to take her in and socialise her with two young degus. This went really well and left us just a week to get Degustan back in shape again*, since Candy and Estelle had eaten away quite a lot of the wood holding the wire in place. Of course we ran from problem into trouble, since most parts are cobbled together from leftover pieces, so what used to fit the last time doesn’t fit now. But we finished yesterday and went to pick up the crew today. So please meet Candy, Sky and Lulu.

An adult brown degu, a juvenile white and a juvenile brown and white degu snuggled together in a carrier.

©Giliell, all rights reserved

When we brought them home they were a bit shaken from transport, so the two babies snuggled close to Candy.

Juvenile brown and white degu held in  hand

©Giliell, all rights reserved

Lulu is a shy little girl. She has already claimed what used to be Estelle’s favourite spot: behind the running wheel.

Juvenile white degu sitting on a girl's upper torso. The face of the girl is not visible, only the mouth

©Giliell, all rights reserved

Sky, on the other hand, is more like Candy. They will probably have some fights about who’s the boss when Sky grows up. It’s funny how much juvenile degus look like adult mice.

Adult brown degu nose to nose with juvenile white degu in an enclosure.

©Giliell, all rights reserved

Here you can see Candy encouraging Sky to go exploring. It is clear how much comfort her presence gives them. When Candy went on a short trip outside of the enclosure, they both hid and only came out after Candy returned. Now, please, let those three have a long and happy degu life, my heart can’t take any more breaking.


*I’m afraid my colleagues think I’m crazy. We were chatting on Friday, with me mentioning that I need to finish the project and a colleague shared that yeah, with his hamster he always had to replace the wooden boards not just because of gnawing, but also because of the pee. I said “oh, that’s no problem for me, I put down tiles” and they all looked at me like I had sprouted an additional head…

My Auntie’s Garden – Part 1 – Introduction

Very rarely do I have an opportunity to visit my favorite aunt in the spring when her rock garden is in full bloom, so today year when I got lucky I took a ton of pictures. I will post them piecemeal over a non-specified period of time.

This is the outside view of her house and the garden. You can already see the multitude of shapes and colors.

© Charly, all rights reserved. Click for full size.

And to start things first a picture of a small pond with water lilies. They are not blooming yet, so just a little anecdote to amuse you: When I was a little kid, I liked to play in this garden by running and jumping on the rocks. My aunt did not mid as long as I did not damage any plants, which I somehow managed. But she did warn me to not do it near the pond because I could fall in it. So of course I ignored that instruction and one summer day I did indeed fall into the pond, butt first. There was laughing and Itoldyousoing on my aunt’s part and wailing and gnashing of teef on my part. Luckily I did not hurt my self nor the water lillies.

© Charly, all rights reserved. Click for full size.

Mighty Kites

For me, a true sign of coming spring – a red kite sitting on the huge ash tree behind my house. They are magnificent beasts and I do wish they would sit still long enough to get really up close and in focus pictures.

© Charly, all rights reserved. Click for full size.

I have realized that I have not posted any bird pictures for a looong time. Unfortunately, there are very few birds around lately and even fewer opportunities to take pictures.

A Day at the Zoo 3: Because the Night

Night zoos are one of my favourite things because they have the coolest animals. They’re also bad for taking pics. Even my most light sensitive lense isn’t much good, mostly because it’s too dark for the auto focus but also too dark for me to use the manual setting. But there are some acceptable pics.

Dark image of a tree porcupine

©Giliell, all rights reserved

The tree porcupine was kind enough to step into the little light and my focus. This is where digital cameras with their near limitless image storage play to their strength: I probably deleted 100 blurry images to walk away with about 6 decent ones.

Very dark and blurry picture of an echidna

©Giliell, all rights reserved

Nope, that’s not a worse pic of the same animal, that’s actually an echidna. No, I don’t care that the father next to us told his kid it was a porcupine. Zoos offer many learning opportunities, but obviously no learning obligations.

And now, are you ready for one of my absolute favourites? The aardvark!

Image of an aardvark, full body

©Giliell, all rights reserved

We were very lucky: on our second visit to the night zoo, the aardvarks (3 wonderful animals) had their enclosure cleaned and the caretaker had turned up the light there. They didn’t mind (they could have gone to their dark burrow) and posed for some nice pics.

Image of an aardvark, front view

©Giliell, all rights reserved

Aardvark in action!

Side view of an aardvark

©Giliell, all rights reserved

Look at that snout!

There is a story that goes with the aardvarks: The zoo in our state capital also has a night zoo with aardvarks, but while this here has the glass all up the enclosure, our zoo only has it about a metre high, just enough so the aardvarks cannot escape. Some years ago when we visited the zoo, Mr looked at the aardvarks, not realising that there was nothing between him and the animals at the level of his nose. Well, the aardvark obviously thought it was only fair game that if Mr got to look at it, it got to look at Mr, went on its hind legs, put the front legs on top of the glass and put its snout almost into Mr’s face. The look on my beloved one’s face was something I still treasure to this day.

Better Late Than Never???

It is still unclear whether or not I or my parents will have some long-lasting Covid effects. However, so far it looks good. It does not look so good for one of my cousins though. The cousin in question is about twelve years older than I am. When we were kids, he sparked my interest in nature, and thus he was one of the first people who have put me on the path of actually seriously studying natural sciences. But…

My parents are an exception within the family in that they both are decidedly non-religious (my father even being resolutely anti-religious), a fact that I have not known about until my late teens. And although my religious relatives are not the “frothing-at-the-mouth-fire-and-brimstone-biblical-fundangelicals” that seem so typical representatives of Christianity in the USA, the negative effects of the religious rot on the human mind are noticeable amongst some of them even so.

That my moderately religious cousin has married a deeply religious woman was unbeknown to me for years. They both seemed pretty reasonable in our interactions and religion rarely, if ever, came up. When my cousin-in-law scolded my mother that she should not do laundry on Black Friday because it makes Jesus bleed or something like that I just rolled my eyes, but it was not a harmless superstition, she actually believes that crap. The first warning sign of really bad things to come was when she has become a part of a radical cult and the family almost broke apart – she almost left not only her husband but also her three children over religious bullshit. Once you start to truly believe moderate bullshit, apparently believing egregious bullshit becomes easier.  They managed to reconcile that issue somewhat, but it was apparent from that time on that many of the problems in that family – which I won’t discuss in public in detail – stem from the fact that religion, not reality-based knowledge, and not even common sense – guided many decisions.

Things came to a culmination of sorts last year when they both got Covid and were sick for over a month. They did not get vaccines because “they did not believe in them”. They both have long Covid now and my cousin, a jolly bear of a man of rude health to whom illness was a nearly unknown thing for most of his life, is now battling chronic tiredness and depression. He did say to my mother that he will accept vaccine boosters if they will be recommended to him, as well as new vaccines should the need arise in the future.

It does make me wonder if this is “better late than never” or just “late”.