There and Back Again: Towing a caravan with an EV

View over the marshland towards the sea

©Giliell, all rights reserved

Some of you will remember that last year, our old diesel died several times on our way home from the holidays, until we had to have car and caravan shipped to us and get home by train. Fortunately we had already been looking into a suitable EV to replace it and were lucky to get a Kia EV6 with all the trimmings on short notice. In our daily lives, the car is just the best one I’ve ever had: I can charge at home, with my own energy in summer, but there is pretty little data on towing a caravan over long distances. There were two major issues: reach and charging and we were a bit anxious about the whole thing.

First of all we, made the most important change beforehand: we changed our expectations. If you keep comparing it an measure it by the old diesel experience, you’ll end up unhappy. The EV will not have the same reach, you will be slower, you need to plan accordingly. Since this was the trial holiday, we were happy to go along when friends proposed to go to the North Sea together. It was only 600km and within Germany and we planned to go there in 2 days, since we had zero experience. Beforehand I said that I would be OK with a reach of 150km, I would be absolutely happy with 200, but less than 100 would mean looking into alternatives.

Normally we only charge the battery up to 80% to go gentle on its life cycle, for the first part we charged a full 100%. Generally, the last 20% charge slowly as fuck, again for the sake of the battery, but that’s no problem when you charge over night. Anyway, we started our journey at home and soon got a feeling for the energy consumption. I usually drive the car around 15 kw/h per 100 km  in summer, my beloved at around 18, but I’m sure there’s lots of people who regularly need 25kw/h. Towing the caravan got us between 30 and 40 kw/h. Energy consumption is much more direct with an EV, because it’s much more energy efficient. A combustion engine uses a hell lot of energy just standing there, so the increase is less steep. An EV doesn’t do that. The first leg of our journey took us through the medium mountain ranges of the Hochwald and the Eifel (Charly will know those) with lots of ups and downs. Once we were past Dortmund, everything became flat. We were pretty careful and always charged the car when we still had at least 30% left, so we made 4 stops in total each way, which gives you that 150km range. If we had very carefully planned the stops, we could have made it with three, but that would have left no margin for a non functioning charger or things like that.

We could have made it to our destination the first day, but since we only had booked for the next day, we called it a day early near Osnarbrück and enjoyed an evening of bathing in a lake and getting a good dinner. we arrived without any problems the next day and had some fun holidays. We made the way back in one day, again, with 4 charging stops and plan to make a longer voyage next year. On the way back we also planned our stops better, looking for fast chargers so charging actually didn’t take that much time. Two breaks for breakfast and lunch, and two for peeing and stretching your legs. A fast charger will go from 30% to 80% in 10 minutes, which is very reasonable.

But….

Nothing is that easy. The issue is that while there’s more and more charging stations and more fast chargers (though a Danish guy we chatted with assured us it was nowhere as bad as in Germany), they’re all made for cars only, so what about our caravan? We always had to detach it, move it somewhere we could park, sometimes do not quite legal driving manoeuvres and later hitch it again. It was annoying, but ok. The big disadvantage of all of this is that I got mostly banned from the driving seat. Not because I cannot drive, but because my beloved is really bad when it comes to all things digital, gets sick when he has to look at his phone to check out charging stations while driving and I am also really good at getting an overview quick, see where the chargers are and where we can put the caravan. This will have to change because if we really go to Spain it would be too much for him to drive alone.

Oh, and a final word on energy consumption: We needed about 180kw/h energy in total. Since one litre super fuel has 8.9 kw/h energy, this equals a bit more than 20l super or 19l diesel fuel for 600 km with car and caravan. No combustion engine is ever going to beat that.

Toe-May-Toe Saws

On Thursday, I harvested the first 5,5 kg tomatoes from the greenhouse.

© Charly, all rights reserved. Click for full size.

About 4 kg were ripe enough to be used straightaway and the rest we left in a bowl to ripen for now. And those already ripe had to be processed of course, so we made them into canned sauce.

© Charly, all rights reserved. Click for full size.

First I cut them all into eighths. This is a task where a big and scary sharp knife comes in handy because it is possible to cut multiple tomatoes with one cut. A small knife allows only work on single fruits and even a slightly dull one will do more squishing than cutting.

After cutting tomatoes, I also cut three big onions into quarter-crescents, two red bell peppers, and one small pattypan (optional) into small cubes (5-10 mm). I divided everything into halves because it was clear it wouldn’t fit into the pot all in one go.

© Charly, all rights reserved. Click for full size.

We have thrown the onions into hot oil to soften them. While they were bubbling we added spices – whole black pepper, allspice, and bay leaves (also homegrown, I have three Laurus nobilis plants) and let it all simmer together for a bit. BTW, that brown spot on the pot is a mystery – even when we wash it spotless with steel wool, which we do, it appears in the same spot once the pot is heated.

© Charly, all rights reserved. Click for full size.

When the onions were sufficiently glazy but not too soft, the tomatoes, peppers, and pattypan went into the pot too with a generous amount of salt and a bit of sugar. We let it simmer under a lid for twenty minutes and added one bouillon cube (also optional, soy sauce works well too) per 1 kg of tomatoes. These are ketchup tomatoes so they are not very juicy. This is a good thing because they make good thick sauce without the need to boil off too much water. They do contain just enough water to dissolve into a nice sauce.

Once the sauce was done, we put it into pre-heated jam jars with twist-off lids. My mother pre-heats the jars with steam because it sterilizes them better than just washing and it reduces the risk of the glass breaking due to thermal shock too.

© Charly, all rights reserved. Click for full size.

Once the lids created a vacuum seal, my mother labeled the jars and I took them into the cellar. These are circa 880 ml jars so this is about 7 l of tomato sauce prefabricate. In the cellar, it will keep for years (I think our record was five years). Essentially it only spoils if the lid is damaged and rusts through.

When preparing for eating, my mother adds cream and flour to thicken it into proper tomato sauce. One jar is enough for about 6-8 servings. It is great with pasta. It is one of my favourite foods so I do hope to harvest more tomatoes. In the greenhouse, it looks promising. Outside the greenhouse, it is a bust and I will run the tomatoes over with the lawnmower so they decompose quicker.

I got a break “Quod Subigo Farinam”

I took a few day’s break from working on the cutting boards and associated machinery because my car is in repair. Without it, I cannot buy the necessary materials, and it’s not worth ordering these online. I also cannot buy groceries until the car is repaired, so yesterday I baked bread, and today I baked pizza. It was under guidance from my mother who told me what to do and what ingredients to use etc. but I think I can claim most of the credit because I did most of the actual work and I did in fact knead the dough.

The bread looked kinda meh going in.

© Charly, all rights reserved. Click for full size.

But it looked splendid going out. I had it for dinner and it tasted absolutely fabulous. Not even the best bread bought at a supermarket can beat a home-baked loaf.

© Charly, all rights reserved. Click for full size.

The pizza looked as usual going in. I.E. a mess.

© Charly, all rights reserved. Click for full size.

And it did not look any better going out since pizza is one of those foods that looks like someone already ate it.

© Charly, all rights reserved. Click for full size.

But it tasted great too and after that lunch, I could not move for several hours and still have left over for dinner.

I also harvested about 45 kg of potatoes. The small patch near my greenhouse dried up about 90% already so I decided to dig them all up. 45 kg is a reasonable harvest considering that in this patch, I planted mainly leftover tiny/green potatoes from the previous year and about 5 kg of those that I could not fit into the main potato bed. Of these 45 kg about 34 kg were in good enough shape for storage and 11 kg need to be eaten or otherwise processed asap.

© Charly, all rights reserved. Click for full size.

Thus after the very crapy start of the year it at least appears I might get my money’s and time’s worth out of the garden after all. I already harvested enough pumpkin to can them as canned fruit (ala pineapple), pickled (ala gherkin), and sauerkraut ersatz to last for two years. I am still not even on the money due to the huge amount of molluscicides I had to use at the beginning of the growing season, but I should get there easily now. It would be strange if I did not get at least 100 kg of potatoes from the main patch and I will definitively get more pattypans and pumpkins still.

© Charly, all rights reserved. Click for full size.

Tomatoes outdoors got consumed by mold despite my best efforts. The weather was simply too wet and I could not spray them with fungicides all the time. At least the potatoes appear to have resisted it and the tomatoes in the greenhouse are shielded from rain and fog and thus so far resisted too. While annoying, it is not too big a loss. The weather was so cold and wet that the tomatoes outdoors did not grow above my knees anyway whereas those in the greenhouse are up to my shoulders, as shown in the picture. I hope those in the greenhouse do not catch it because if the weather stays reasonably warm, I could harvest tomatoes at least till the first frost. I would very much like to try my hand at homemade ketchup and dried tomatoes. It looks promising. The first tomato started to blush on August 2. and as these things usually go, others followed quickly after that. It takes about two weeks for a tomato to fully ripen therefore sometime toward the end of next week I should start harvesting.

© Charly, all rights reserved. Click for full size.

Like every year for the past few years, I planted beans along the south wall of our house. Those appear to have thrived and I can look forward to at least a few kg of shelled beans and some canned bean pods. Although I hope most of them ripen and dry – we still have not eaten all the canned pods from last year.

Did you have any success this year in your gardens? From what I read in the news, most people around the world do not experience abnormally cold and wet summer this year, quite the opposite. I would not mind the wet, but the cold is bumming me out. One of the strangest things that happened due to the cold weather is that some of the corn I planted in the spring started to grow only about two weeks ago. It appears that wet and too cold or dry and too hot are the only two options we have now. We haven’t had what I’d call a “normal” summer for about a decade by now.


Making a Thicknesser – Part 2 – The Failure

Fuck it. I did not expect to have to write this.

Works were progressing nicely, I ran several tests and optimization rounds. I got the thicknesser remove material in parallel both across and lengthwise with several iterations that I won’t write about now because they are moot. It was working adequately. Also as I wrote, I did try to plane one board across the grain manually and it worked just fine. I really did not expect any significant problems. I was ronk.

Today I glued sacrificial sides to all my kitchen boards and decided to try to flatten those. The first one I tried to push under the thicknesser, removing barely 1 mm of material – BOOM. And the planer was broken. When I disassembled it I found out that for some reason the wood bent the steel knife of the planer, thus it bit into the housing. Subsequently, the propulsion shaft broke off and the aluminium cylinder for the knives got deformed too.

Apparently, planing hardwood across the grain is even more pernicious than I expected. Now I don’t have an electric planer anymore. That would not be a problem since I do not really need one. However, I still do not have a thicknesser, which I do need. And I have several glued-up boards which I cannot finish with a reasonable amount of work. This is a huge setback and I am at a loss about how to proceed.

I can buy a new hand planer but it won’t fit in the stand I built. I can’t buy the same one because it is no longer on sale and it is no longer possible to get replacement parts to fix it. Not to mention that when I removed the cover, so many metal parts were bent out of shape or broken that repair is probably not feasible. Now  I am even afraid to run these boards through any kind of thicknesser whatsoever. If I bought a thicknesser for 500,-€, and found a way to fit it into my workshop somehow and this happened, saying that I would not be happy would be an understatement of the year, I would be ruined.

Making a Thicknesser – Part 1 – The Dread

I glued up seven boards and I tried to flatten them with the drum sander. At first, it always appears to progress reasonably quickly but as the boards get flatter, the abraded surface gets bigger and thus I have to slow down to not burn the wood. And when I get to an almost flat board with a few deeper spots it slows to a crawl. I was aware that this might happen and I hoped to avoid it by being diligent when gluing the boards. It did not work. One part of the problem was that I cut these with my old slightly blunt and wobbly table saw blade so they were not very precise. The other part of the problem was that no matter what I did the boards shifted while the glue was curing. Even when I tried to insert dowel rods to prevent it.

So I tried to flatten one board with my electric hand planer. It worked, just so-so. It did reduce the time needed on the drum sander later on but the surface was still way too wavy for that to be the solution. I am not very good with the hand planer, I rarely need it so I lack the experience to use it properly. I also hate it, it is heavy and the gyroscopic precession makes it unwieldy.

So, the drum sander works splendidly for perfectly flattening surfaces but I need something else to remove material more aggressively first. In other words, I need a thicknesser. I really hoped I could avoid this.

As with the drum sander, there are two obstacles to simply buying one. I am broke and none of those that I could find on the internet would fit into my shop anyways. I toyed with the idea of attempting to make a second drum for my drum sander, but I rejected it – I would need really high rpm and there’s no way I can make this thing so precise to not be dangerous when spinning really fast. My electric planer came with a jointer adapter that I never use because, despite appearances, I like having all ten fingers. However, that adapter means one thing – the planer has anchor points for fixing it somewhere permanently. So I decided to try and use those.

First I spent a few days being grumpy and thinking about how to do it. I rejected at least three ideas of my own and three that I found on the internet. There were some good solutions to be found but they all required something that I lack, usually space and versatility. I need something compact that can be set up relatively quickly and easily, I cannot store a dozen or so shims and spacers or have huge skids and guidance rod protruding on sides. I was constantly going through my scrap piles and thinking about what could be useful and how. And two days ago I finally arrived at an idea that I thought is worth trying to realize and I made a very rough sketch of the various parts that I will need.

© Charly, all rights reserved. Click for full size.

The materials I initially gathered were: 4 pieces of angled iron, 6 black locust boards, 2 offcuts of 22 mm galvanized piping, an old spigot handle, two hammer-in M10 nuts, an M10 threaded rod, and a handful of woodscrews. I still dreaded the start of the work because I am constitutionally incapable of precise work and this does require precision.

I started by cutting all the black locust boards to size and shape and smoothing the surfaces on my belt sander.

© Charly, all rights reserved. Click for full size.

I also flattened two boards on my drum sander to get perfectly flat and parallel surfaces and I glued them into a bigger block. I would use one piece of wood but I could not find one of sufficient size.

© Charly, all rights reserved. Click for full size.

This has shown that whilst for my sloppy work most of the blame goes on my two left hands, part of the blame was on my tools too. With a new, sharp, and thick blade suddenly my table saw was capable of cutting black locust wood to precise dimensions and at really right angles. The use of a drum sander made making two surfaces mate perfectly positively easy. After three days of work, I got to this.

© Charly, all rights reserved. Click for full size.

I managed to fix the planer to the scaffolds and run a small board under it. That is a very tentative sign that this might actually work.

I will write more in detail about all the individual parts and the whole thing when it is finished. If it fails, I will write about it too. I won’t progress much in the next two days, however. Tomorrow I must take my father to the hospital because he injured his knee and what I will do next depends on what the diagnosis is going to be. We might need to buy new crutches, with underarm support.


Making a Drum Sander – Part 5 – Painted

The weather was very nice so I disassembled the drum sander, took it outside, and slathered blue paint all avo. I painted all exposed particle board surfaces because I want to make sure it does not swell and crumble if I accidentally spill a few drops of water on int in my workshop. I did not do a very neat job but from a distance, it does not look so bad.

© Charly, all rights reserved. Click for full size.

I did not paint the tilting table because the paint there would be a hindrance and not a boon.

I also improved the inner geometry of the dust cover by gluing in two pieces of polystyrene and grinding them on the drum until there was just a small gap.

© Charly, all rights reserved. Click for full size.

The P40 abrasive with velcro finally arrived and it is scary stuff.

© Charly, all rights reserved. Click for full size.

Just putting it on mangled my fingers so much I had trouble logging into my phone via fingerprint recognition for a few days. I forgot to put in the safety screw on the right side as you can see in the picture. It did not appear to be a big deal, just folding the paper into the cut was enough and it run without a hitch for a few hours before I noticed the missing screw.

I was baffled at first that even with 40 grit it took me two hours to flatten four boards, i.e. with the same speed as with 80 grit. The machine was stalling all the time whenever I tried to be a bit more aggressive with it. And after two hours I realized that the leather belt stretched a bit and did not have enough tension to power the drum effectively. I knew that the belt would stretch with time so it is a tad embarrassing that it took me two hours to realize it had done so already. After I corrected the tension (by making a jig for precise cutting of the belt at an angle and shortening it), I breezed through the remaining six boards in about an hour and a half, i.e. twice as fast.

After that, I cut these boards into strips with my table saw.

© Charly, all rights reserved. Click for full size.

I took some of these and I glued an end-grain cutting board of the biggest size  I intend to make – ca 30×50 cm – and I am currently in the process of flattening it.

© Charly, all rights reserved. Click for full size.

This one will not be for sale since it is a learning piece. I will use it personally to see how it performs but it has some gaps and thus it will probably serve mostly as a pretty background for photographing knives.

I learned that I will have to take more time and care with the glue-up to save time when flattening the glued piece. Jatoba is extremely hard in all directions but trying to sand or plane the endgrain is truly a penance. I spent three hours today doing it and I am nowhere near finished. At least that is an assurance that if I make and sell cutting boards from this wood, they will last.

When I figure out the ins and outs of making the cutting boards I will post about it. As far as the drum sander goes, it is finished and functional. All that remains is to figure out where to store it when it is not in use


Making a Drum Sander – Part 4 – It Sucks!

My brother and my sister-in-law were busy as bees and between the three of us, we managed to do all the necessary work re-painting the kitchen in just two days. On Wednesday I had to do some little cleanups and shopping and on Thursday I could continue to work on my drum sander. So I did.

After the first successful test run of the drum sander, I glued up a 50×1500 mm leather belt to drive it. For better precision, I bought an already-cut leather strip (a prefabricate for leatherworkers to make belts), cut both ends at an angle of 45°, and glued it up with special extra-strong elastic cement for shoes. I was thinking of reinforcing the seam with sewing, but so far it does not appear necessary – the glued joint can withstand all the force my hands can exert, which is significantly more than the spanning spring on the belt sander can do. I run into a minor setback here – I made the driving wheel on the drum sander with a groove as I would for running it with a rubber belt. That was a mistake, the leather jumped the low fence quite easily and when I tried to make the fence higher, it jumped the spanning wheel and the motor wheel. The best solution (which, luckily, did not take long to find out and implement) was to remove the fence on one side and to make the cylinder wider. The leather belt is not precise and needs some space to oscillate from side to side.

© Charly, all rights reserved. Click for full size.

After this, It was running quite well. The crowned spanning wheel does keep the belt on track and on the motor wheel, and on the driving wheel of the drum sander, it moves a bit side-to-side when running. With that problem solved, I could move on to dust collection. Pushing the wood with one hand and vacuuming the dust with the other is neither an easy nor elegant solution.

© Charly, all rights reserved. Click for full size.

The dust collection does not need to be especially sturdy. Its main two functions are to stop sanded-off particles flying all around the shop and to prevent me from accidentally grinding off my fingers on the drum. Thus I opted for the easiest and cheapest material to use I have available – cardboard. And it is held in place by four M6 fly screws that go into threads cut directly into beach wood.

I cut a piece of pine board to put across the drum and I glued on it fences from cardboard that slot into the grooves I pre-cut in the two pillars holding the drum. To prevent the edges from fraying, I glued strips of sturdy paper over them. To attach the vacuum cleaner I used a reduction I saved from my old hand-held circular saw when it broke.

© Charly, all rights reserved. Click for full size.

As far as inner geometry goes, I tried to glue in two strips of paper to reduce the space between the drum and the walls. I tested it with these and without them and I think that they did help with the dust collection, but they were not very stable and had issues (dust collected behind them). I am currently in the process of finding a better and more permanent solution to getting the inside of the housing to conform to the drum better. For now, it works, albeit it can be improved.

© Charly, all rights reserved. Click for full size.

Initially, I intended to glue the belts on the drum but rsmith’s link in the comments under the first article gave me the idea of using velcro. If I can change the belts reasonably fast, I can use the drum sander not only for material removal and flattening of surfaces but also for getting a reasonable surface finish on completed cutting boards. And I also could have a separate set of belts to flatten metals, if I need to. So I went and ordered some velcro and a set of belts. The velcro was so far the most expensive part of this whole assembly- about 30,-€! I hope it was worth it. I glued it in a spiral around the drum and I wound up a strip of abrasive around it in the same direction. On the trailing edge (left side of the drum) the velcro suffices to hold the paper in place. On the leading edge, I had to make a groove, bend the paper into it and secure it with a screw.

The next day I made a few optimizations. I improved how the whole assembly is held near the belt sander by inserting two M10 hammer-in nuts into the table. I made one of the two supporting legs adjustable in length so I could adjust it to the uneven ground of my workshop. I made two long M8 fly screws and I used them together with two hammer-in M8 nuts to attach the legs in a secure yet easy to disassemble way. And finally, I made a specialized push tool to shove the pieces through the sander without endangering my fingers and without exerting myself needlessly.

© Charly, all rights reserved. Click for full size.

It is made from an old furniture leg and two offcuts from an old spruce board. The table height is just below my navel so I can easily brace this thing against my belly and gently but firmly push with my body weight.

And with all that done, it was Friday evening and I went to bed late. Yesterday, I ran it for about 6 hours to test it thoroughly. In those 6 hours, I managed to flatten twelve jatoba boards approximately 15×30 cm. I think I could do the job faster if I used a coarser abrasive, but unfortunately, 40 grit was not in stock and the 60 grit I ordered had not arrived yet. Thus I had to do with 80 grit. I ordered the 40 grit finally yesterday and the 60 grit should arrive on Monday. I still have some unflattened glued-up boards and I will probably wait for those to see how much faster I can do the same work.

© Charly, all rights reserved. Click for full size.

I do consider the test to be a success. The machine ran the 6 hours (three 2-hour segments) without a single problem. The boards are not tutti flatti perfetti, but they are flaterooni accepti. As in within a few tenths of a mm over the 30 cm. That is enough for a good and practically invisible glued joint.

I learned a few things while doing this. The food-safe PVA glue does not gum up the abrasive but it does create small resin-like chunks that can attach to the wood and/or the table and make the board run unevenly. So I have to brush those off, especially at the beginning when it grinds off the glue runoffs. I also learned how to incrementally lift the table for best results and I got a few more ideas for improvements and optimizations.

That was significantly easier and quicker than I thought it would be. It is not completely finished yet and I will write about the finishing touches. However, as of now, I have a fully functional drum sander. I made it in about three weeks and so far it cost me less than 200,-€, most of which was the velcro and the abrasive belts.

And while I am waiting for the coarser abrasives to arrive, I will paint it.

Making a Drum Sander – Part 3 – First Run

With the drum sander being essentially functional, I could start fixing it in its working place and truing the drum. Both issues were simple but not easy, so it took me a whole day and some more to do it properly.

The first problem to solve was how to fix the drum sander besides the belt sander so it could be powered by it. Here has shown my first serious mis-measurement. I had to trim a sliver of the belt sander base because I could not position the drum sander close enough for the wheels to align properly. Then I stood in front of the problem of how to fix the drum sander in place so it does not slide around.

© Charly, all rights reserved. Click for full size.

From the start, I wanted to do it with two M10 bolts at the back but my first attempt was a bust. You can see the results of that first attempt, those two yooge holes in the back of the base. The problem was not that it was not stable or somesuch. The problem was that the bolts would be in the way if I wanted to sand something longer than about 40 cm. What followed was about an hour of serious thinking and faffing around in the workshop and when I started to work on another solution, I accidentally found two metal angle irons with pre-drilled holes.

© Charly, all rights reserved. Click for full size.

I undid all the work I did in the last hour, screwed these two onto the back of the belt sander base, and cut the 10 mm holes open. That way I could slide them onto the M10 rods inserted into holes in my workbench and fix them in place with winged nuts. I also had some play to slightly re-position the belt sander to align the wheels properly before tightening the nuts.

© Charly, all rights reserved. Click for full size.

With the back of the belt sander being fixed to the table, I could run it but I also added two legs on the front just in case. They are not strictly necessary – in fact, one of them is a tad short and is not even touching the ground properly and I will have to add a screw extension – but I feel better with them.

© Charly, all rights reserved. Click for full size.

With the belt sander standing, I could run it for real. I used an old trizact belt to power it. That works for now as an impromptu measure, I will make a proper sturdy leather belt to do the job. For now, I stood in front of it for a couple hours running a piece of particle board with 60-grid sandpaper glued to it to true the drum, holding the board in one hand and vacuuming the particles with the other.

© Charly, all rights reserved. Click for full size.

Here you can see the drum being sanded down to being nearly, but not entirely, concentric. There are still visible gouges made by the table saw. I had to run the sandpaper under it quite a few times after each lifting of the table, and I only could lift the table about ¼ of a mm at a time. I only ran it at 20% speed at first because the drum was so unbalanced and the whole assembly vibrated violently. After a while, I could increase the speed to 40% as the cylinder became more and more concentric and thus better balanced. That is also the top speed at which I intend to use the machine since higher speeds would burn the wood and destroy the abrasives (I built the machine so the surface speed of the drum is approximately the same as the surface speed of the belt so I can transfer experience from one to the other).

© Charly, all rights reserved. Click for full size.

Late in the evening truing the drum was finished and it was flush with the table across the whole length to within a tenth of a mm. I left a bit of a gap here so it can be seen.

© Charly, all rights reserved. Click for full size.

With the drum being concentric and true, I could finally fix some abrasive to it. For a test, I used an old torn 40-grit belt. First I wound it around the cylinder, fixed it with rubber bands, and trimmed the edges to flush (these scissors are used for trimming abrasives and nothing else, in case you are wondering). After that, I cut grooves into the sides of the cylinders, tucked a bit of the belt in it, and fixed it in place with a screw.

© Charly, all rights reserved. Click for full size.

It worked reasonably well as a temporary solution and I learned a few things when running it for a few hours with some testing pieces of wood. The leading edge held up fine but the trailing edge eventually tore off. It seems that at the trailing edge, the screw is completely unnecessary and a bit of double-sided adhesive tape would suffice plenty. That is good to know, but I am already looking for a better way to do it in the final version. I am ordering some velcro and abrasives with velcro.

© Charly, all rights reserved. Click for full size.

And that’s it for now. The 40 grit did hog off material quite nicely. I flattened a seriously twisted and bent piece of jatoba that I definitively would not be able to flatten manually, ever. Although manually feeding the stock through the machine is still hard work (for me) – I did get some workouts on my back and my pecs that way. Still an order of magnitude less work than trying to flatten one of the hardest woods on the planet by hand.

There is still a lot of work to be done and I will do it and write about it. Optimize the assembly/disassembly, optimize the attachment of abrasives, optimize the legs, make dust collection attachment, make a proper and safe push tool to feed the wood through, and finally, paint job. Only I do not know when I will do all this it because I have to take about a week’s pause from this work. I have to paint the kitchen now. I hate it, but it needs to be done and it has to be done now because now my brother can come by to help with things that need four hands.

Making a Drum Sander – Part 2 – Tilting Table

I took Sunday off and on Monday I had other things to do but yesterday and today I could work on the drum sander some more and I progressed significantly. First I finished and attached the propulsion wheel. I started that right at the beginning but it progressed slowly because I glued it from several layers of old plywood and I had to wait for the glue to dry a few times. Just before the two-day break, I soaked the surface with epoxy resin to make it harder and on Tuesday I turned and sanded it until it was passably round. I will probably give it another layer of epoxy once everything is finished, I will use the epoxy on other parts too to improve their surface hardness and strength.

© Charly, all rights reserved. Click for full size.

The wheel is attached to the axis with an M4 screw going through a thread drilled and cut into the axis. I hope it is strong enough and won’t get sheared off in work because I do not have any better idea how to do it. I need to be able to eventually remove this wheel in case a ball bearing gets busted and needs replacing. I am also leaving myself a bit of the axe poking out so I can power the thing with my drill in case powering it with the belt grinder does not work.

© Charly, all rights reserved. Click for full size.

On the right side, I added a fence with a shelf to lift the base 55 mm; on the left side, I simply added a 55 prism. Then I screwed two spruce boards on it to reinforce the structure. Though I screwed them on with the wrong grain direction of the core but it seems to hold strongly enough. Should a problem occur, I will reinforce it later or replace it with properly oriented boards.

© Charly, all rights reserved. Click for full size.

The base under the propelling wheel is unsupported. This has a reason – I need to be able to slide this side over the base of the belt grinder because I need to align this wheel with the motor and the spanning wheels of the belt grinder. It should not be under too much stress but I did reinforce it with steel under the wheel where there will be most of it. Again, I might add some more support later, for now, I think this suffices.

That was Tuesday done. I attached it improvised to the belt grinder and it worked, albeit it was loud as hell. I think that can’t be helped, the ball bearings are not perfectly aligned and the drum is not concentric yet and I can only solve the second of these two issues.

Today I made the tilting table to adjust the sanded thickness. And here I must thank to rsmith for pointing me to a page with useful information about how to make a very simple one.

© Charly, all rights reserved. Click for full size.

I started by cutting-out a piece from the lifted base. This was the plan all along, to use this space for some sort of mechanism to lift the table. On the front, I added a 55 x 20 mm beech board across. Beech is reasonably strong hardwood, it should be able to support the table. In the middle of the board is inserted a 24 mm long M8 nut with a sufficiently long rod through it. To operate the screw I tightened on it a hex nut and a winged nut against each other.

© Charly, all rights reserved. Click for full size.

I decided to make the table from a 15 mm particle board because the piece I had had a very smooth surface and it is straight. However, particle boards are not exactly known for their strength, so I had to reinforce it. I reinforced the rear end with stripes of beech wood for the hinges to have better and stronger anchor points. I put it under weight and went for lunch while it was setting

© Charly, all rights reserved. Click for full size.

After lunch, I continued reinforcing it. On the front end, I added an offcut of angle iron. That also provides a hard surface for the screw to lift the table.

© Charly, all rights reserved. Click for full size.

For longitudinal support, I screwed on two beech strips. I forgot the exact measurements, somewhere around 25×15 mm or somesuch. I tested it and it seemed to be sturdy enough against bending, but not against twisting due to the table being supported by a single point on the front. It should not be a huge problem if the sander is loaded in the center as it should be, nevertheless, I decided to reinforce it further with three offcuts from the same particle board intended for firewood.

© Charly, all rights reserved. Click for full size.

One continuous piece would be better and I had a suitable one – the one that I cut out of the base in the morning – but I completely forgot about it until these were screwed on and I did not want to go through the hassle of trimming it and drilling all the holes again. I think it is strong enough and if not, I can add more support later. I say that a lot.

© Charly, all rights reserved. Click for full size.

And this is where I finished today. I think the work is progressing nicely. I have a tilting table with a range of about 35 mm, which is plenty for my purposes. It takes about 80 half turns to lift from zero to full. That is enough sensitivity to sand off only tiny layers of material when needed. The whole assembly so far is sufficiently light and compact that I can easily lift it and put it under the table next to the table saw when not in use. I am reluctant to be optimistic but I do feel ever so slightly positive about this project.

Making a Drum Sander – Part 1 – Base

How the time flies – it is two years since I wrote a series of blog posts „Showing off my wood“ where I have shown various woods at my disposal for crafting. I have so much material in fact that it is not improbable but downright impossible for me to use it all up making knife handles and knife blocks, I just cannot make that many different knives alone. So I would like to make some high-quality end-grain cutting boards to convert at least some of that massive amount of material into something useful.

I started last year but I hit a snag. I need to mate wooden surfaces together perfectly, but there is no convenient way for me to flatten wooden surfaces in reasonable time and in scale. My manual method is precise, but also tiring and time-consuming. I need a drum sander to make even a few end-grain cutting boards. And I cannot buy one for two reasons. Firstly I don’t have the money. Second, I don’t have the space needed for one.

But since I have managed to build myself a belt sander, I decided this year to spend some time trying to build a drum sander too. I had more than a year to think about it and with the money these things cost, even if I spend a whole month building one, it would still be worth it.

© Charly, all rights reserved. Click for full size.

I started by gluing three large pieces of black locust wood together to form a large prism through whose center I put a 10 mm threaded rod. I cut the edges off on a circular saw and then I stood in front of a bit of a problem – how to turn a large-ish wooden cylinder without a lathe. I rigged up a temporary wooden structure that allowed me to span the prism in such a way that it could run against the edge of the circular saw whilst being continuously rotated with hand-held akku drill. I hope the picture makes it clear what I mean.

© Charly, all rights reserved. Click for full size.

It made an absolutely unholy mess and I was terrified the whole time but I succeeded in making a rough cylinder round enough to progress to other works. I will make the cylinder perfectly round and concentric with its rotational axis later.

© Charly, all rights reserved. Click for full size.

I swapped the threaded shaft for a smooth 10 mm one and to secure it to the cylinder I drilled 3 mm holes throughout it and the shaft on both ends and I drove 3 mm hard steel through the hole. I hope it’s strong enough for the forces needed, if not and it shears off during work, I will have to think up something better. I also cut grooves in the shafts to secure one ball bearing on each side with circlips. I later decided to use two ball bearings, with the second one being put near the first one and not being secured with circlips. As you can clearly see, I am making things up as I go along and I do not always know what I am doing.

© Charly, all rights reserved. Click for full size.

A 15 mm particle board from an old PC table serves as a base to build upon. To hold the ball bearings I cut short boards from hardwood (beech) and I made cutouts for the ball bearings between two pieces and screwed them together with long wood screws. It appeared to be reasonably strong and it held the ball bearings firmly, but it was a bit wobbly. So I glued 15 mm particle boards to the beech boards to widen the bases a bit.

© Charly, all rights reserved. Click for full size.

While the glue was setting on that, I trimmed the edges of the cylinder. I used the boards that held it in the circular saw jig and a hand-held drill as the source of rotation again. That left me with only one hand free to trim the edges but a hacksaw blade proved to be quite efficient at that. Setting the initial groove was a bit fiddly but once started, it went easily, albeit slowly. The edges are not perfectly square and flat but they do not need to be.

© Charly, all rights reserved. Click for full size.

Once the boards for holding the ball bearings were glued together, I glued them to the base with five-minute epoxy. Epoxy is expensive, but I needed a strong bond to make subsequent works easier.

© Charly, all rights reserved. Click for full size.

Once the epoxy cured, I added 4 80 mm wood screws through the beech cores and then also multiple 6 mm bamboo dowels glued in with PVA glue. I do hope that is strong enough in itself but it was additionally reinforced with the last step.

© Charly, all rights reserved. Click for full size.

 There are strong anchor points on the base for the ball bearings and I changed the way they are held between the boards from the temporary wood screws to the final solution – I put two M8 rods through the whole thing with pronged nuts hammered into the particle board base and wing nuts on top. It holds the ball bearings firmly in place and the cylinder can rotate freely.

And this is where I am right now. Next, I can start working on the propulsion part.

During all this work I am also spending a lot of time just thinking not only about each step but also about what might be the main challenge of this project – the adjustable sanding thickness. I have several ideas but they all are fiddly and complicated and I would like to keep things as simple as possible. The simpler the mechanism, the fewer potential points of failure. I won’t even attempt to make some sort of automatic feeding – the wood will be fed through the machine manually (if I manage to make it work).

I Don’t Need No Gym

I am doing my best to publish at least one article a week on my knife blogge, but I had trouble managing that and I could not write much for Affinity as you might have noticed. The main reason is my huge garden, which kept me occupied for two months almost continuously.

© Charly, all rights reserved. Click for full size.

Whilst re-potting my bonsai, I tried this year also to plant new poplar trees in my coppice since the water voles did such a number on them a few years ago. I found an easy way this time to plant them -instead of digging holes, I drilled them with a long carbide-tipped 12 mm masonry drill. It went comparatively easy and fast and after just a few days work I managed to plant several rows of trees. Then came warm weather and everything started to grow, the trees took root and it looked promising. And after that came abnormally deep frost (-5°C) most of the trees died and my work was thus wasted. The frost also killed one of my most beautiful outdoor bonsai trees – my only hornbeam – the roots froze in the bowl. What a beautiful spring start!

© Charly, all rights reserved. Click for full size.

I did manage to get about 2 cubic meters of firewood from my coppice this year, which is good, about a month’s worth of heating right there, with minimal money expenditure. I also cut a lot of dead wood from my apple tree, which is slowly dying from water vole damage. The tree still lives, but only just. The odds are that next year it will all be firewood since it also received additional damage from the late frost. What a beautiful spring start!

© Charly, all rights reserved. Click for full size.

When planting potatoes this year, I added a lot of charcoal to the soil that I prepared over winter. Then I covered the potatoes with only a thin layer of soil and a thick layer of grass clippings to try at a larger scale the experiment from last year. After that came a short drought and abnormally high winds, which blew the grass away in some parts, and the potatoes froze due to the strong late frost that followed shortly after. About 10 % of the potato patch thus did not sprout at all and another 10% look weak and sickly even now. What a beautiful spring start!

© Charly, all rights reserved. Click for full size.

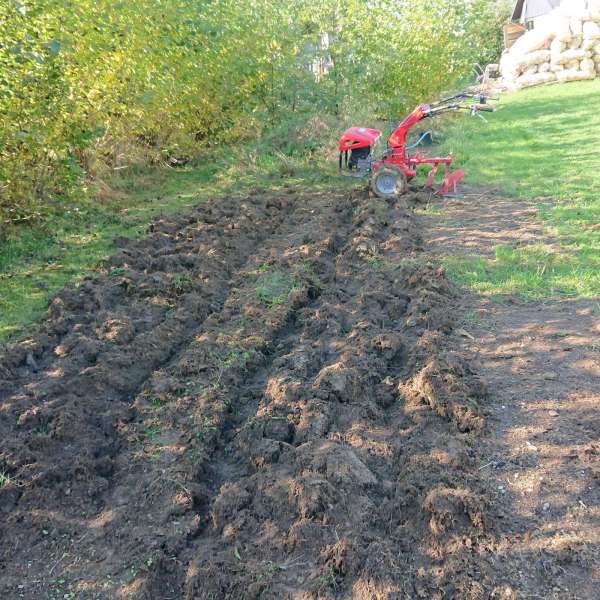
Here used to be several huge compost heaps. I flattened them out into one huge new patch, which took me several weeks of hard work. I planted pumpkins on there after the strong frost was over. But the weather after that was so cold and miserable that they did not grow at all for about a month and slugs destroyed about half of them despite my best efforts, using both manual and chemical tools at my disposal to kill those buggers. On some evenings I collected as much as about 1kg of slugs from the vegetable patches. This week some of the pumpkins finally started to grow as the night temperatures are over 10°C at last, but some are still tiny and there is a huge question mark over whether I will or will not have any use from all this work at all. What a beautiful spring start!

© Charly, all rights reserved. Click for full size.

The seeding potatoes were very small and thus there was more of them than I expected. I had to prepare a small new patch near my second greenhouse to plant them. It was a lot of work to haul all that compost there to plant them, but at least these were completely unaffected by the frost and they appear to thrive. Great! When I was at it, I also prepared a second patch, where I planted red beets. Those are still tiny because the weather was so fucking cold overnight that it was on some days in June colder than it was first two weeks in April. I also planted some sweet corn, two packets. One packet did not germinate at all, and the other one produced just several sickly plants that are now still smaller than the grass that I have not mown for a week. Fuck this spring.

© Charly, all rights reserved. Click for full size.

I had so many tomato seedlings that I planted over twenty of them outside. Three got immediately mauled to death by slugs. The rest managed to grow tough enough for the slugs no longer trying to eat them but they did not grow any taller – they are positively tiny. Because the nights were so cold. I am curious if we get an extremely hot and dry summer after the extremely wet and cold spring. So, like last year, first nothing grows because it is too cold, and subsequently nothing grows because it is too hot. I hate this year’s weather.

© Charly, all rights reserved. Click for full size.

I did not sift the compost heaps but I did at least pick bigger stones manually, as I do all year throughout my vegetable patches. I got several buckets worth. If you remember, I used most of these accumulated stones last year to repair the walking path to my home. Well, I got about 20% of what I used up last year back again. Stones are not a renewable resource, but my garden has a seemingly unlimited supply of them.

© Charly, all rights reserved. Click for full size.

When planting the trees, I hit something hard twice. Once a bigger stone and once a buried brick. And when planting beans and working on the compost heaps I suddenly hit a really large stone, that I subsequently had to dig out. These are big slabs of phyllite that were used as paving stones in the past around here. I have a pile of them both from digging them up in my garden in seemingly random places and from the time when we too had walking paths paved with them, which I replaced with modern concrete paving a few years ago. At least these stones can be useful in the garden, but hitting one with a gardening fork or a shovel is not fun. Neither is hauling them solo onto the wheelbarrow. I procrastinate moving this one for three weeks because I sprained my back with the previous one.

© Charly, all rights reserved. Click for full size.

Apart from slugs, grass also thrives in the fucking cold weather. I have to mow it to be able to access all the areas of my garden where I need to work. At least there are no HOAs here so when I want to leave a patch with pretty flowers on it where it does not impede me, I can do that. So I do. Yay for pretty flowers!

© Charly, all rights reserved. Click for full size.

Tomatoes inside the greenhouse do look promising this year. I put a lot of compost and some fertilizer in there in the fall and I mixed it with the soil thoroughly. Inside the greenhouse, the climate was warm enough, albeit possibly too humid. The plants had wet leaves each morning because they had to actively pump out water. I used a chemical spray to prevent Phytophthora infestans. I hope it works because if they do not get sick, they really do look promising. Fingers crossed, I had enough setbacks this year already, and I need some wins.

© Charly, all rights reserved. Click for full size.

The fig trees are growing like mad. I cut them down to about 70-90 cm in height and they are double that already. They were overshadowing the tomatoes and I had to prune them. They put out some fruit already, so I might get some this year too despite the really heavy pruning in early spring. The figs really liked the warm and tepid winter and the greenhouse shielded them from the negative impacts of the cold spring, so they are the only plants that truly thrive. The grapes and pomegranates thrive too, but I did not take pictures of those since I have been ranting long enough already.

Often in the past, I said that I do not need to go to the gym, I get enough workouts in the garden and it is more useful. Well, this year the bad weather and extreme slug infestation are doing their best to make the second part of that statement untrue. At least I don’t have to pay for it. Oh wait, I do pay for it – the molluscicides, fungicides, and seeds…  Well, I might still come out with a profit, but it is not sure. I need at least 150 kg of potatoes to come even. Every other vegetable on top of that would be a bonus. That is not impossible, even with this bad start of the year.

A Jack of all trades is thicker than water

This is just a small post about sayings that are now abbreviated and have come to mean the opposite of their original meaning. Much like the poor word literally, which leaves me a bit unsure about how to express that I actually mean literally literally, not figuratively literally.

First one is “The customer is always right”. Especially in the US this has taken on a meaning of customers being allowed to abuse staff and make their life as difficult as possible, when it’s actually “the customer is always right in matters of taste”. They want a strawberry mustard cake? You bake it. They think that pink and green make a lovely facade? Let them have it. It doesn’t mean that they get to return a meal they ordered just because they don’t like the plating.

Second one is a “Jack of all trades, but master of none”. It’s used to dismiss people with a broad field of knowledge, but no real speciality. The actual quote is “a Jack of all trades is a master of none, but often times better than a master of one”. What use is a plumber when your electricity is broken? What use is a car mechanic when you need help in the garden? That’s not to dismiss specialists, but it also means that often a broadly educated and versatile person will be more useful.

An last but not least, the ever favourite “Blood is thicker than water”. The full quote is that “The blood of the covenant is thicker than the water of the womb”, meaning the exact opposite of the common understanding that blood family is the most important. Most important are your chosen relationships, not those you acquired through birth.

What other sayings come to your mind that have changed?

A Soaring Eagle Knife

In a sense, this knife was in the making for over twenty years. At least more than twenty years ago I drew the picture of a soaring eagle for the purpose of using it to adorn a knife. Initially, I wanted to etch the image on the blade, but I made this blade with a ridge, thus it could not be fitted on it. So I decided to use it on the leather sheath instead.

© Charly, all rights reserved. Click for full size.

The blade is mirror-polished and it was a major PITA to take a picture. One day I will simply have to invest time and money in a better lighting setup. I just don’t want to.

© Charly, all rights reserved. Click for full size.

© Charly, all rights reserved. Click for full size.

The handle is made from the same material as the kestrel knife, but the inserts are only from a birch polypore. The big thick white pieces contrast nicely with the wood. Which has in my opinion a much more interesting pattern than the previous one.

© Charly, all rights reserved. Click for full size.

© Charly, all rights reserved. Click for full size.

To take a picture of the embossed sheath was a bugger too. It is too shiny and in most pictures, it gleamed like a naked bum. At some point I had to work with what I had, I could not re-take the photos forever.

© Charly, all rights reserved. Click for full size.

© Charly, all rights reserved. Click for full size.

Carving and embossing all the feathers was fairly difficult, especially the tips of the wings, and I am sure it could be done better. Sometimes I think I am punishing myself with these elaborate designs. But despite its flaws, this time I do like the end result. I think it looks handmade, but not ineptly made.

© Charly, all rights reserved. Click for full size.

The metal fittings are from wire-brushed bronze and the washer at the end of the peened tang is shaped like a chrysanthemum blossom. It is already acquiring patina. I was thinking about whether to let it age naturally or whether to speed up the process and I decided to let things to their natural progression.

© Charly, all rights reserved. Click for full size.

With the blade over 17 cm long, it is a big boi. But weighing just about 392 g with sheath, it is not particularly heavy. And since the point of balance is at the forefinger just at the boundary between the white polypore and the wood of the handle, it feels very light and nimble in the hand.