I think the idea is genius: taking ordinary (and some serious) complaints from everyday people and turning it into a piece of music.
I hope our Finnish readers can enjoy this one particularly.
I think the idea is genius: taking ordinary (and some serious) complaints from everyday people and turning it into a piece of music.
I hope our Finnish readers can enjoy this one particularly.

Photo by Erin H.
Today’s tree photo was sent in by VBFF. It’s a picture taken by her niece Erin, who has given her permission for me to share it with you. Erin used the photo to make Christmas cards, and I think it captures the quiet, still, soul of winter and I hope you love it as much as I do.

Camping in the Canadian Rockies. Walter Dwight Wilcox. New York; London, G.P. Putnam’s Sons, 1896.
via: The Internet Archive

Happy 12th Birthday Jack ©voyager, all rights reserved
Well, I’m home from Mexico, and I’m none too happy about it. We left Ajijic, Mexico, at 8 a.m. on Wednesday, February 26 and arrived home nearly 24 hours later. Our connecting flight to Houston arrived in good time, but we were delayed in Texas by bad weather in Toronto. We finally took off and managed to land in Toronto, but after landing, we sat on the tarmac for over an hour while ground crews cleared the snow. By the time we got off the plane, it was 2:30 a.m., and we’d missed our shuttle bus home.
It had been 18 degrees and sunny when we left Mexico, and it was -10 with blowing snow here, which was quite a shock to the system. Despite all the bad weather, we felt lucky to get as far as Toronto, because all outgoing flights from the airport had been cancelled. The shuttle service told us the bus was still running, though, and, finally, at 4:30 a.m., the airport bus pulled up. Janet and I both let out an excited “there it is,” as it rolled to a stop. The driver loaded all our cases, and away we went, slowly and carefully, into the storm. About 2 hours later, we finally arrived home to our snow-covered city, where Mr. V and Jack were excitedly waiting for me.
Jack has been a bit clingy since I arrived home from Mexico, and I’m alright with that in the short-term, although it would be nice to use the toilet without being watched. In any event, we didn’t venture out far over the weekend because the storm lasted until late yesterday. Today, though, it’s warmed up to 6 degrees, and it’s raining. Oh, Joy!
I did make it home in time for a significant event, though. On Saturday, February 29, my baby boy, Bubba, turned 12. It’s only the fourth real birthday he’s ever had, so we made it special. He had toast with jam and yogurt for breakfast, then he got a new rubber pig-pig and a rather sizeable birthday cookie plus a walk around the neighbourhood. For supper, he had steak and the rest of his birthday cookie, then we played pig-pig again and to top off the day, he had ice-cream before bed. We sang the happy birthday song to him a few times and Jack was pleased with that. He likes it when we fuss over him. I got him a hat to wear, but Jack told me that he didn’t want to wear it because he felt silly, so I didn’t push the issue. I feel a bit silly in those hats, too. All in all, it was a good birthday, and even though Jack is now a senior citizen, he still has a few adventures left to share with me… and you.

Mme. La Comtesse Sophie Rastofichine Segeur. Baltimore, J.P. Piet, 1881.

Multiple Authors. The Lady in the Tower and Other Stories. New York, Cincinnati, Chicago, Benziger Brothers, 1909.
This bit is, alas, often not discussed in bonsai literature as much in detail as it should too. Some books mention it in passing, some do not mention it at all. The talk is about types of tree growth. (note – the used terminology is my own, I have long since forgotten the official technical terms and anyway I am too lazy to search for them in foreign language)
There are three basic types that every bonsaist needs to be aware of, and it is vital to know which type each of your plants has because they determine what kind of care they require to get turned into a bonsai and survive the procedure.
1 – Continuous growth.
This does not mean that the plant grows continuously throughout the year, although usually when a plant does grow the whole year, it has this type of growth. But the growth might slow down or stop completely in certain conditions, like drought or cold or insufficient daylength. However, when the growth slows or stops, it does so without any apparent change in the plant’s physiology. No special structures develop, the plant just stops growing and when the conditions get right again, it continues. The “buds” are simply a bundle of small leaves/needles bunched up together.
In temperate regions, typical representatives of this type of growth are some evergreen conifers, like junipers or thujas. It is most typical for many subtropic trees – citruses, olives, and hibiscus. And of course tropical plants and succulents, like a ficus and money tree. This type of growth have mostly evergreens, although there are deciduous plants with it – for example, russian olive (Eleagnus angustifolia) and fig tree (Ficus carica), but they are the exception, not the rule.
2 – Continuous growth with a hibernating stage.
During the season, these plants just grow like the first type, adding leaves to their twigs continuously and growing in length. But when the conditions start to signal the end of the growing season, not only do they stop growing, they create specialized wintering buds. These buds then contain a relatively undifferentiated beginning of the next twig. When the hibernation ends, the buds shed their protective layers (modified leaves) and from them emerge twigs that again start to grow in length and adding leaves as much as they can manage.
This type of growth is typical for deciduous trees in temperate regions, like willows, poplars, maples, hazels and many more. I am not aware of any evergreen with this type, maybe holy (Illex sp.).
3 – Growth in spurts.
Some trees take the hibernation stage to the next level. The wintering buds do not contain just the beginning of a new twig, but a complete one with non-differentiated buds. At the beginning of the growing season these whole twigs emerge from the buds, they stretch in lengths and gain girth, but they do not add any new leaves or buds – the number of those has been determined previous year already.
This is typical for firs, pines, spruces and many other coniferous trees of temperate regions. From the top of my head, I only can remember one deciduous tree with this growth type – beech (Fagus sp.).
For a beginner, types 1 and 2 are the best option. Those are comparatively easy to manage, they mostly heal easily from pruning and the pruning itself can be often done at almost any time of the year or in wide enough window not to need to fuss about it too much.
Type 3 is difficult, and thus alas another point against pines. These types of trees cannot have twigs trimmed just anytime and anywhere, they often require being cut during very specific time otherwise the next year’s buds will form where you do not want them.
The worse in this regard are spruces, whose growth is nearly completely unmanageable. That is why you won’t see many very old spruce bonsai trees. More on that later.

J. Horace Lytle. The Story of Jack: A Tale of the North. Dayton, O., Miami publishing co., 1917.
The Jack of the story is a terrier, but today’s book is in honour of my Jack, who is having a birthday today. Jack is a leap year baby, so this is only the fourth official birthday he’s ever had. In reality, my baby is twelve today and I don’t know where the years have gone. I haven’t had a chance to read the story yet, but the book is delightfully illustrated.

John Trevena. Heather. New York, Moffat, Yard and Company, 1909.
Happy Birthday, Heather. This one is just for you.
I do not know where and when, but I have gotten a broken and rusty file that was too small to make a usable knife, but I thought I might find a use for it. Then, somehow, somewhere, I got another, very similar one. Almost as if I CTRL+C CTRL+V it.

© Charly, all rights reserved. Click for full size.
I even nearly forgot about both, but the learning batch of kitchen knives is giving me some grief and I realized that among other things I do need a file guide for making ricassos if I am to make knives reasonably fast and comfortably (all 12 knives have mistakes now, but their whole purpose was learning and it was to be expected – these will be given out for free anyway).
And since I have to heat my workshop nowadays to do anything, I have used that opportunity and I tossed them both into the fire. I got them nice red-glowing and I let them cool down very slowly in the stove.
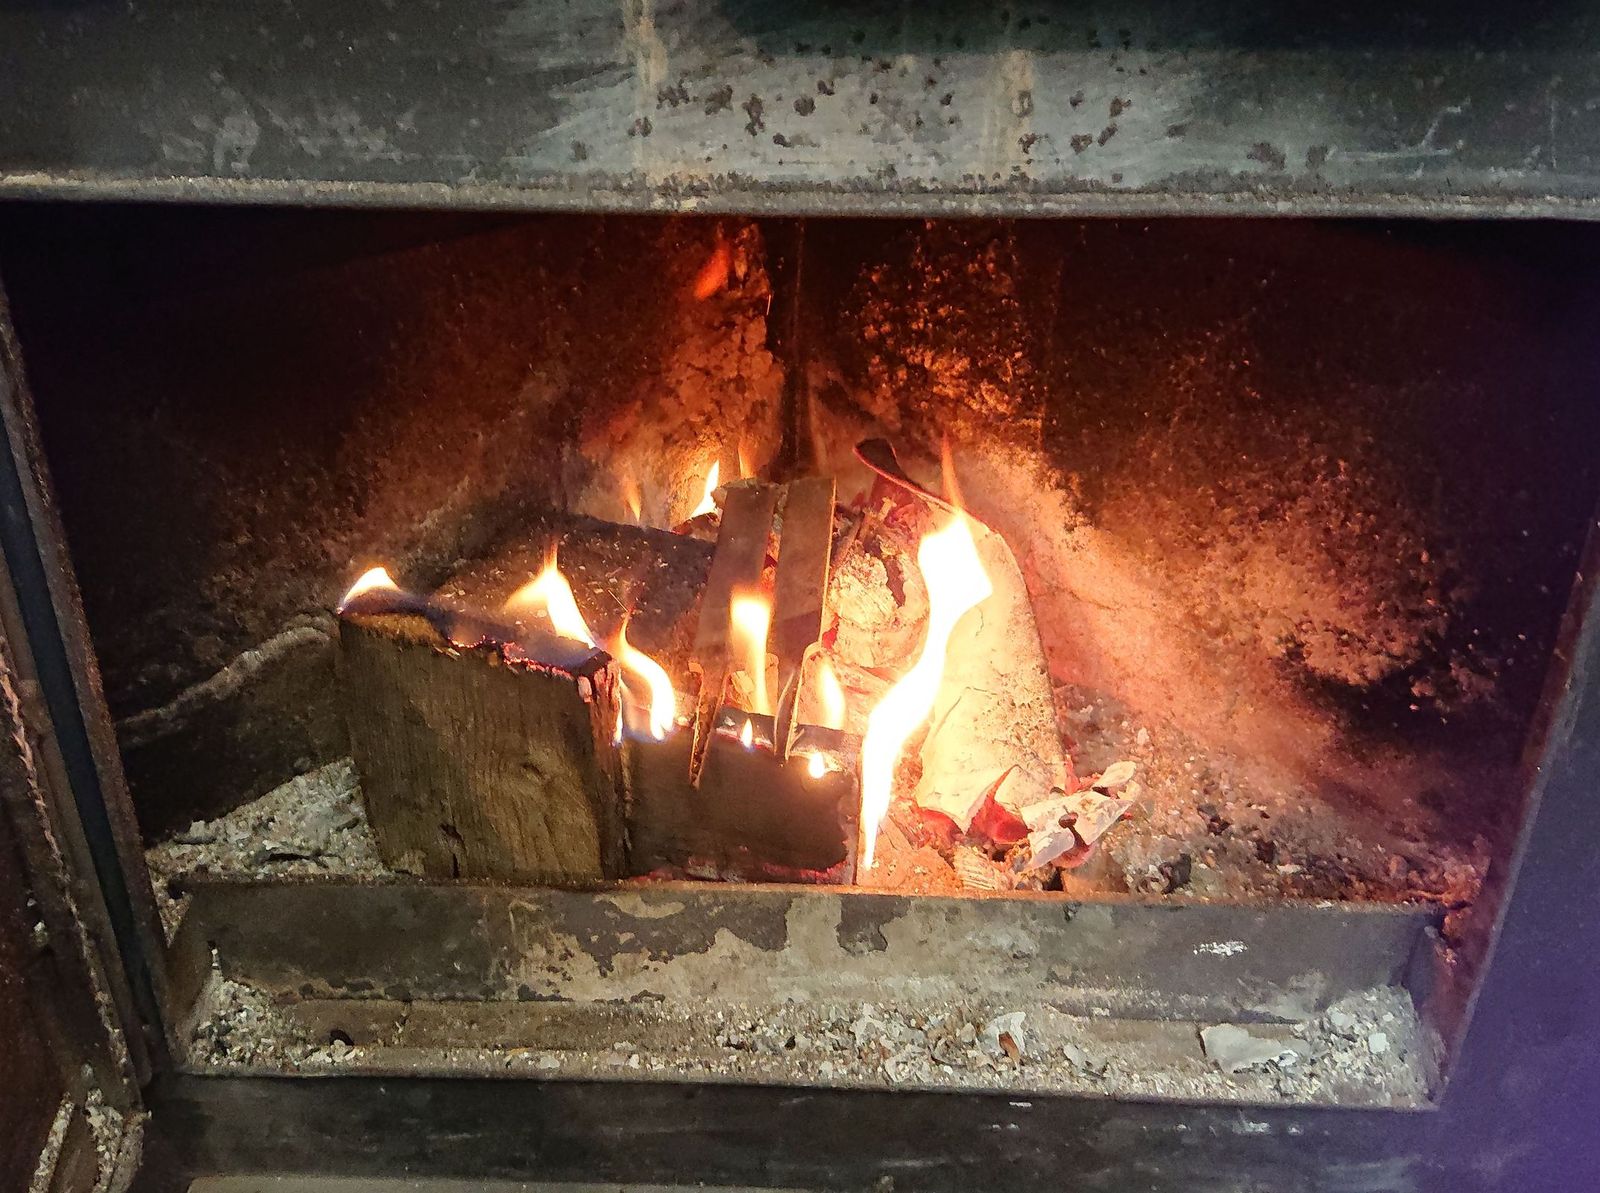
© Charly, all rights reserved. Click for full size.
The next bit was pretty straightforward – I cut off the tangs with angle-grinder and I ground the rest flat-ish on the belt grinder with a pretty chewed-up 40 grid ceramics belt and nothing more. I do not have grinding attachment for flat surfaces yet, so I had to grind simply against the platen, but I have managed a flatness that I estimate about ~0,1 mm – there was a tiny bit of light coming through when I put them against each other and looked against a lightbulb – which is definitively good enough for its purpose.
Next, I have drilled two pairs of 5 mm holes down the center of one piece, 10 and 22 mm from each end, and I copied the holes into the other piece. To keep the holes reasonably aligned I have first drilled one hole, then used a 5 mm drill bit to keep the pieces aligned, drilled the opposing hole and so forth.
The four holes were not perfectly in line, but that does not matter that much and in the end, it has proven a bit of a blessing – the slight miss-positioning serves as a visible sort-of poka-yoke. However, I had to make temporary marks with a file on both pieces to keep their alignment in check without having to fumble each time I take them apart during the work.
With four 5 mm holes in both pieces, I have cut M6 threads in the inner pair on one piece and the outer pair on the other. The other four holes I have widened to 6 mm and chamfered the edges with an 8 mm bit.
I have found two M6 screws with wide-socket heads in my drawer, but I could not find any 6 mm steel stock. I thought I have one, but I thought wrong. I also could not find any M6 screws that had the non-threaded part thick enough for a good fit. So I had to make one. I started with a 6 mm thick old, bent and rusty nail and I cut out the approximately 100 mm straight part. Then I have ground it down to 5.8-5.9 mm using running slack-belt on my belt sander and spinning it with a cordless drill. And then I polished it a bit with old and used-up trizact A-65 belt.
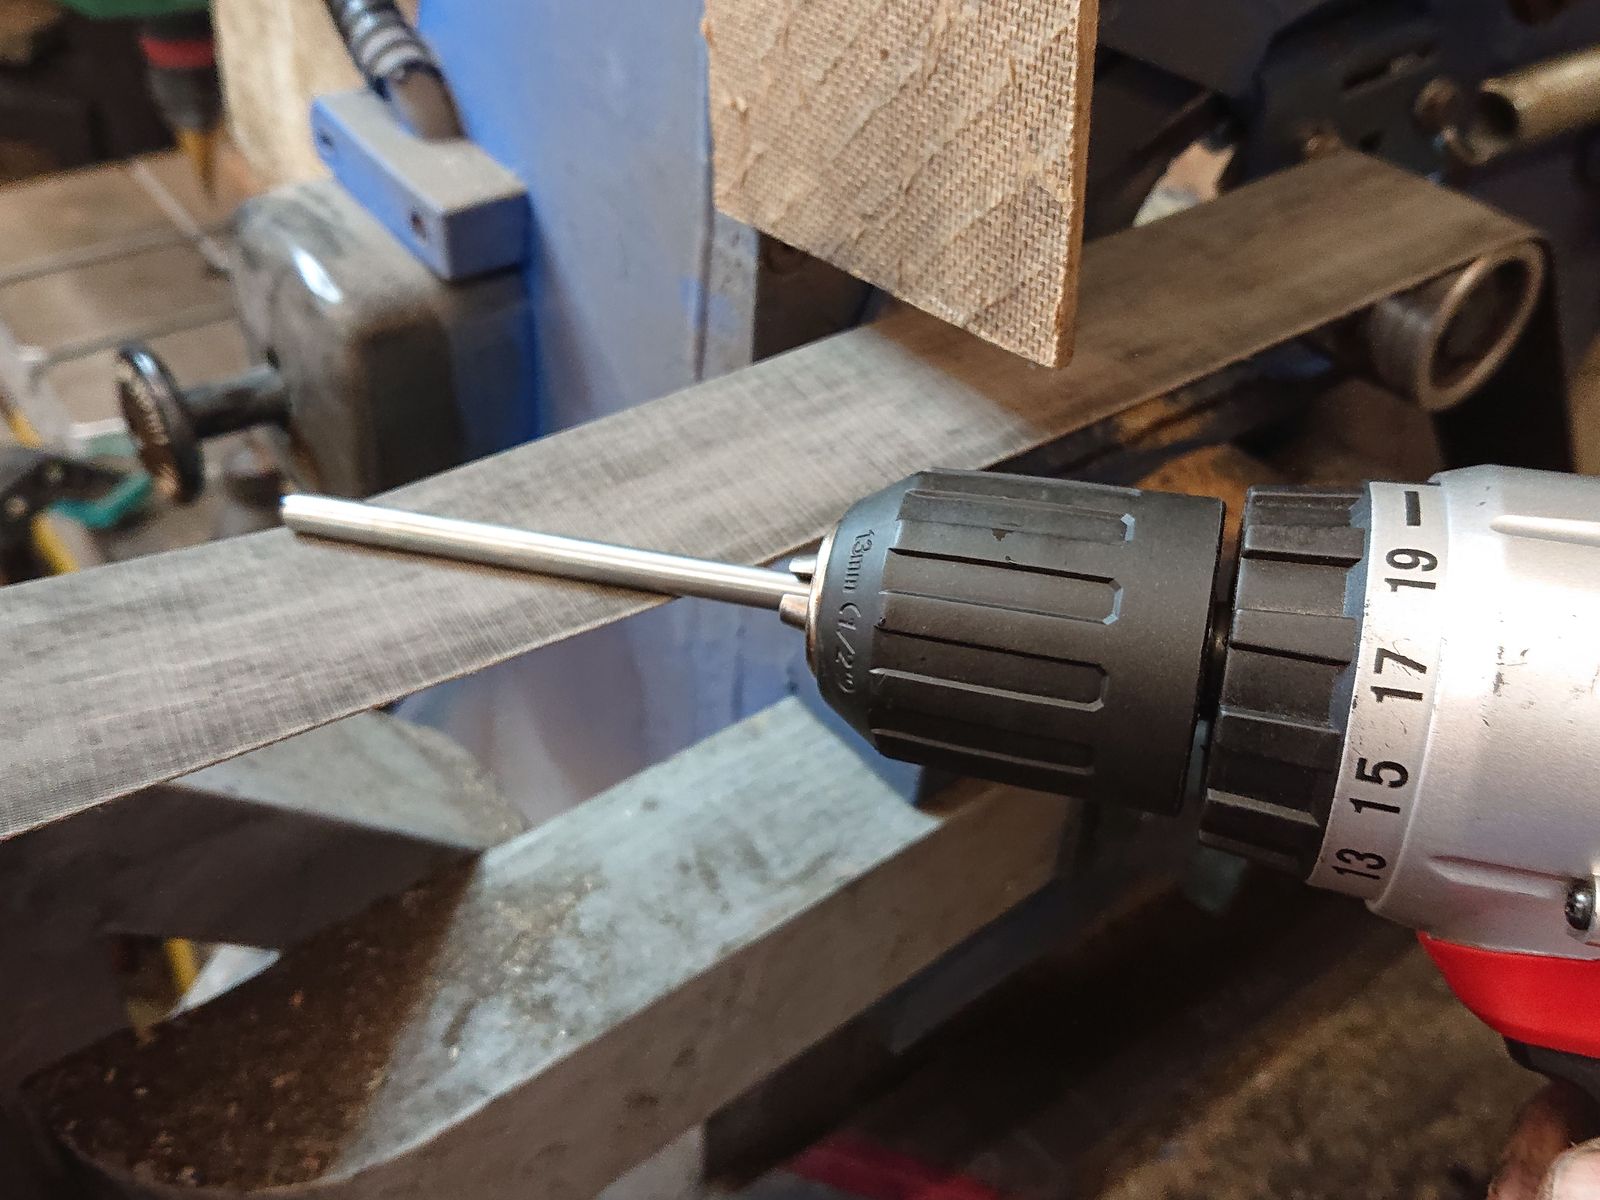
Of course, staged, neither device was running for the photo-op. © Charly, all rights reserved. Click for full size.
I cut the resulting round piece in half and then came the most challenging part – to cut about 4 mm of M6 thread into one end of each bit. I failed at this, both shafts have the thread a tiny bit at an angle. I guess one of my future projects will be making a jig for cutting precise concentric threads, cause I certainly cannot manage it by hand.
But I could assemble the whole thing after that and it worked, although I cannot fasten the leading-rods too much due to the badly cut threads. But when assembled, it had no sideway wobble and that is all I needed. So I have assembled it, tightened the screws and ground the outside-facets into perfect alignment. And here is the nearly finished thing, gleaming in my grubby hand.

© Charly, all rights reserved. Click for full size.
Now for hardening. I did not know whether the files were surface hardened or thorough-hardened, and of course, I had no knowledge of the carbon content of the nail I used for the leading rods, only that it was very, very soft. And even so, I wanted to make it as hard as I possibly can.
Therefore for the hardening, I did not go for simple heat-quench. I went for carbonitriding, which is the hardest I can make a steel surface in home-setting. For this, I took the whole thing apart again and I put the two flat-pieces and two rods into a steel tube together with a mixture that would, when heated, enrich the surface with both carbon and nitrogen.
Commercially this is usually done with various cyanide salts, but not only do I not have those. I don’t even want to have them. I have the training to handle cyanide properly, bot I do not have the means and the desire to do so. Luckily many ordinary things will do the same – leather scraps, bone and hoof dust, hide glue, soy flour etc. Anything organic that contains a mixture of carbon and nitrogen compounds. But I have not used any such improvised mixtures, I went for a 1:1 mixture of urea and dehydrated sodium carbonate. These two chemicals react together to produce sodium cyanate when heated. Despite the very similar name, this chemical is not nearly as toxic as sodium cyanide – its LD50 is about half of that of kitchen salt. And it works for carbonitriding.
I compacted the salt mix around the parts as well as I can.
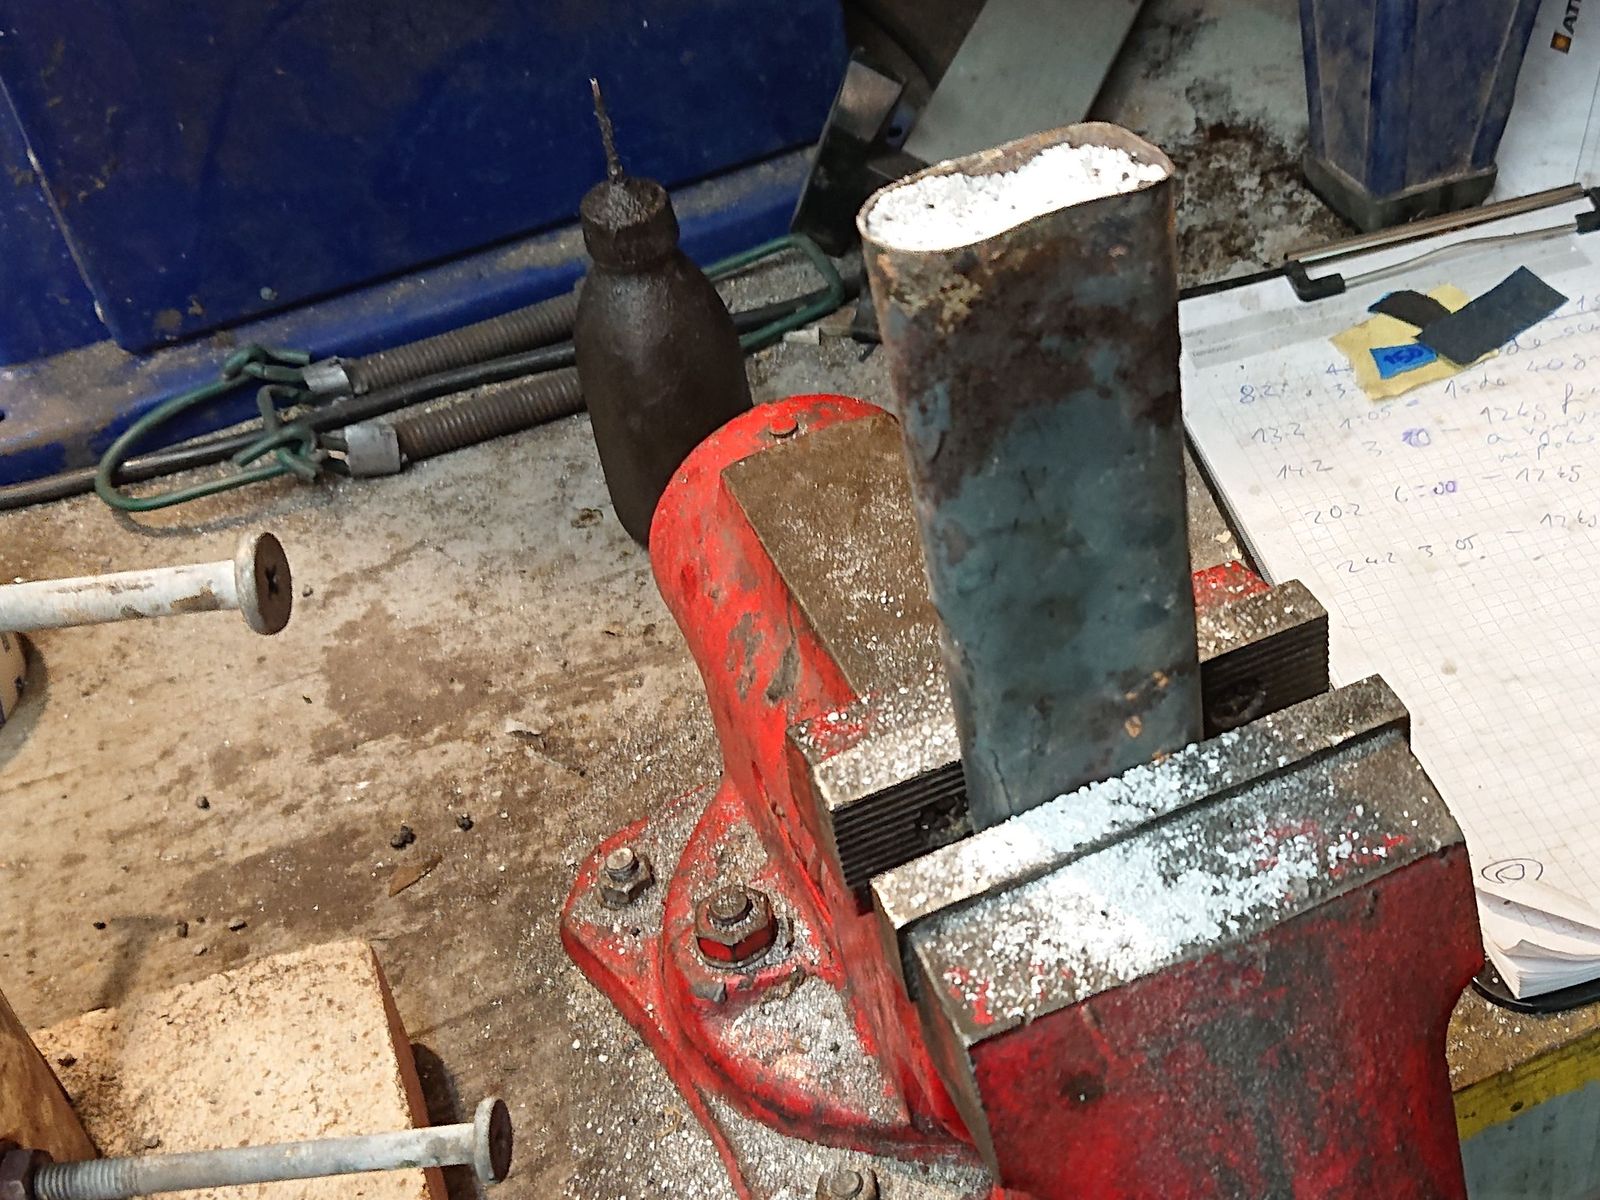
© Charly, all rights reserved. Click for full size.
Next, I put a cap from an old pea-can on it – it need not be air-tight – put it in the forge and the whole assembly went into the fireplace, because the first circa 20 minutes it produces rather noxious smoke that I am not too keen on inhaling.
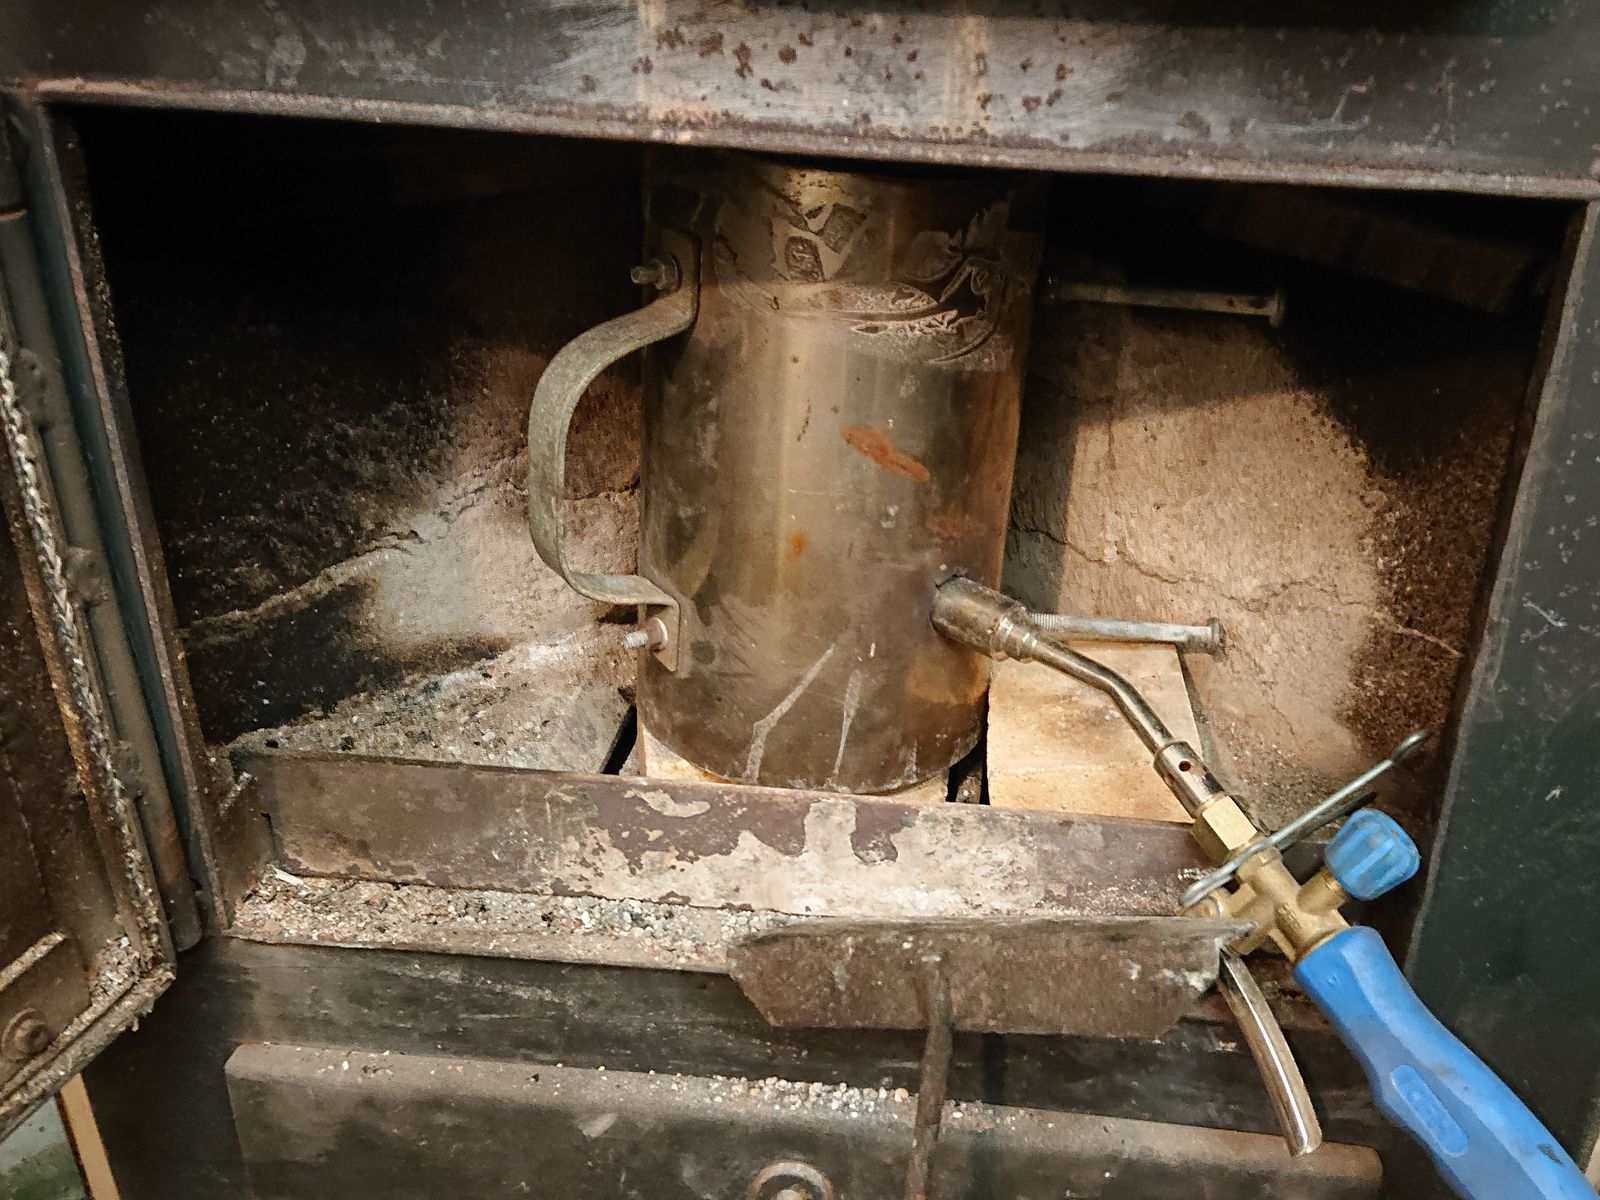
© Charly, all rights reserved. Click for full size.
It sat there for two hours with the burner on the lower setting. Temperature between 600-800 °C is enough for this and after two hours I should have a hardened layer of at least 0.2 mm.
When the time was up, I took the container out of the forge, took the lid off and dipped its contents into a bucket of cold water. A slight explosion took me a bit by surprise – either not all salt has evaporated yet or a piece of glowing hot fireclay dropped out of the forge (my forge, unfortunately, died in the process, the inner lining has finally disintegrated completely), but it was just a little bang and nothing dangerous.
All the pieces were successfully hardened, although one flat piece developed a very slight bend – a few tenths of an mm. But I could still assemble everything together, so I did that. I tightened the screws and tempered the whole thing for two half-hour cycles in boiling water – I wanted to relieve some of the stress so it is not as brittle as glass, but I also want it to retain as much hardness as possible.
A few passes with scotch-brite wheel cleaned all the crud off and buffing with abrasive pastes polished the scratches enough for a bit of protection against pitting corrosion.
And that is it, I now have a file guide. Despite my lax attitude to precision, it does not wobble but it opens/closes easily, the surfaces are hard enough for ordinary files not scratching them and it is from recycled materials, which is my favorite kind of material to use for such thing.

© Charly, all rights reserved. Click for full size

Alden Arthur Knipe. The Captain of the Eleven. New York, London, Harper & Brothers, 1910.

Margaret Warner Morley, The Renewal of Life, How and When to Tell the Story to the Young, Chicago, A.C. McClurg & co., 1906.
This book notes in its introduction that any child old enough to ask a question is old enough to know the answer, the real answer, which I find enlightened for the period. Ms. Morley notes that parents only do their children harm by withholding truthful information and that it is best to give geared to age responses that the parent may elaborate on as the child matures.
via: The Internet Archive
Yes, I’ve been productive last week. Last night I sanded down some pieces I had cast some days ago, finally revealing their true shape. One piece contains some of Marcus’ burl and I wanted to try something new and I’m quite happy with the result, unlike with yesterday’s catastrophe.
The piece started out as your basic square block. I drew the oval shape I wanted it to be on the back and the front and then set to shape it with the belt sander (this time without also sanding my hand in the meantime. It’s a nice scar I got myself the last time). After I had the general shape I set to creating a dome so it would become a regular cabochon. I’m sure you have already spotted the problem here: taking out one sharp edge with the belt sander creates two more, so I only worked out the basic shape and then went to hand sanding.

©Giliell, all rights reserved
This is what I got after the belt sander. You can see the shape and also the deep, deep scratches. Now sanding paper creates the same problem as the belt sander, unless you keep the piece still and move the sanding paper. I prefer a different method for smoothing edges: First I like working with sanding fleece anyway. For the rough sanding it’s much more durable than the sanding paper. It#s also thick so it creates naturally smooth curves. Once the rough sanding was done I simply placed my wet sanding paper on top of a piece of fleece and kept sanding. It’s a hell lot of work, but I can tell you, the moment when you wash off the grit and for the first time it becomes really transparent and shiny? Pure magic! With this piece that happened at a 3000 grit and got “fixed” with abrasive paste.

©Giliell, all rights reserved

©Giliell, all rights reserved
Now I have to figure out how to turn it into a necklace…
But wait, there’s more!

©Giliell, all rights reserved
This little fellow is a scrap of pear wood. It is part of a longer piece. the top got turned into something else and the bottom got turned into this. Isn’t that wood gorgeous?

©Giliell, all rights reserved
I tried to give it roughly a crystal shape, but it would not hold the edges. I’m not sorry, I love it the way it is. Also, it’s shape just nice to hold.
The last piece is oak wood. I experimented with some cheap pearl pigment and I quite like the effect:
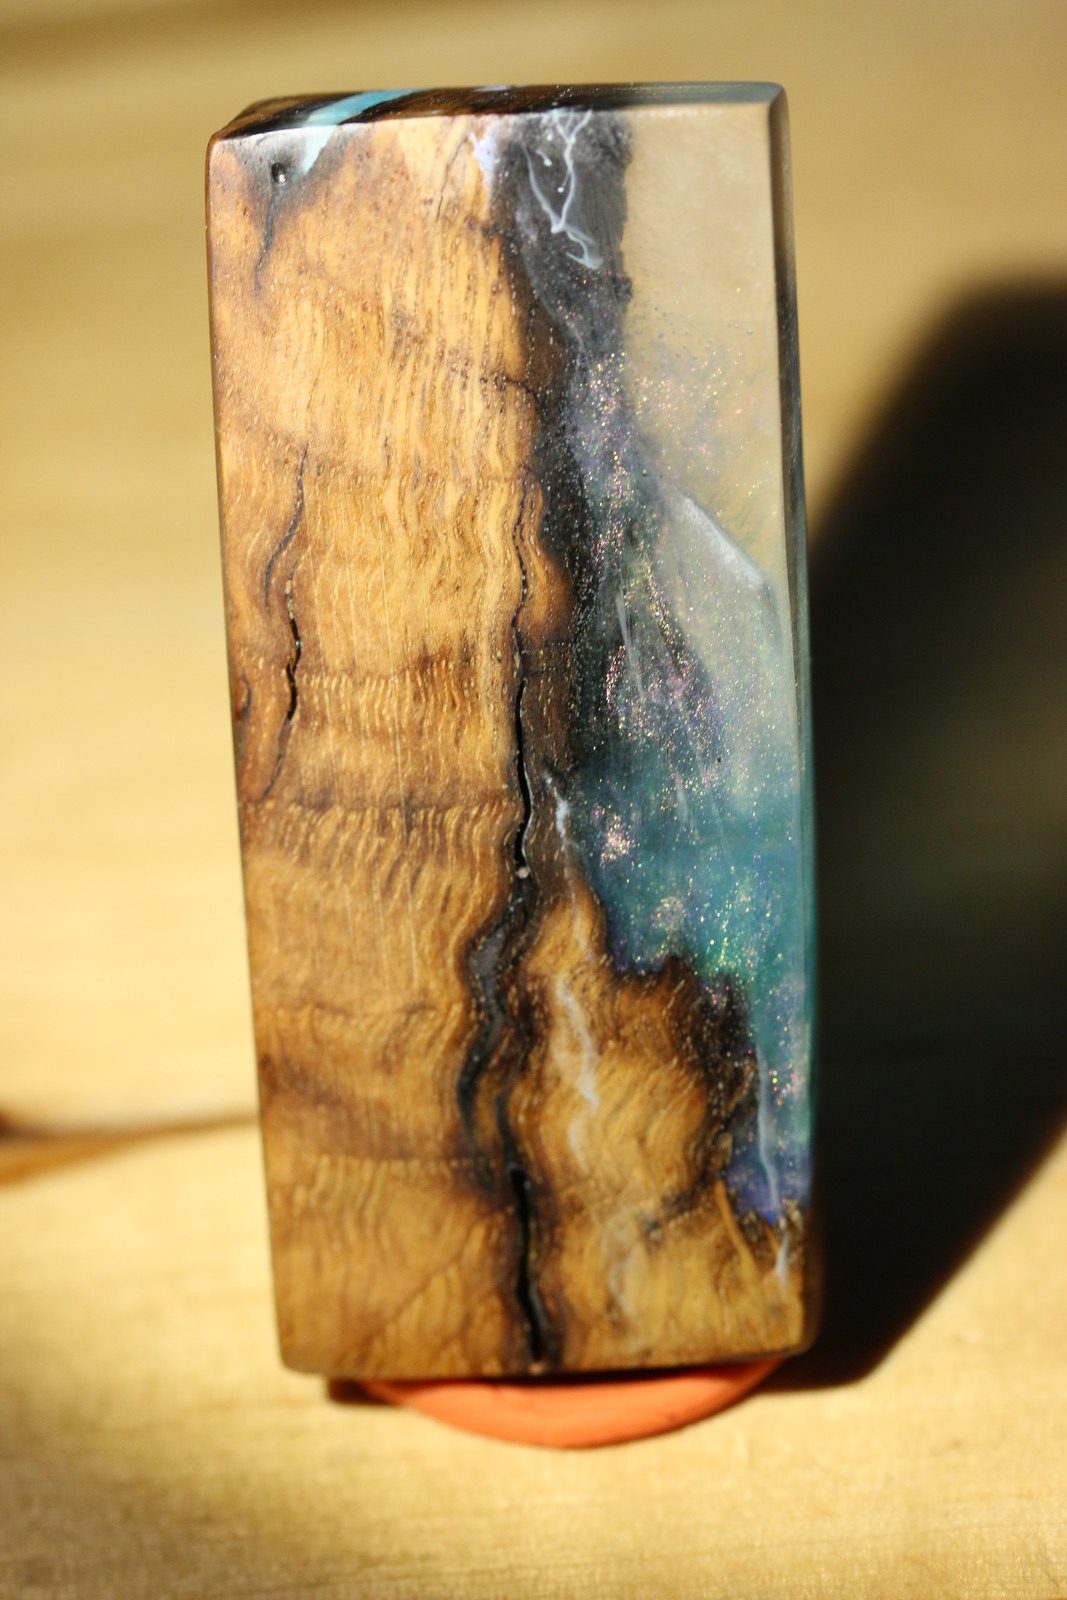
©Giliell, all rights reserved

©Giliell, all rights reserved
Since I had some problems with the sticky tape that enclosed the cast getting stuck in the resin I had to take off quite a lot of material, but I am please with the result nevertheless.