At Dragonfly Forge, when we made the habaki for our short-swords, Michael Bell made a little cardboard “mold” for the silver. It almost instantly turned to charcoal under the heat of the silver but it slowed it down just enough that the metal retained its shape.
Casting metal is an industrial process that goes back to, well, the bronze age (at least). Most of the bronze that made the age bronzy was cast. The molds were either clay or strong sandstone; that makes sense: it’s got to withstand the thermal shock.
I was nominally interested in this stuff because I cooked up a design for a knife that I want to make, a sort of giant scalpel with a black wood handle and a great big wingnut on the end made out of solid silver. Hey, don’t ask me, it’s art, OK? I was also thinking about casting ferrules for the neck of handles, and that got me curious enough that I made one and made a mold from it using a small box full of green sand, and naturally it didn’t work because the wingnut shape is too irregular.
Please don’t think I am one of those ultra-stubborn guys who never reads directions. I am, in fact, obsessively interested in comparative safety suggestions for processes involving boiling water – let alone molten silver. When I was a kid in school I read Johnny Tremain and I don’t remember the scene where his hand was crippled with molten pewter, it was so upsetting.
Then, there were the swords.
When I was at IT-Defense in Stuttgart (Feb 6-9 2019) I noticed that the cultural museum was having a show on swords. You can’t get much more up my alley than that. So, I went and rather unexpectedly fell in love. With a bronze sword-handle. But first, I wandered around and noticed what I assumed was a pretty rare artifact: a sword mold.

Note the cuts down the sandstone, to allow superheated air to escape without blowing the mold apart and giving everyone in the vicinity a bronze bath? I believe something like that is what happened to Johnny Tremain, too.
I felt a deep and immediate sympathy for the unknown bronze-smith of old. That mold represents some serious investment of time and skill. Looking for the necessary rock, making sure it’s dry, carving it and fitting it, then how many castings do you get from such a mold before it begins to drop in quality? And speaking of “drop” if you drop that mold you may have just wasted months of work. These things were weapons, too, which meant that the metal had to be as good as they could get it – a clean cast without a lot of dross in it.
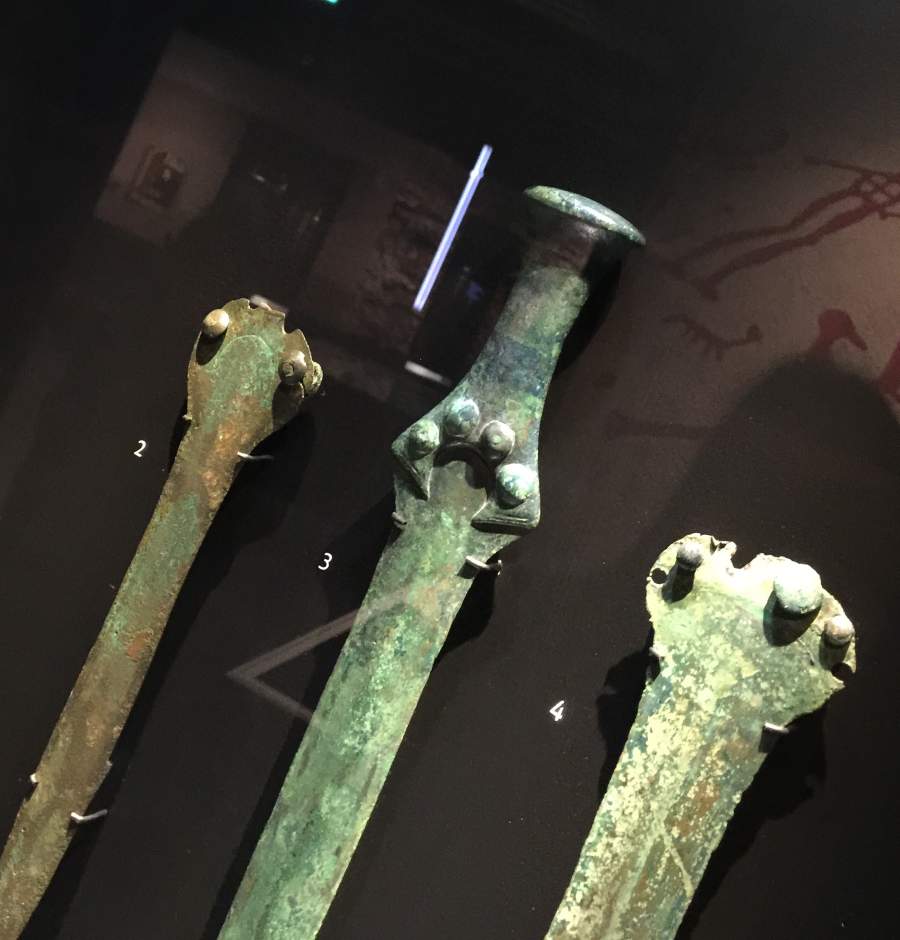
The bronze swords of the time were a pretty bad design, to be frank. The blade was held into the handle using rivets. Compare how the tang of a Japanese sword transfers the impact to the … uh, never mind. These were the swords people made when they were figuring out how swords worked. That’s not the period I am interested in. Then, I stumbled across this:
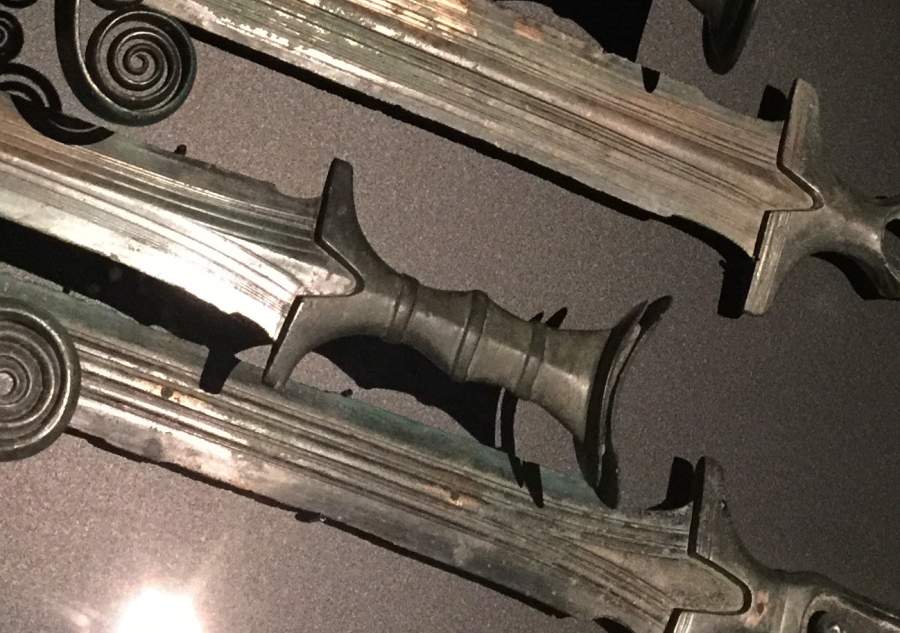
Somewhere between the first swords cast from the bronze mold, and the ones above – also bronze – a great deal of improvement happened. For one thing, someone invented the tang. It was probably just a cast-on part of the blade, but the blade and handle were now separate assemblies that had different design properties. I assume the ridges in the blade are not decoration; they are to increase its rigidity by boosting the surface area. And if you look at the characteristic notch in the guard, it’s clear that the guard also helps fit itself onto the blade and also helps support it.
I just love the shape of the center handle and I can see it with a nice damascus blade coming out, the handle made of bronze and bog oak: black and bronze-purple patina on heavily figured steel. Well, let me tell you something: the larger a casting, the more painful it is to produce. I’m still not even close to being able to make something like that but eventually, I will be. I’m aware that as the amount of molten metal goes up, so does its weight and its thermal mass – accidents get worse and worse as the size of the work-piece increases. That’s a dynamic that’s pretty familiar to me from forging blades, but at least a yellow-hot billet of steel does not try to pour itself on you. My “run away” reflexes have gotten a lot better in the last year, too.
The wingnut and the gummi bear became experimental objects that I can work on, perfect that stage of the process, and move on from. To get there, I reinvented the lost wax process. Naturally, the tools available to a practitioner today are both immediately familar and ground-breakingly better than what a bronze-age smith would have had. Today, we have heat-resistant plaster that is both tough and porous; you can pour it like plaster, let it cure, and then heat it in your oven and melt the wax until it runs into the plaster and vanishes. It happens that I do not like conventional casting wax – it’s too thick and crumbly – so I cut it with beeswax to make it flow better. While I’ve got the whole mess melted, I add a drop of cinnamon oil to make it smell nice when I’m melting the wax out.
So, I made a small mold of a gummi bear in silicone and started pouring wax. I also made a mold for the wingnut. Then, I cut some tube steel and used it as a frame for my molds (“investments”) the miracle heat-resistant plaster gets poured into the frame, around the wax gummi bear, and the wax is melted out (“lost”) then I take it over to the shop and melt some silver and pour it in.
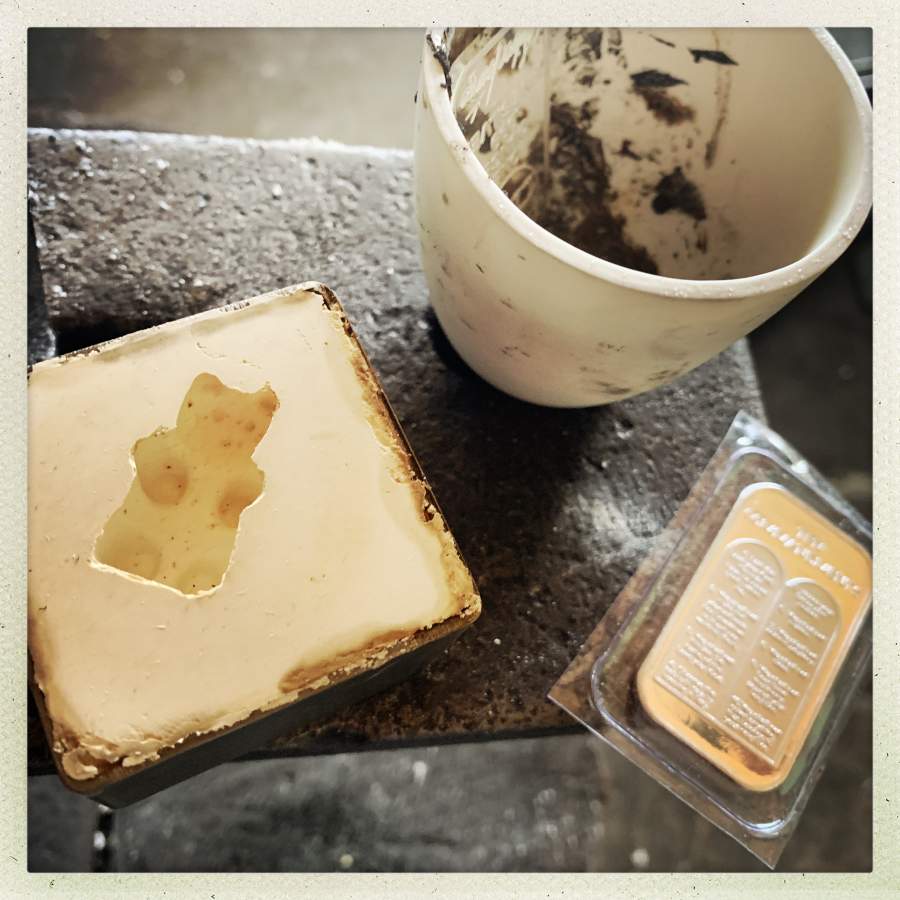
.99 fine silver is about $35 a troy ounce on Ebay; that little ingot is a troy ounce. It happens to be about exactly what a gummi bear takes. You’ll notice that I sprung for ingots with “The Ten Commandments” on them; it was somewhat satisfying to melt them down, though I wish I’d had an ingot big enough to carry the Leviticus version not the Cecil B. DeMille version of the commandments. The silver goes in the crucible and the crucible goes in the forge. The mold goes on the ground at the mouth of the forge, nestling neatly in the sand in my sand table. I make some effort to level it but, seriously, this is not a precision process.

Those are not flames shooting from the mouth of the forge: that’s blasphemy happening
I’m happy about my sand table; if I spill any of that stuff, it’s going to wind up congealed in nice non-bouncy sand. To tell the truth, I did spill a small crucible-load of silver, and it ran all over the refractory brick in the bottom of the forge – the brick is covered with flux, so the silver sort of made like solder and became part of the brick. Yeah, well, it could have been worse.
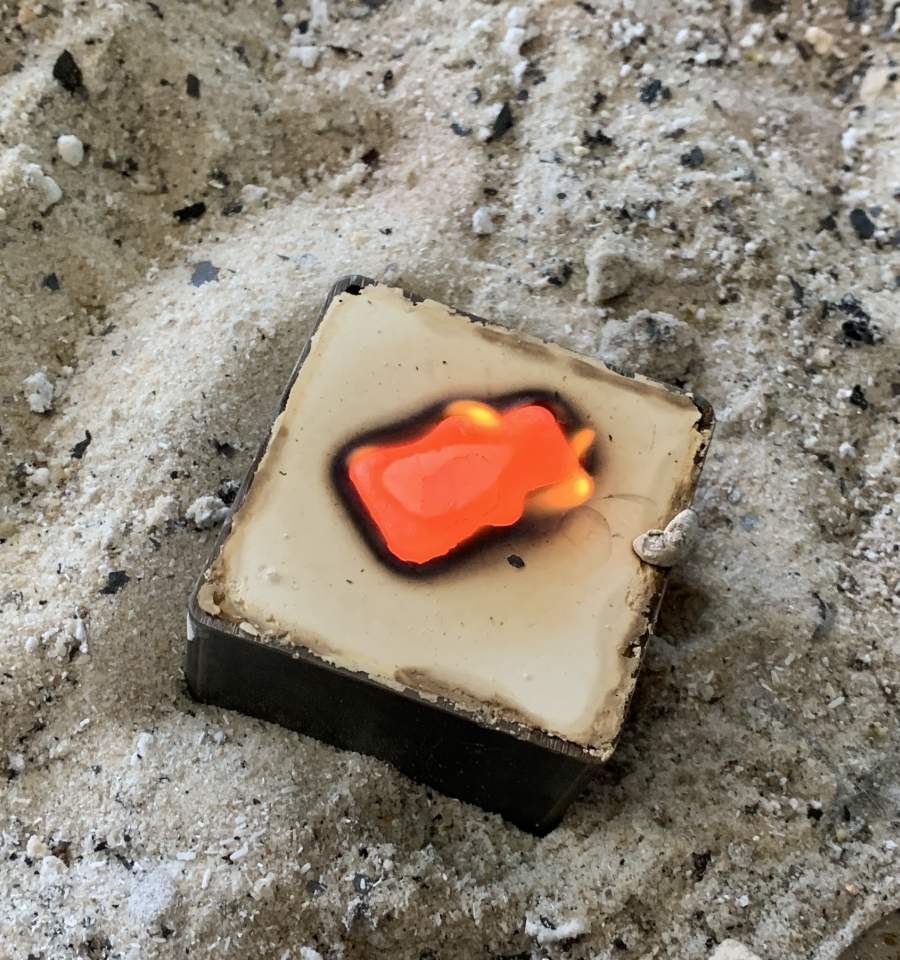
Jewelers quench the entire mold, to blow the refractory apart with the heat change. I just give it a wee tap with my forging hammer and it turns to powder and the gummi bear falls right out. From there, it’s a matter of flattening and polishing the back on my belt sander and then a surface plate with some 1000-grit and then steel wool. To get into all the crannies and stuff, there are various techniques involving sandpaper wrapped around popsickle sticks, sandpaper folded into edges, and sandpaper rolled into tight little tubes.
It takes much longer to polish and clean up my little silver object, than it does to make it (cumulatively) but I find it very satisfying to feel it once it’s finished to steel wool and buffed a bit. I left some of the texture of the casting material, because that’s also pretty cool.
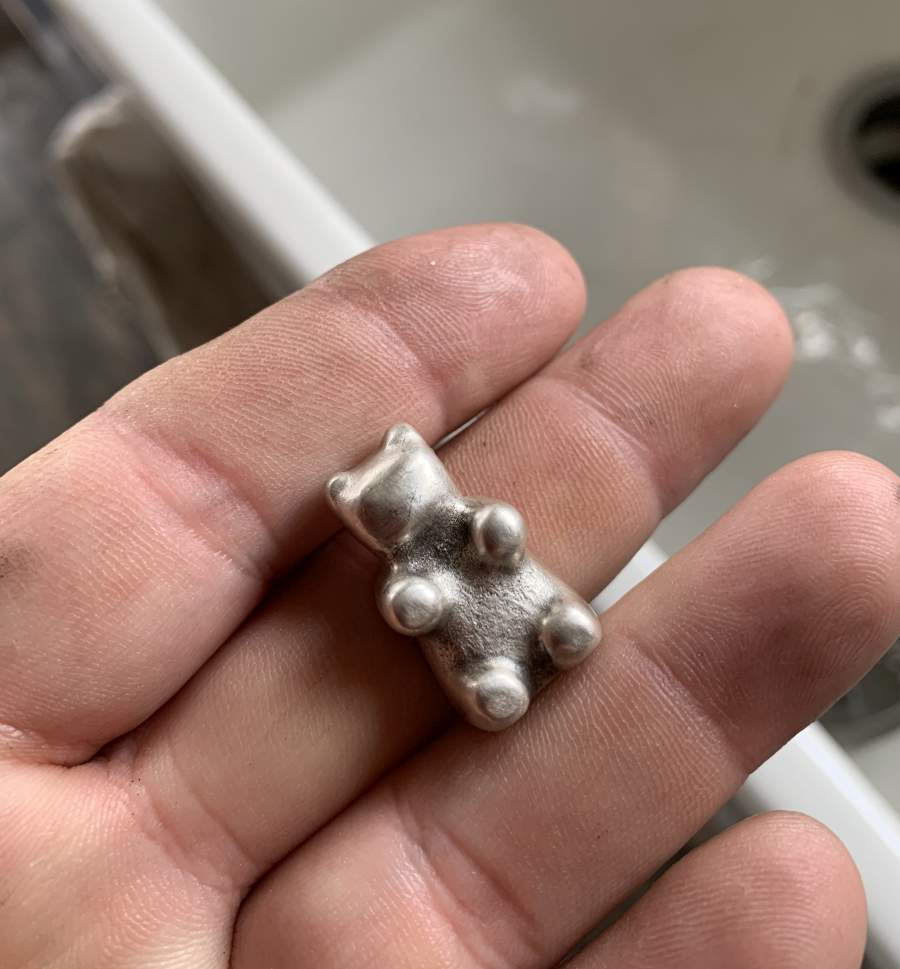
The accuracy of these casting processes is amazing. I’m sure the ancients would have loved to have silicone for making their wax models, but they (rather obviously) got by.

I know at least kestrel among you is a serious jeweler, and knows all this stuff far better than I apparently do. I’m actually farther along in my process than this posting might make it appear; this is just casual object-making. I am also experimenting with enclosed waxes and sprues and stainless steel flasks and all that. I want to see if I can make a few Fuel Rats ID coins in bronze or silver, before I start working on things like knife guards and handle pieces. There are two state of the art ways of forcing the molten metal into your mold:
- centrifugal force; basically, you pour molten metal into a sort of centrifuge wind-up toy and let it spin, pushing the metal down into the mold.
- vacuum; it turns out that investment plaster is quite porous and if you place the investment flask on a sealed vacuum-source it will suck the metal right down into the investment as the air goes out.
The centrifugal method makes sense but I can see how it could go horribly wrong; usually when you see people doing centrifugal casting, they have a wall built up around the machine, for obvious reasons. I have all the components to build a vacuum table – I just haven’t done it yet. It’s going to take some welding and fabricating and whatnot and right now most of my fabricating energy is directed toward getting the forging shed done. I have a great big CO2 tank that I plan to use as a vacuum reservoir, which I’ll charge using a venturi vacuum generator hooked to my air compressor. From there, it’s just a couple of valves and some manifolds to assemble it. I wonder what an ancient bronze-worker would think?

You’re making a teeny bust of Alex Jones as a finial? That’d make a great finishing touch for Elric of Melnibone’s _Stormbringer._
fusilier
James 2:24
Wait, it’s not that kind of wingnut? oh, sorry
They’d be incredibly envious of all the modern tools and materials we have.
Learning about ancient art techniques and materials, I realized how immensely lucky I am to have access to modern pigments and binders (which I had been taking for granted). It’s incredible how several hundred years ago artists could make such amazing artworks with the poor quality materials they had access to back then. For example, up until relatively recently, the only good blue pigment artists had was genuine ultramarine, which was ridiculously expensive to produce. And graphite wasn’t even discovered back when Leonardo da Vinci was making his amazing artworks.
That is so cool. Your gummi bear turned out *great* and it’s even better since now we know you melted down the 10 commandments for it. Yeah, centrifugal casting can be kinda scary. Vacuum casting is *way* better, with one added benefit: practically no fire scale on your metal when you’re done. Also, on investment: I have never heard of a jeweler quenching a flask, which is of course not to say that no one does it. The way I was trained, you waited for it to cool down (sometimes would take a day, it just depends) and then you whack it with a hammer to break off the investment.
When you use carving wax to make the original, you can get it super polished and perfected with the wax. This is great because on the whole and taking one thing with another, wax is way easier to polish than metal. Carving wax is really rigid and strong and can be carved down very fine and thin without breaking. I remember upsetting the Partner quite a lot by buying a pair of panty hose; I am not the sort of person who would wear such a thing. The Partner was quite relieved to learn that panty hose is perfect for polishing wax! Years later I still have the same pair, and chop off a piece every now and then for polishing wax.
kestrel@#3:
Also, on investment: I have never heard of a jeweler quenching a flask, which is of course not to say that no one does it.
That seems to be the new way of doing it. The thermal shock crumbles the plaster and then you don’t risk damaging your work-piece with a hammer.
Carving wax is amazing stuff. It’s more workable than wood, and that is saying something.
My current forge is not tall enough in the opening to fit a big enough crucible that I can melt the amount of bronze I’ll want for the guards. That means I will probably make a small vertical propane-powered smelter, which means I will probably make a separate welded steel tube bench with splash guards and a firebrick surface, etc. That’ll give me space for the vacuum system too. You know how projects magnify…
fusilier@#1:
You’re making a teeny bust of Alex Jones as a finial?
I’d maybe use a casting of that head as a hammer…
I think the ‘imperfections’ on the gummi bear’s tummy make it look soft, like a real bear’s tummy.
True story: my dad once started out cleaning out the cupboard under the sink, and ended up remodelling the entire kitchen (including moving a wall). This may be while I am often reluctant to start new projects…
Dunc@#7:
True story: my dad once started out cleaning out the cupboard under the sink, and ended up remodelling the entire kitchen (including moving a wall).
That’s impressive project magnification, for sure!
Awww, it’s cute, and I like that it has a fur-like texture on its belly.
@#4, Marcus: So that’s the new way to do it, quench the flask? These kids these days…. LOL…. That would be so great to see. Too bad I did not get to do that (I do not cast, even though I know how – I drew the line at slinging molten metal around inside my house and instead gladly pay others to do it) I would have loved to throw a red-hot flask straight after casting into a bucket of cold water. Such drama! I am sure it would make me laugh with glee.
That (the mechanics) sounds interesting, but I don’t understand it. Can you elaborate?
xohjoh2n@#11:
That (the mechanics) sounds interesting, but I don’t understand it. Can you elaborate?
Interesting question; I will see if I can do a posting on the topic someday.
I’m not sure how to illustrate it, though! I guess I can powerpoint together some pictures of how the leverage and stresses in a sword work.
A silver gummi bear is adorable.
A silver gummi bear made of melted 10 commandments is awesome!
xohjoh2n@11
this is a bit of an oversimplification, but most swords have what would be considered a “full tang” – part of the metal making up the blade extends through the handle.
The second pic has what looks like two blades and one assembled sword, and it looks as if the handle is just riveted on to the end of the blade, so that there is a mechanical joint in betwixt the portion that one would be holding, and the portion that one would be striking things with. This would put a lot of stress on those rivets, and be prone to breaking. “full tang” is considered a necessity on hard use knives, these swords are effectively “no tang”
It’s similar reasoning to why those hollow-handled Rambo “survival” knives from the 80s are considered crap – they are just a blade bolted on to a pipe, and will break/bend fairly easily (the main exception are the old Chris Reeve one-piece, but that’s another topic…)
https://en.wikipedia.org/wiki/Tang_(tools)
voyager @#13
If you already have a silver crucifix or 10 commandments or the like, then melting this crap and making something cool out of it is a great idea. But I wouldn’t like buying some new silver pieces with religious messages on them for the sole purpose of destroying them. Whenever you buy something, you are financially supporting the person who made and sold this thing. I wouldn’t want to financially support believers who make silver items with religious messages on them. This attitude extends also for art in general—I wouldn’t buy bad art for the sole purpose of destroying it, because this way I’d still be financially supporting the person who made this bad art.
It’s hard to be sure from the photo, but those riveted bronze swords don’t seem to show any sign of use – bronze is pretty soft, and a bronze sword gets pretty badly banged up if it’s used at all. A lot of bronze swords were made with no intention of ever being used – they were purely status objects, or solely intended for “sacrifice” (where the sword is ritually broken and then thrown into a lake or bog).