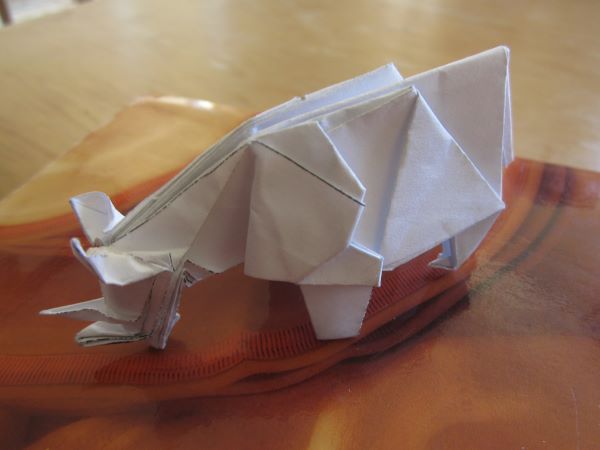
Rhinoceros, designed by Nguyen Hung Cuong
When I folded this model back in 2016, I was challenging myself to fold it without explicit instructions.
Traditionally, people fold origami by following folding diagrams, which list out the steps in sequential order. However, at more advanced levels, you can fold origami with nothing but a crease pattern, also called a CP. A CP shows where all the essential creases will lie, if the paper were fully unfolded. CPs provide information in a much more condensed format, and are far easier to create than folding diagrams, so it tends to be a lot easier to find CPs than full folding diagrams.
Below the fold I have a few tips for origamists interested in folding from CPs.
I found the CP for this model on this page (not reproduced here, respecting copyright). In this case, the crease pattern indicates which folds are valleys and which are mountains. Many CPs don’t differentiate, which makes them a lot harder to follow.
I printed out the crease pattern, and used pencil to trace the lines on the opposite side of the paper. I precreased along every line, meaning that I fold along the line and unfold. It generally helps if you don’t extend the creases beyond what’s marked on the paper.
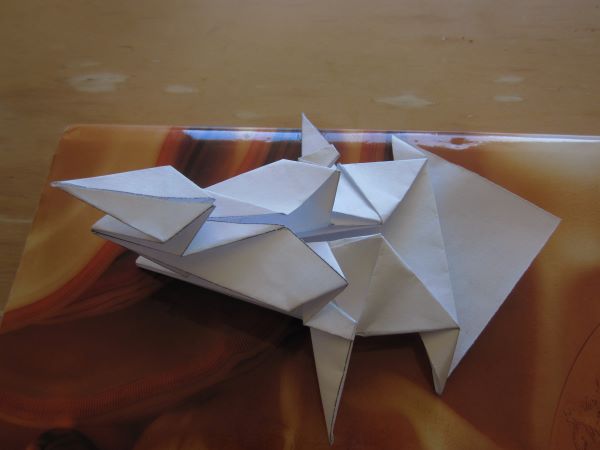
Next is the “collapse” step. Basically you want all the creases to fold at once. But you don’t really fold the whole thing at once, you fold a little bit at a time, leaving the rest of the paper loose and 3-dimensional. You might need to undo some folds as you go; this isn’t a problem, because they will refold easily later. When everything is folded, you get the model’s base, which looks like this:

I had never seen something like this, and I didn’t know what to expect. How is this a rhino? I figured out that you have to fold the entire thing down the middle. The broad corner on the right is its tail, and the pointy bits on the left side are its head and horns.
Next we have the molding step. This step is much more free form, and usually makes creases not in the CP. You want it to look like a rhinoceros, so you make little folds and nudges here and there. I bent the head down, folded the horns so they’re pointing upwards, opened up the ears, shortened the forelegs. There’s no way I was following the same set of molding steps that the original creator did, but that’s alright. It looks like a rhino, so I’m satisfied.
Once I learned how to do this, I realized that many folding diagrams are essentially following the same steps. Precrease, make the base, and then mold.

I was always fascinated by origami but the art seemed way too difficult to learn. What a nice rhino.