Click for full size.
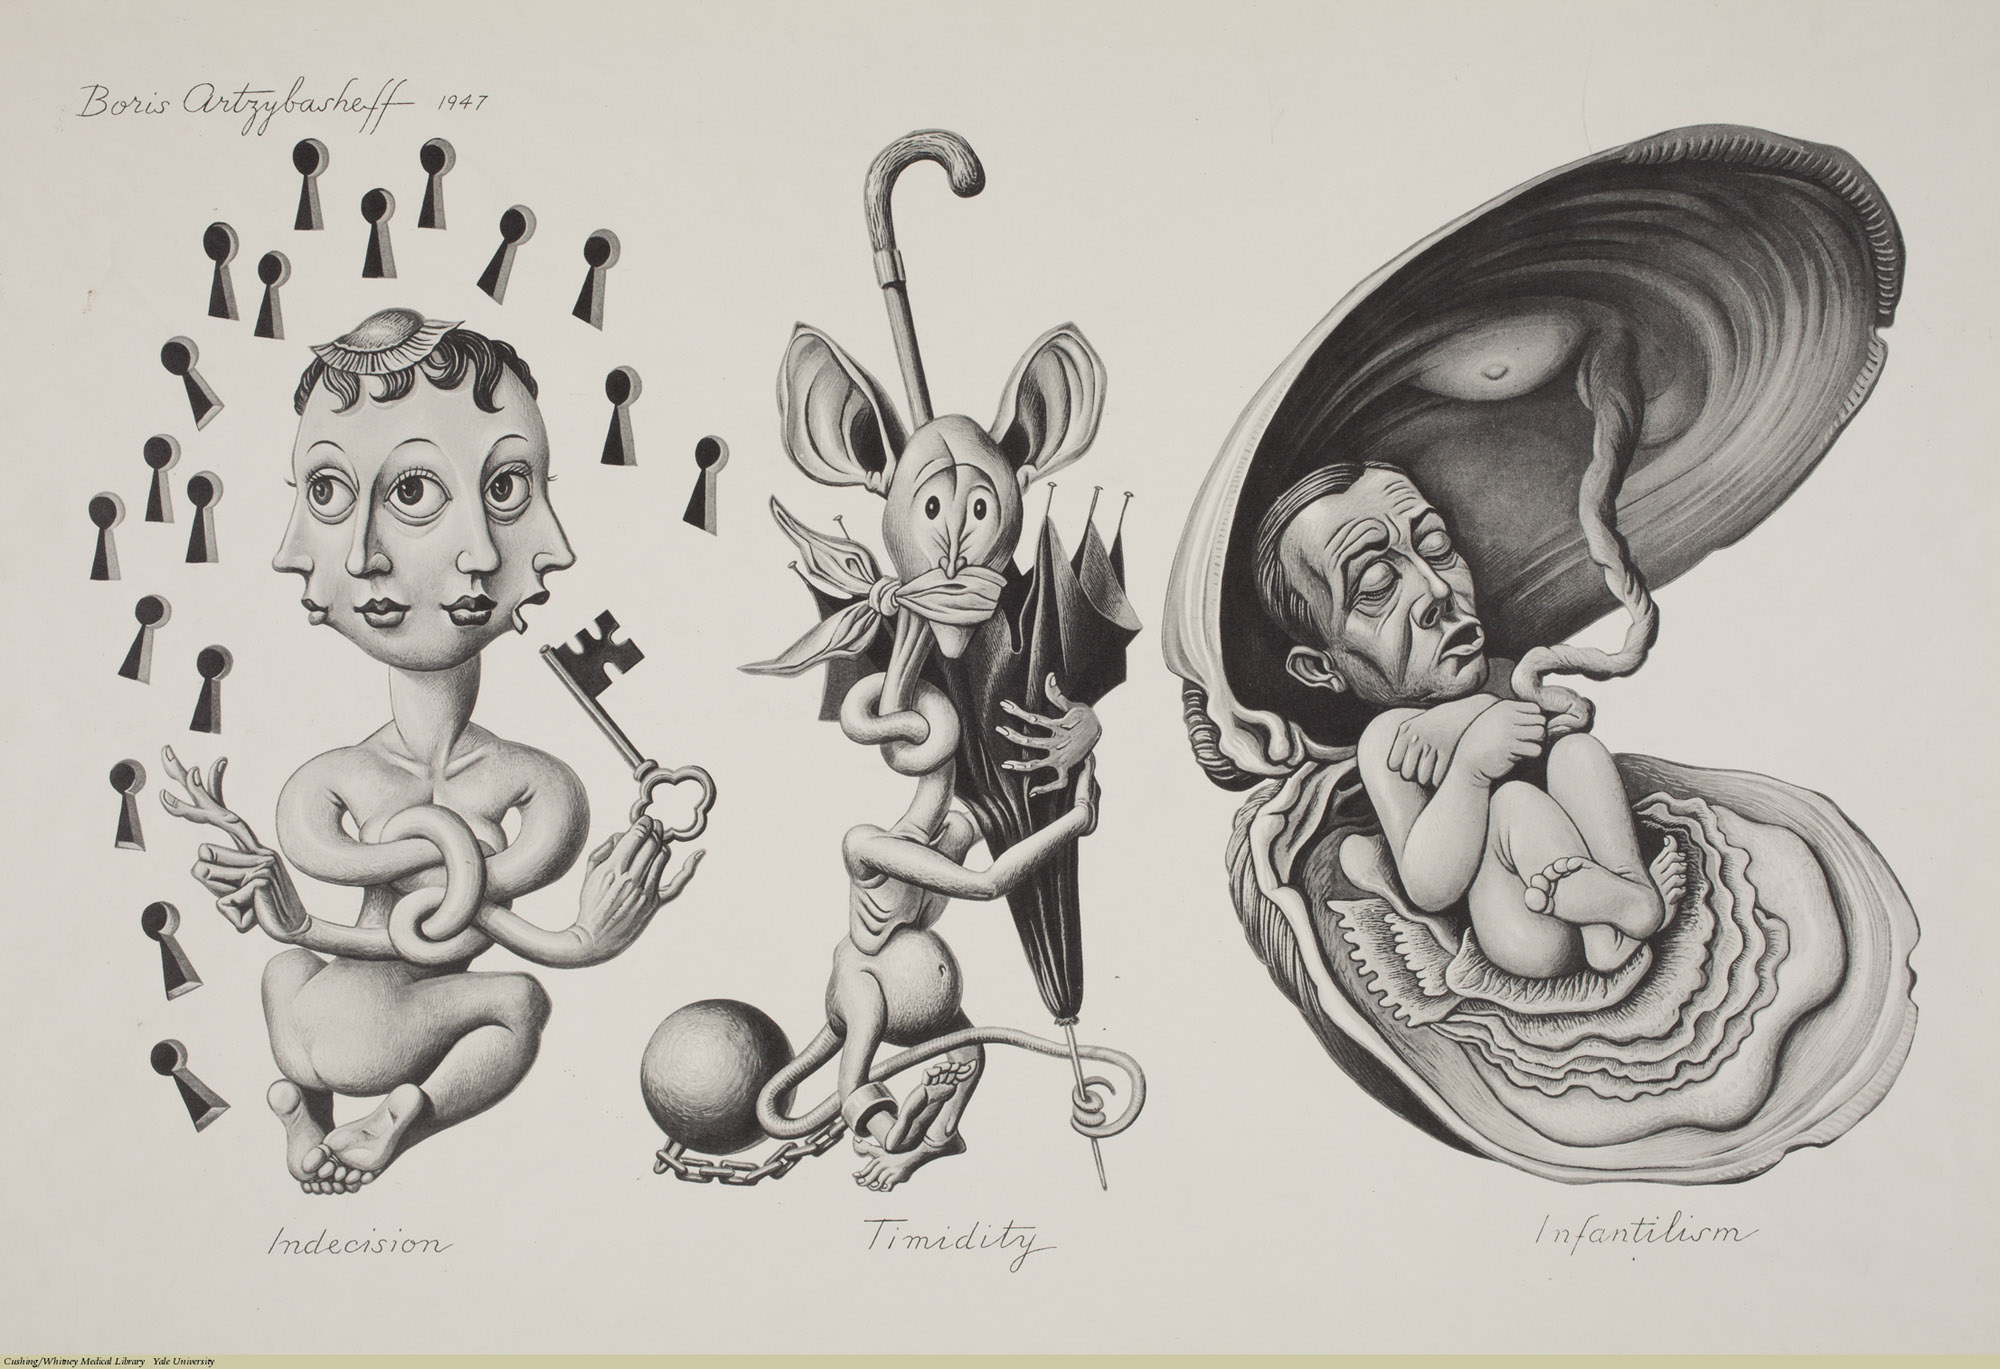
Indecision, Timidity, Infantilism. Boris Artzybasheff, 1947, published in Life Magazine. Subject: Psychiatry, Emotions, Mental Health, Neuroses.
Click for full size.
Indecision, Timidity, Infantilism. Boris Artzybasheff, 1947, published in Life Magazine. Subject: Psychiatry, Emotions, Mental Health, Neuroses.
This was my first attempt at making the rondel on Saturday. Also my first attempt at forging something. I failed completely to achieve my goal, but I learned a few things.
The rondel is supposed to be circular with ten asymmetrical grooves. The simplest way to achieve that would be to take a piece of 4-6 mm steel and cut the grooves with angle grinder. It would also lead undoubtedly to the prettiest looking result I might add, with the crispest lines and smoothest surface.
However I do not want to do that for multiple reasons. One is that it is not historically correct – AFAIK that thick steel was rarely used. The other reason is that it would make the dagger very heavy towards the butt of the handle, and that would make it very uncomfortable to use and it might tend to overbalance in the scabbard and fall out off it.
 So I wanted to go the more historically accurate way of making bowl-shaped rondel. With the equipment that I have (not to mention total lack of skill and experience) that unfortunately means I will not be able to make crisp and deep groves, but you can’t always get what you want. Maybe some other time.
I have decided that this old broken shovel is about the right thickness (about 2 mm). It is also good and strong steel that should withstand hammering and bending etc. Unfortunately it is also strongly pitted, but I have decided to use it anyway.
 My anvil is a simple piece of rail screwed to a log, and I have not modified it yet for any kind of attachments. Therefore in order to be able to forge bowl-shaped object I could not use it at all and I had to improvise. I fixed a cut piece of thick-walled steel tube to my wood chopping block.
I also lack tongs, so I had to use adjustable pliers. But at least I have proper ball peen hammer, one of the few usable things that I got from my uncles’ derelict and trash filled house (you would not believe how difficult it is to buy ball peen hammers around here, nobody is using them and therefore nobody sells them).
For fire I have not used charcoal but half rotten dried wood. Not for any practical reason, but because I have a pile that I need to get rid off and I do not want to burn it in the stove so I co not carry the rot into the house. It is possible to heat steel with wood fire quite easily, temperature is not a problem. Problem is smoke and long flames. If you ever try to do it, be aware that it is dangerous and I advise strongly against doing such a foolhardy thing.
 I thought these tools will be sufficient to achieve my objective, but to be honest I was not overly optimistic. I assumed skill will be a bigger problem.
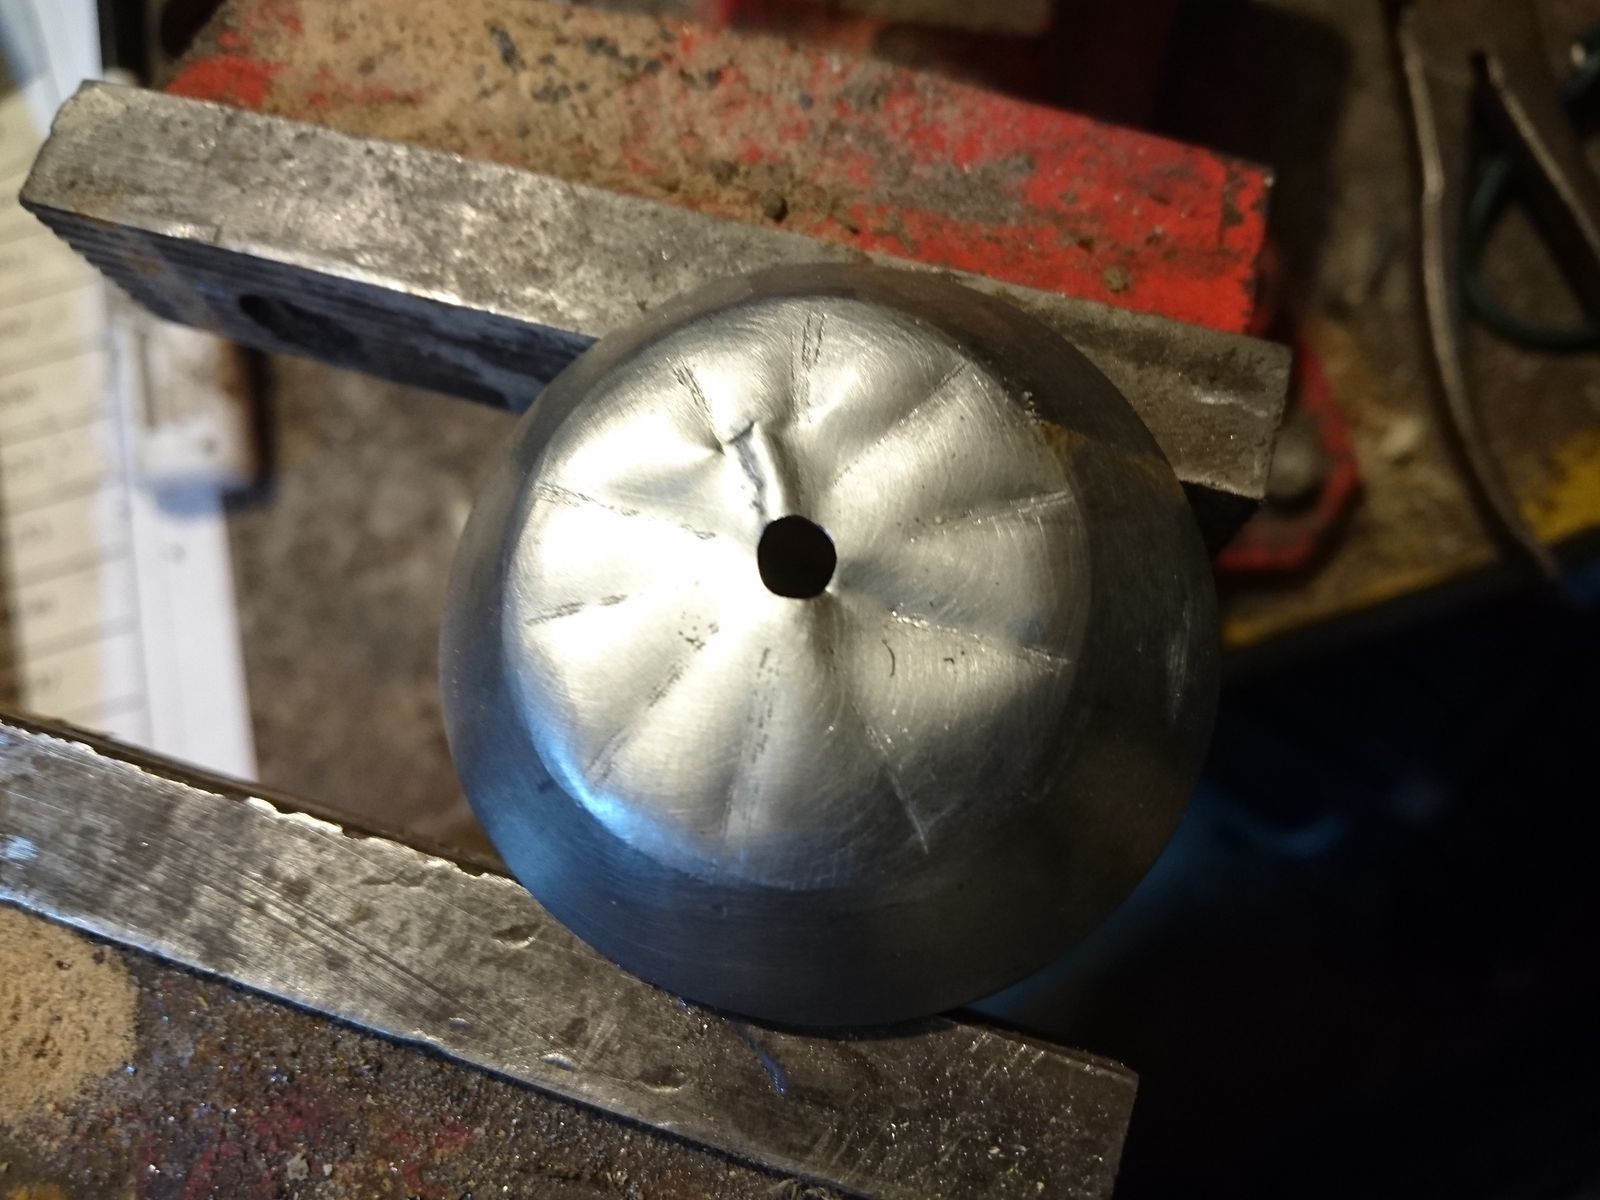
It started promisingly and I had a bowl-shaped object in a jiffy. It was after this that it all got wahoonie-shaped.
The problem was the diameter of the ball peen hammer, which was slightly too small for the task that I wanted to do. When trying to correct this, the bowl only got deeper, but its bottom did not get any wider. I ended up with a shape that was too deep, too thin-walled with too small bottom and completely wrong shape – I was aiming for a shape like a bottle cap and I ended up with a miniature dog bowl.
 Nevertheless I have decided to try and finish it to see how it looks on the dagger. I cut off all the excess with angle grinder, drilled a hole in the middle and shaped the whole thing on belt sander, removing all rust and pitting in the process and preliminarily polishing the surface to 320 grit.
It did not look all that bad on the dagger, but I did not like it very much anyway. It was not the design I was aiming for at all, not even close, and despite looking kinda good it has completely changed the character of the dagger. I knew I will have to compromise on this part, but I was not willing to compromise that much.
Nevertheless I have tried to make the grooves, just as an exercise to see whether my intended way of making them will work. It worked, sort off. It also completely destroyed the part, because I have made it too thin-walled and the walls were so thin in one place that the steel crumpled like paper instead of bending nicely.
That was it. Time to rethink my process. With these lessons learned I went to sleep on Saturday, completely tired, but determined to give it another shot right next day morning.
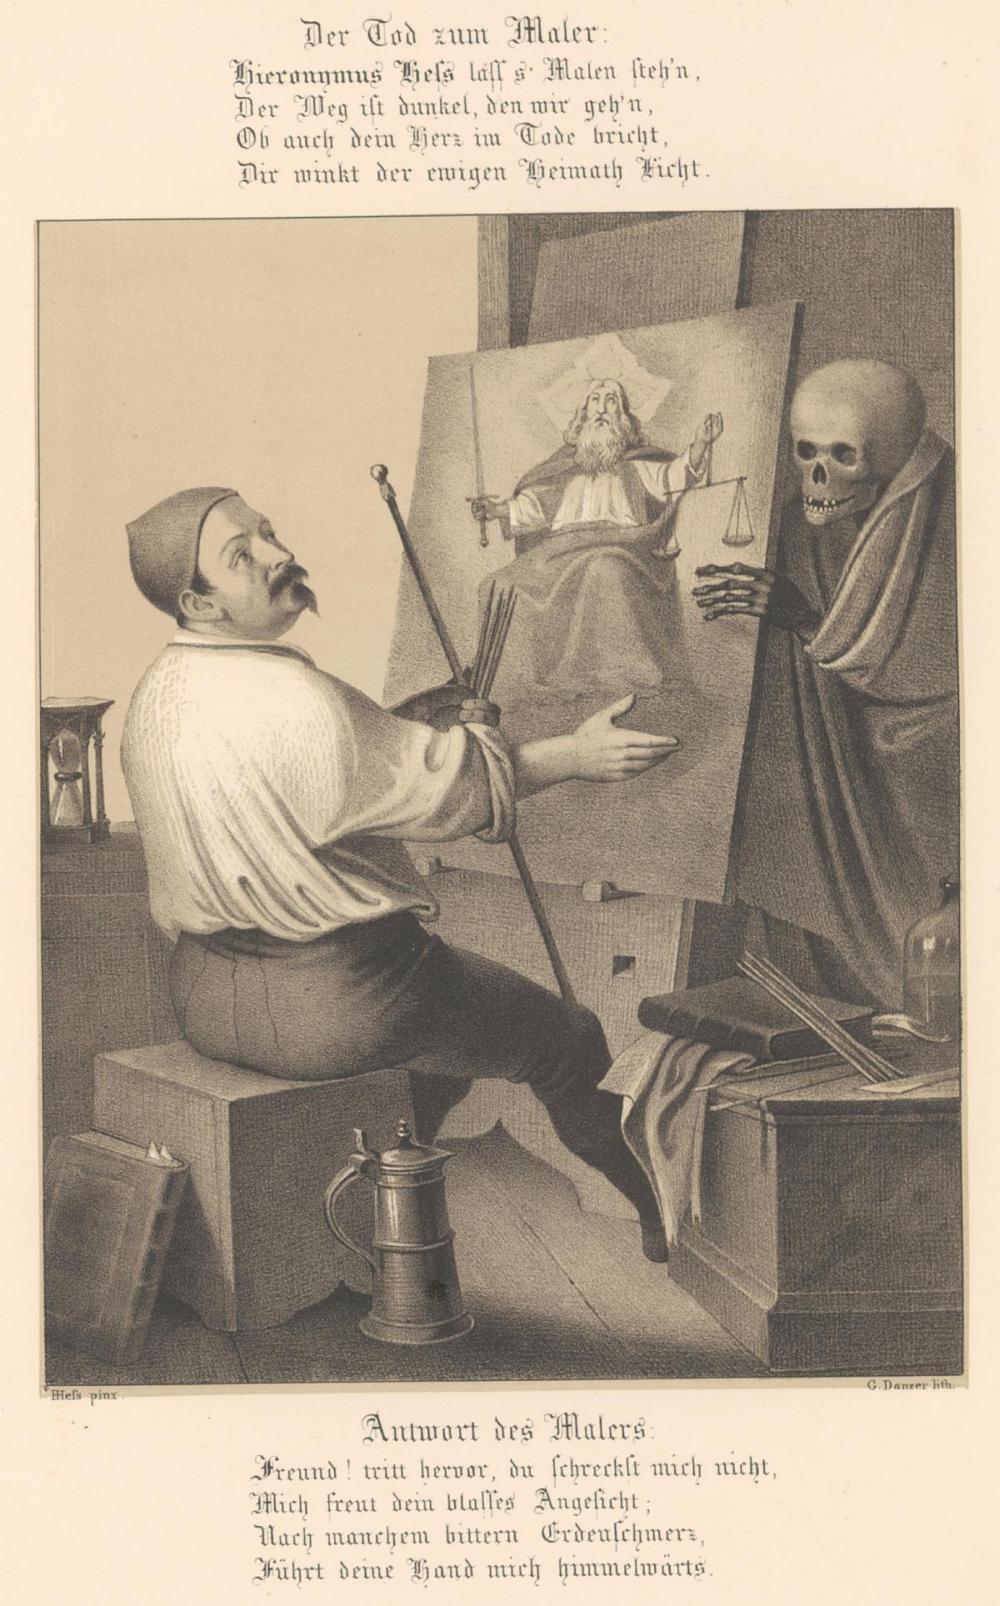
Click for full size. The Painter is a self portrait of Hess. Text translations in comments.

I think Boris Artzybasheff was one of the greatest artists ever. His artistic explorations of emotional and mental states were, and are, absolutely stunning. He had a great gift for being able to draw and express such states perfectly. All of them instantly recognizable, so much so they come as a bit of a shock. Have a look here for more amazing art by Mr. Artzybasheff. Click for full size.

Anxiety, Frustration, Repressed Hostility. Boris Artzybasheff, 1947, published in Life Magazine. Subject: Psychiatry, Emotions, Mental Health.
Click for full size. Text translations in comments.


Click for full size.

Charles Wright’s Champaign Driving Away Real Pain. Theodore Lane, Aquatint coloured, ca. 1824-26. Inscription: Wine Cures the Gout, the Colic and the Phthisic, Wine it is to all men the very Best of Physic. Subject: Charles Wright, Alcoholic Beverages, Wine, Gout, Cholic, Asthma.
Beautiful artwork here. Click for full size.

Habit d’Apoticaire. Nicolas de L’Armessin (1640-1725), Engraving coloured. Subject: Pharmacy, Apothecary.
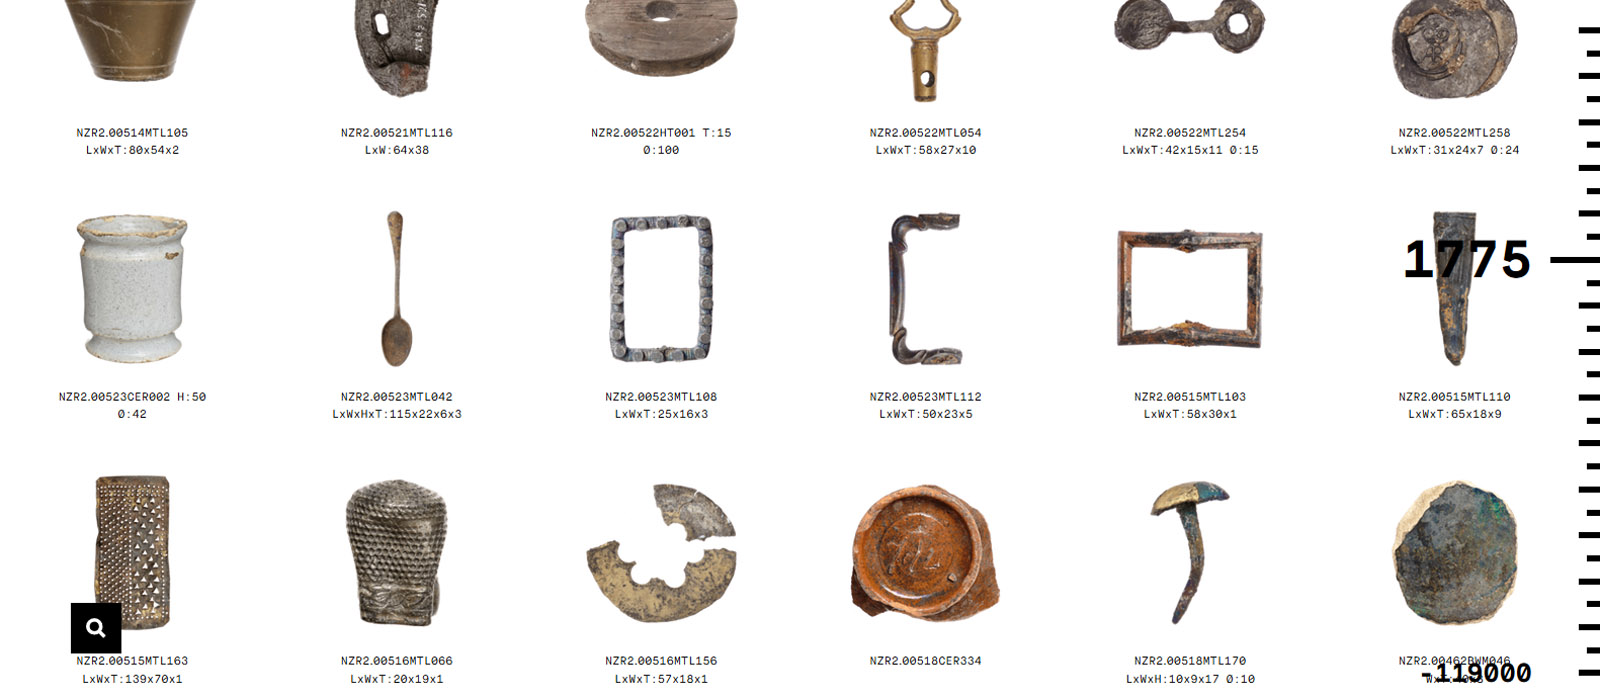
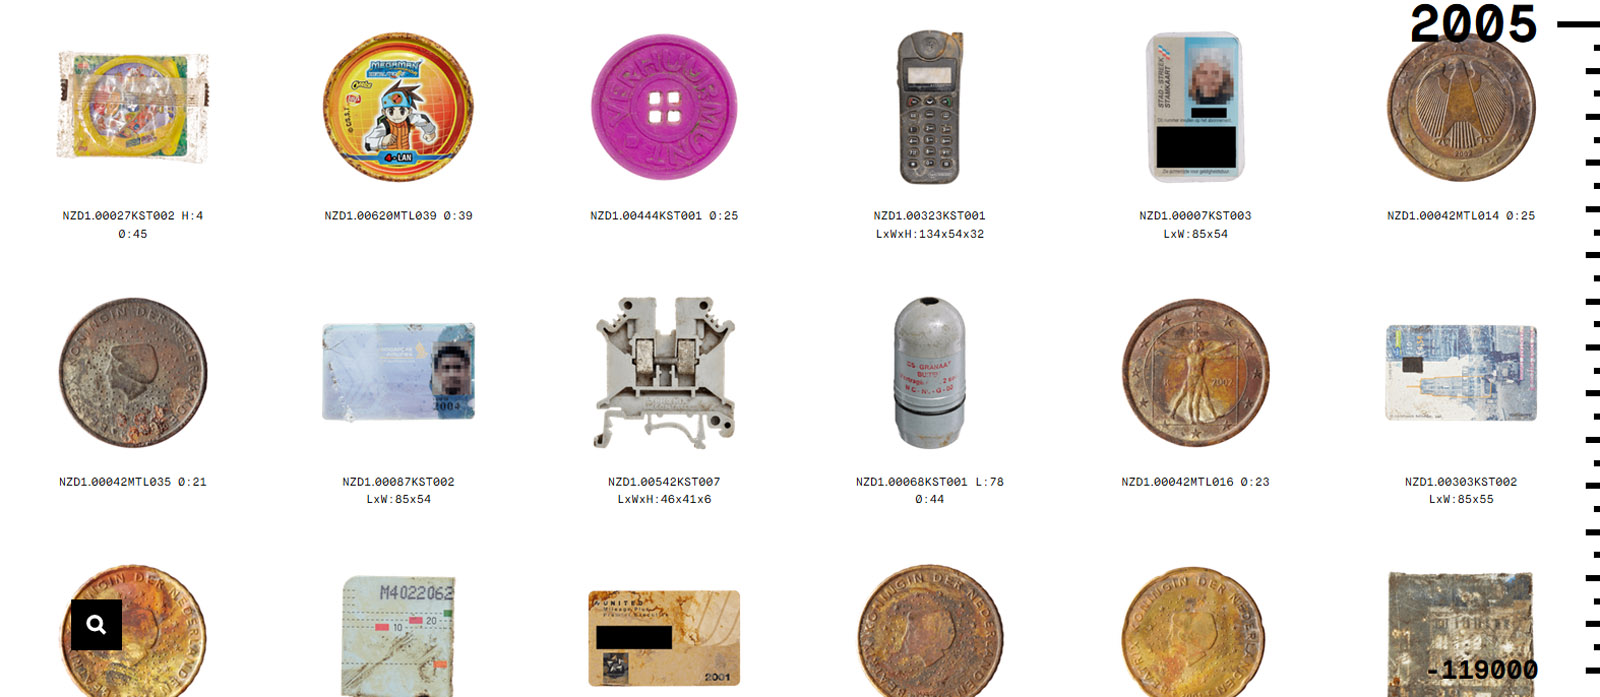
Peter N. sent this amazing project to me, and it’s absolutely fascinating!
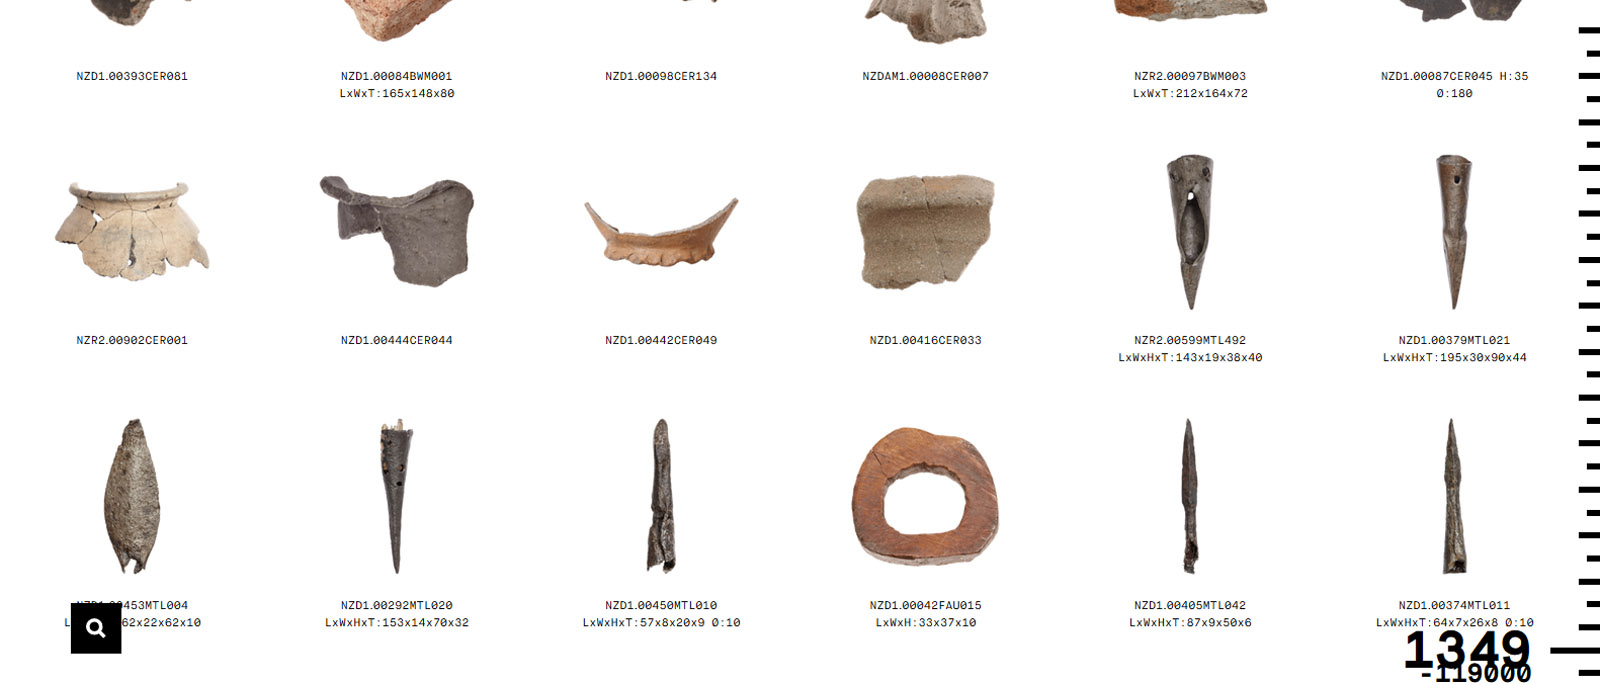
In Amsterdam there’s a public works project going on which has involved draining a river. Archaeologists have been able to search through many feet of sediment for artifacts – which date back 800 years. There’s a wonderful website which describes the project in detail here: https://belowthesurface.amsterdam/en/pagina/de-opgravingen-index
… and one of the pages is a catalog of over 11,000 finds, with beautiful photos and descriptions, arranged in chronological order: https://belowthesurface.amsterdam/en/vondsten
It just thrills me to think that every single one of those objects comes with a story, which, unfortunately, is lost forever – a lovers’ quarrel, a picnic, a flood, a missed arrow shot…
I feel the same way as Peter. Seeing small pieces of history always makes me wonder about all the people and their lives. Peter chose one particular piece for me, and was spot on, I love it!
I’m going to be spending some time gawking at all the amazing things found in this streambed archaeology!
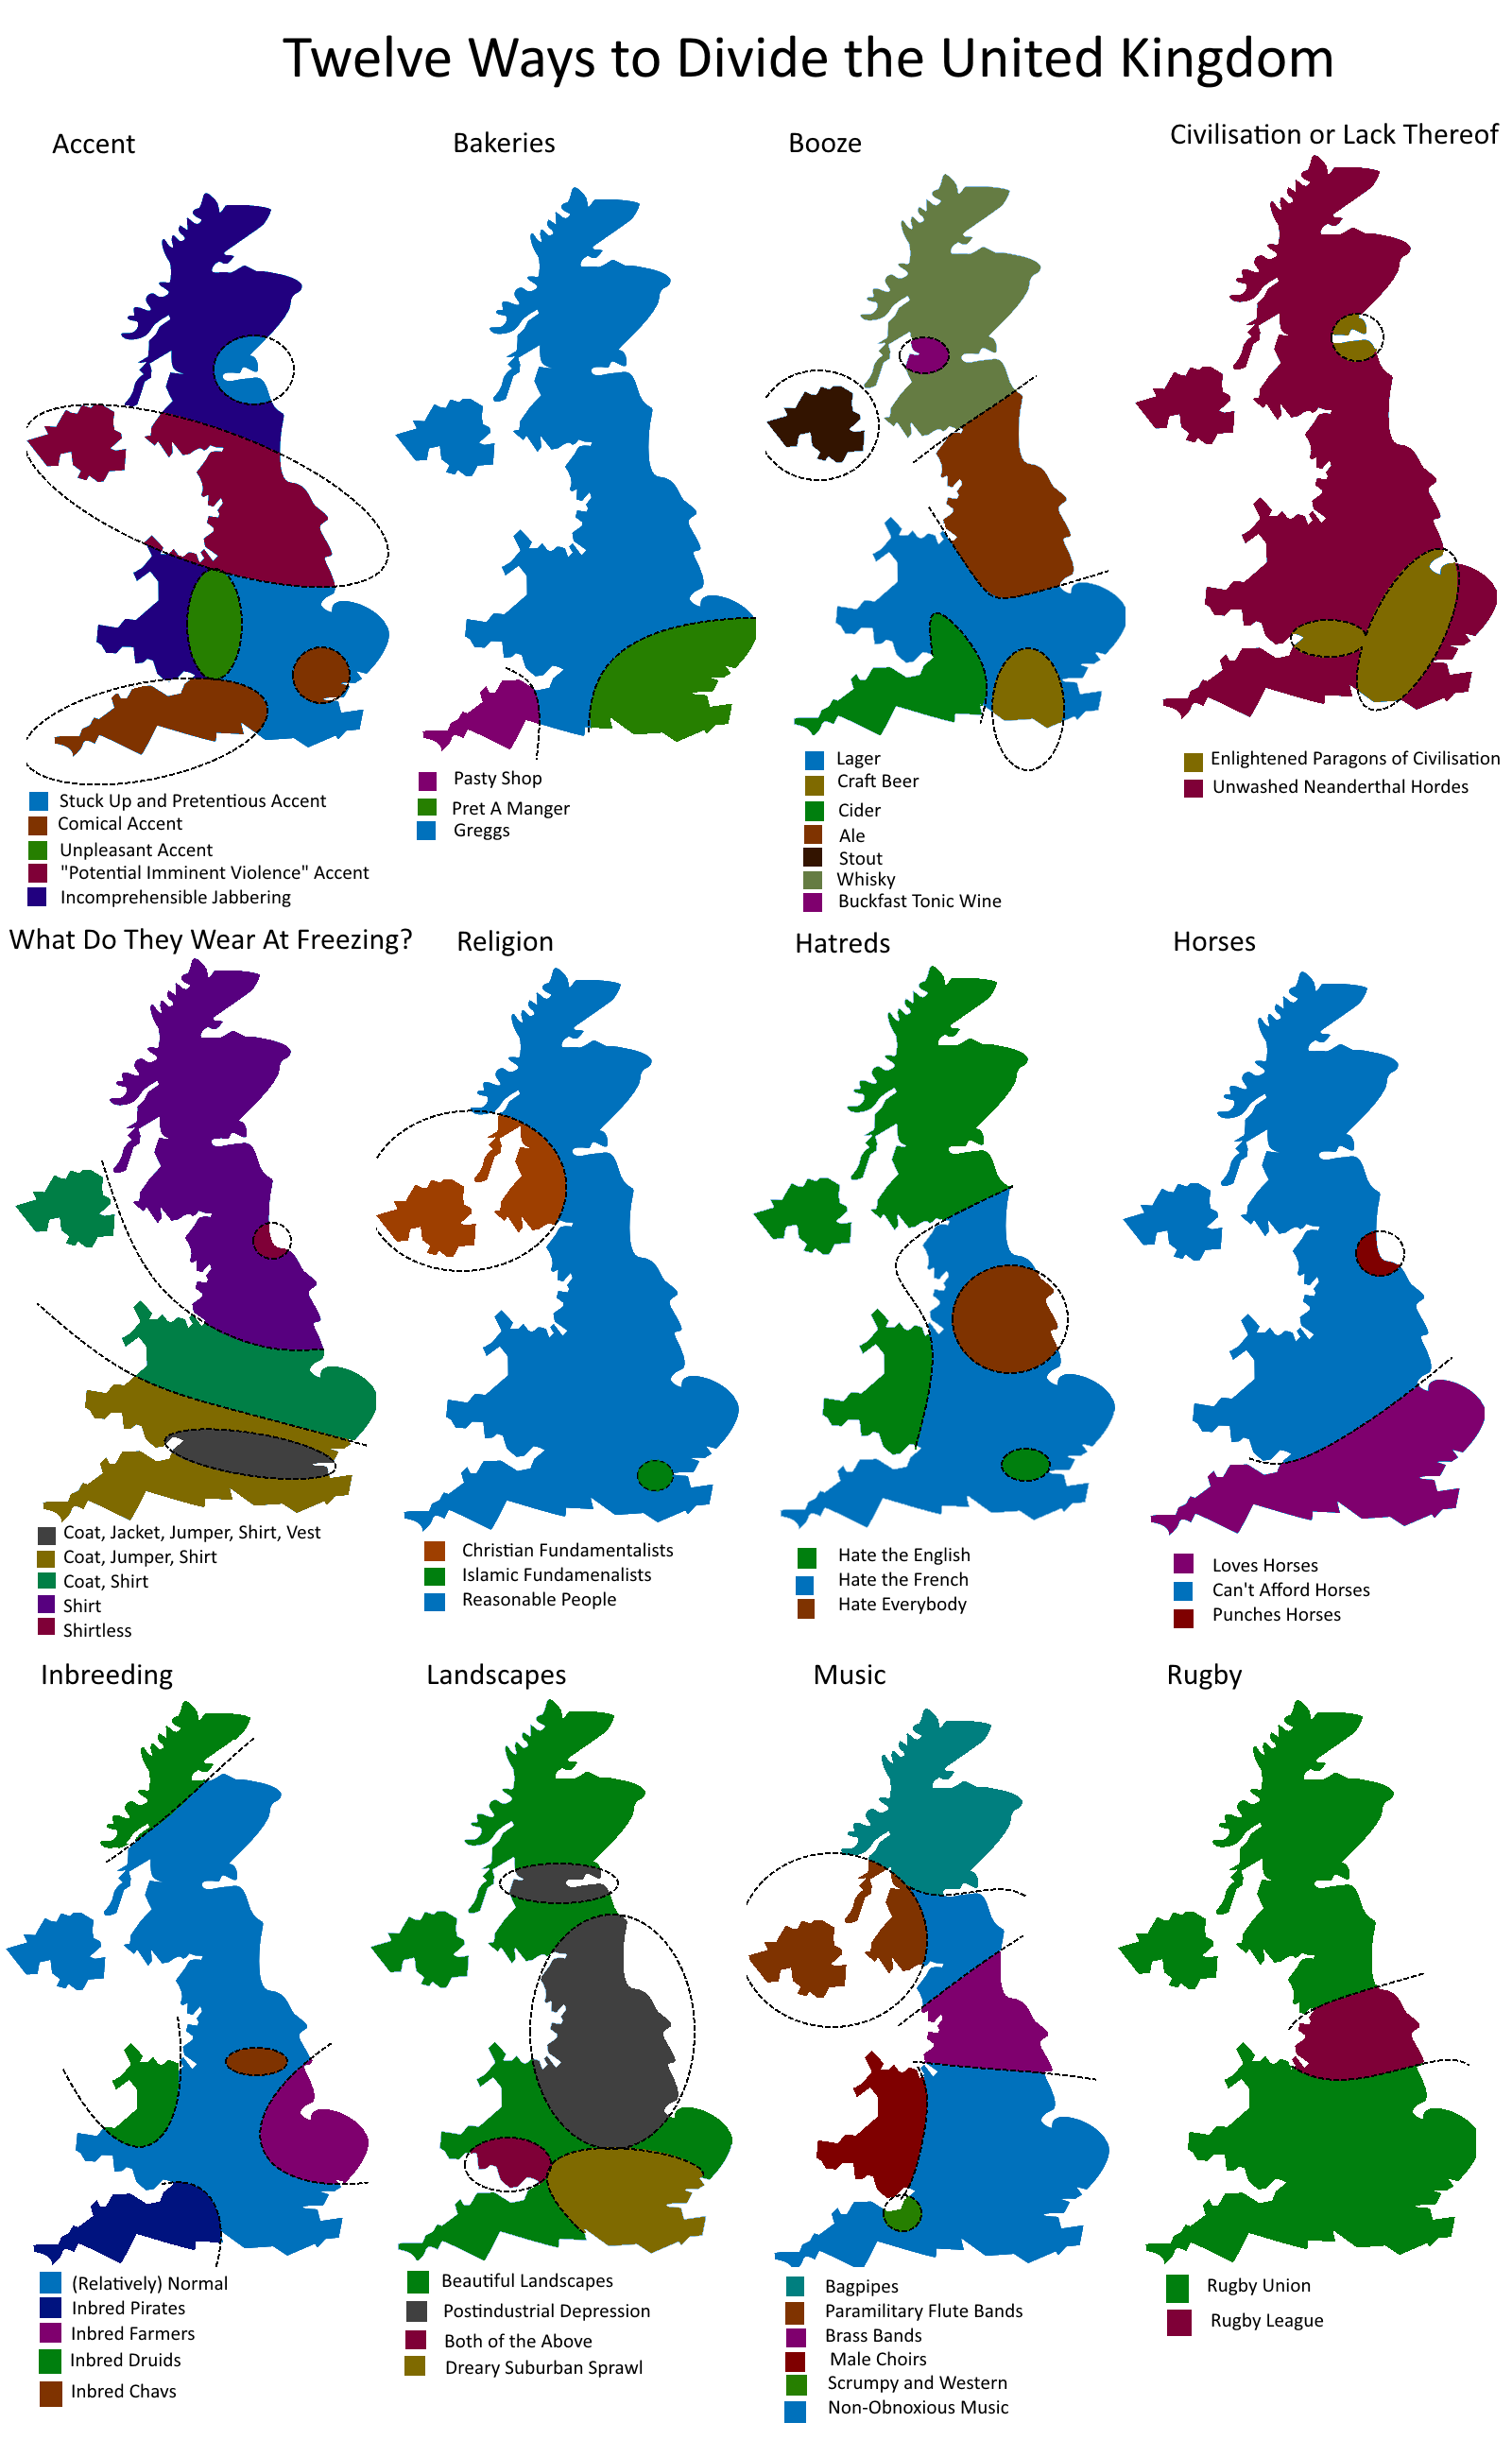
Maps crated by reddit user generalscruff.
Click for giant size!
The 12 maps above are a tongue-in-cheek look at the various ways the UK is divided besides Brexit or how to pronounce scone.
And before anyone complains, they are meant to be humorous and should not be taken too seriously.
You can see each map in more detail below: click over for this!

Map created by reddit user generalscruff.
Click for giant size. You can see more of this here.
Click for full size.

Taking An Emetic. Isaac Cruikshank, Laid, 1800. Subject: Emetics, Vomiting.
One of my favourite Walter Sorrells’ videos. I like the idea of recycling old stuff into new, beautiful things. In fact I like that much more than making things from new materials.
It was Walter Sorrell’s videos what inspired me to try and build my own belt grinder.
The location where I spent this spring’s vacation has a very interesting path through the forest – many tree stumps along it are carved into beautiful statues, some somewhat realistic, some completely abstract. I saw an empty truck parked there with link to this website of Czech artist Jan Kužel. The style of the statues there corresponds to statues in the forest, so it is reasonable to deduce those statues are at least in part his work. These are done mostly with the use of a chainsaw, which is very impressive.
I checked and double checked and AFAIK Czech Law does not prohibit photographing and sharing of photographs of any art that is permanently displayed on public land with unrestricted access. Which is this case. So the photographs are mine, but the art they are depicting belongs to someone else. I will post only a couple of pictures at a time, because there is a lot of them.
It has begun on a clearing with a simple table and a couple of benches, and a road sign reading “To the Mountains” on the left and “Home” to the right.


©Charly, all rights reserved. Click for full size.
Another gorgeous Fancy Bat, Lavia frons (Yellow-winged Bat), from Joseph. Click for full size!

© Joseph Zowghi, all rights reserved.