My first Commission – Part 7 – Sharp!

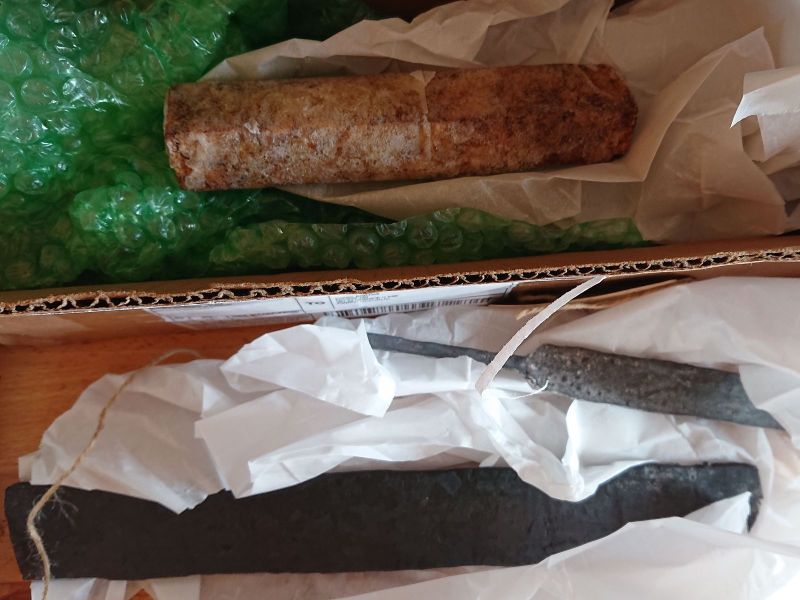
Hell isn’t forever after all. Today I have finished both blades and for the second one, I opted for a satin finish. Not because it is easier – it is not – but because I wanted to see the difference and decide what I like more for the future. Well, I am still undecided, but I can see the difference. And so can you, although it was not easy to think of a way to photograph this.

© Charly, all rights reserved. Click for full size.

The satin finish was made by me not going to the finest buffing compound. Instead of that, I went for a fine abrasive pad right after the medium buffing compound and I dragged it along the blade a few (hundred) times. And I probably will do some more.

After the blades were finished, I have decided to sharpen them. I probably will sharpen blades before assembly for several reasons. Firstly I like making apple seed (convex) edges, that give the blade look as if it does not have a secondary bevel at all. For that, I might need to re-buff the blade a bit, and that can only be done before the handle gets in the way. Secondly, should I scratch the blade by accident during the sharpening, it is easier to re-polish it before assembly. So whilst I do not necessarily sharpen the knives to shaving sharp at this stage, I do sharpen them to some 90%.

This steel (N690) should not be sharpened at an angle steeper than 15°, steeper than that and the fine edge allegedly tends to break off. I have no reason to doubt this since the blades are hard as hell. This time I have a way to get a really nice and consistent angle – I could use my magnetic jig. So I did. The N690 is steel with so-called “secondary hardening”, so it is basically nearly impossible to overheat and destroy the edge during sharpening. Nevertheless, I took care to take my time and not overheat it, it does not pay to get into bad habits.

© Charly, all rights reserved. Click for full size.

You may see that there is no platen behind the belt, so I am using a slack-belt setup here. That means the secondary bevel will be concave and the cutting edge itself will be sharpened in fact at an angle a bit higher than 15°, which is ideal for a hunting/camping knife of this type.  Convex grinds are very durable – the knife that I have made for my mother needs sharpening only about two-three times a year despite being used and abused daily.

Speaking of that, when I was at it I also sharpened all her kitchen knives. Those took just one-two very quick passes on the slackbelt and then a few passes on my stropping wheel (made according to Walter Sorrell’s video)

© Charly, all rights reserved. Click for full size.

Your eyes do not deceive you, that grinder with the stropping wheel is back-to-front.  For stropping, the wheel must rotate in the direction of the edge, not against it, because it is softer than the blade and if you try stropping against the edge, the blade will bite into the fast-spinning wheel and dire consequences will follow. Having the grinder backward allows me to work on the upper side of the wheel, so should it grab the knife and throw it, it will hit the wall and not my leg or the concrete ground. I find it also a lot easier to strop the blades that way.

The stropping wheel gets the knives to scary-sharp in mere seconds. I am using the coarse stropping compound, in my opinion, it makes a better edge than the fine ones.

Now the blades are polished, nearly completely sharp and wrapped in masking tape. It took me three times more time than I think it should and about 30% more than I thought it will. But now the most time-consuming and nerve-wracking part is hopefully behind me and next steps will be free of trials and tribulations. Or at least with significantly shorter ones.

My first Commission – Part 6 – Halfway Through Hell

© Charly, all rights reserved. Click for full size.

This weekend I only could work for about 4 hours on this project, but I have finally managed to finish one blade.

I am not happy with it. Like, at all. I could have done a better job, and I have done a better job in the past. I just could not get into the thing at all. I kept making mistakes, and whilst to make a mistake on belt grinder takes a split of a second, correcting it can take hours. After 400 grit I went to hand-sanding. It is more strain on the fingers than the belt grinder, but a lot less space for a mess-up. And therefore I was, paradoxically, suddenly a lot faster. I might switch to hand sanding on the other blade sooner.

After 1000 grit I went for buffing wheels. Buffing a blade like this is not optimal and if I did not mess up the grind on belt grinder so often as I did, I would not go for it and I would polish it up to 7000 grit sandpaper. However buffing has one advantage, besides being fast – it hides and smoothens slight imperfections on the bevels by ever so slightly rounding up the ridges. Which is also the reason why I normally would not go for buffing for a blade like this.

This is the blade that goes to the customer. Next weekend I will hopefully finish the second one and then I can start on the accessories.

But after I am done with currently started projects, I will definitively make a batch of these. It is a complicated shape, and thus an excellent exercise.


My first Commission – Part 5 – Hell is Forever

Shiny already, but still not even remotely enough. © Charly, all rights reserved. Click for full size.

Wheef. Making a commission when I still have to spend forty hours a week at my daily job is not something I would recommend. I could find this weekend seven more hours for grinding and polishing, and I am currently at Trizact A65 (the equivalent of grit P320), but not finished.

The right blade in the picture is finished on this side with this grit, on the left blade the false edge and the flat are finished, but the bevel is still only at P240. And to make my life easier when picking up the blades next weekend (or perhaps some evening during the week, but most probably not – it is not a good idea to try polishing when tired and sleepy), I have marked each surface that is not finished yet.

Chasing scratches is a nightmare. Partly it is my (lack of) skill. Partly it is the tool – I had to repair and improve some parts of my belt-grinder because the belts were not tracking properly and wobbled from side-to-side. That means I have welded on a threaded nut for the screw that adjusts the tracking wheel and I have given a little twist to the spring that provides tension to the belt. The twist helps to keep the arm with the tracking wheel steady, it tended to bend and thus was not stable.

Also, the whole machine vibrated too much – I had to remove the clamps that were holding it to the table, because they got in the way, but now it has wandered around. I put a few bricks in it for weight and that seems to have helped a bit, but possibly not enough. I suspect I will have to bolt it down, something that I do not like to do in case I will make changes to the workshop.

But as they say, it is not about the tools, it is about the hands.

And regarding my hands, things do not look so good in the long term. For the last eight weeks, I had persistent pain in the first joint of my both index fingers, so I finally went to an orthopedist. On an X-ray he found nothing, which is good – I probably just strained the ligaments in the spring and those take a long time to heal. I do not have arthritis. Yet. But he also has told me that because my mother was heavily hit by arthritis in her fifties, to the point that she had to get two artificial joints in her thumbs, the odds are that I will get the same. And there is nothing I can do about it, except making it worse. Works he particularly discouraged me from doing were works including hammering and working in a wet environment with vibrating machinery. Hand-forging is probably out of the question for me completely and for grinding I will have to develop and put to use quite a few helping jigs to reduce the strain put on my fingers.

Making Kitchen Knives – Part 11 – Establishing bevels

It’s been a long time since I was able to work on this project. Nearly cut-off finger, then tree illnesses in quick succession, and then a huge workload that took several months to get rid of. But this week I finally could dedicate each evening a bit of time, and today I finished grinding the primary bevels.

I cannot actually say how much time did my new magnetic jig/fixture/chuck/norris actually saved because I only used it for the beginning of this step – establishing the bevels with 40 grit belt. After that, I went free-hand again, because I need to alternate the grinding angle slightly with each belt change – so for 60 grit I ground with the point slightly up, 80 grit point down and so on. That is the only reliable way to make sure to have ground away all scratches from the coarser grit before going to the finer one, and additionally, it does help to make the grind more even and true.

I still wasted a lot of time due to my abysmal skill with the belt grinder, unfortunately, and I am not completely happy with the result skill-wise, especially the ricassos. I think I can still substantially reduce the time and improve quality by exercise.

Nevertheless, this time around it took me 6 hours for 12 blades, so 30 minutes per blade. And since it took me 75 minutes last time, that is a very significant time saving of 45 minutes or 60%.

Not all of that time saving is due to the fixture though. About five minutes per blade were saved by working in a batch and thus not changing the belt up on the machine until all blades were finished on the same level. And about fifteen minutes were saved by me not going above 120 grit. So the chuck saved me perhaps ten minutes, which is still substantial and I am not complaining. I will make a better and permanent one from aluminium and brass, definitively.

Blades with established bevels. © Charly, all rights reserved. Click for full size.

So now to coat the blades in protective coating or foil (I will split them in order to be able to evaluate if there is a difference) and into the heat treatment with them. That step is going to be really interesting – if I do not get it to 11 minutes per blade or lower, it will be more cost-effective for me to send the blades for hardening. Which is something I do not want to do because that means sending away some of the fun, plus it would make all my time plans dependant on someone else’s capacities.

My first Commission – Part 2 – Conjunction of Projects.

I did not expect to get a commission this early. I am not quite there yet to be able to make a good quality knife in a reasonable time. I am confident I can get the “quality” part right, but time – definitively not. My original plan was to perfect my manufacturing process with the kitchen knives, which, if you remember, I have left this spring at a phase where the outlines of the blades were established, but nothing else.

But I need to work on both projects now because apart from the time I also need to use my resources – electricity, propane gas and charcoal – in a more economically savvy manner. That means hardening multiple blades in one go for example. And that means I have to establish the primary bevel grind on the commissioned knife as well as on the kitchen knives so I can harden and temper all those blades together.

But the whole point of the kitchen knife project was to develop a viable manufacturing process, and establishing the primary bevel was the part where I knew I have to develop and build a fixture first. You have seen my very first attempt. It did work, but not very time-effectively, I wasted about a minute each time I needed to flip or change the blade. That is a lot, considering that for the basic grind I need to go through five belts on both sides. It was clear I need some way to hold the blade steady, but being able to dismount and re-mount it quickly.

The second attempt was this.

Failed fixture. © Charly, all rights reserved. Click for full size.

The idea was that the hinge and two screws will allow me to set the tilt, and the knife-blank can go into the slot where it will be held by the levered screw. It did and did not work. That is, it worked for one knife and then it broke. The problem was moisture which caused the wood to deform and split. But even without that, fixing and releasing the blade was still not as easy as I would like it to be. I got an idea on how to improve this design, and I already bought the materials to try it out, but then I got sick and everything got put on hold for a few months as you know. All I could do was to think about it.

And then my parent’s hard drive died and I got the idea to use those strong neodymium magnets. But for that, I need first to develop a system on how to switch them on/off, and that needs more time than I can spare right now for fooling around. The customer is not in a hurry to get the knife – they know I still have my day job and that I can only do this in my spare time – but still I think I should not strain their patience. So I needed a fixture, fast.

Luckily I got an idea utilizing things that I already have – the first attempted fixture and a few cheap, weak magnets. There is a way to make weak magnets a lot stronger, at the cost of reach – by concentrating the magnetic field to one side with two slabs of iron/mild steel. It is also possible to make longer arrays with this system.

Magnets and pieces of steel. © Charly, all rights reserved. Click for full size.

So I took six of those cheap magnets and cut nine pieces of mild steel exactly as long as the magnets, but a few mm wider. Then I covered a piece of steel with masking tape and glued the magnets and steel together into three blocks, each consisting of two magnets and three pieces of steel, with the magnets facing each other with the same pole. That means the magnets oppose each other in the middle of the array, forcing the magnetic field of each magnet to the side.

Magnets arrays stacked and glued together. © Charly, all rights reserved. Click for full

The masking tape has stopped the magnets from glueing onto the steel, and the steel was there to get nice alignment on the backside of the arrays. The frontside has the steel pieces overlap a bit, and the spaces were filled with epoxy and sawdust mixture.

Spaces filled with epoxy. © Charly, all rights reserved. Click for full size.

Whilst the epoxy was curing, I took the first wooden fixture and attached a long strip of aluminum to it for the spine of the knife to rest against, and I chiseled out three spaces for the magnet arrays to be glued into. After the epoxy has cured I ground the front faces nice and flat and glued the arrays into the wooden block, again with using a piece of steel covered with masking tape to hold all three on one plane. I used a lot of fast curing epoxy that day, all the while completely forgetting to take pictures of the process. So the next picture is the finished fixture with a knife blank attached to it.

The fixture with knife blank attached. © Charly, all rights reserved. Click for full size.

To get the tilt the fixture has four screws on the downside (up in the picture, not visible).

And the fixture works.  The magnet arrays are strong enough, but not as strong as neodymium magnet arrays, so it is still possible to comfortably detach the blade by hand. It allows me to apply a lot more even pressure on the blank, for a longer time without cooling it because I do not burn my fingers (temperature not being of concern at this stage). There is still room for improvement – the aluminium stop is a bit too fat for kitchen knives, the screws for tilting do not provide stable enough support and they are a bit finicky to get right. But you can see it allows for making nice, flat and even grind.

Established primary bevel. © Charly, all rights reserved. Click for full size.

Added bonus is, that after two hours of grinding not only did I do more work than before, but also my fingers hurt a lot less because the fixture gives my hands more material to hold onto. I am definitively going to use this a lot, and perhaps there will be other uses for this concept as well. I have an idea for sharpening gizmo in my head for about a year by now…

An Unexpected Treasure

I do not intend to use tropical hardwoods in knifemaking too much. Especially I do not intend to buy and use wood from endangered species, but even tropical hardwoods of not-endangered species are problematic – habitat destruction and all that is unfortunately still a thing, not many tropical hardwoods are grown in a sustainable and renewable fashion (although many species can be grown in a coppice, when handled properly).

I think that local species have very often beautiful wood too, and the high price of some tropical hardwoods has nothing to do with how they look, but with their rarity. However, I will use them if I get my hands on some pieces by accident (for example I received some pieces free of charge with the steel I ordered, as an advertisement gift).

One such accident just happened. I was ordering online wood dust briquettes for winter and when doing that I searched for some wood for kindling. The description on the webpage on one product was something like “Hardwood cuttings from furniture manufacture, size up to 15 cm, 320 kg, extra dry, jatoba and black locust”. And I thought to myself “OK, black locust is an invasive species in Europe, and jatoba is not an endangered species. And anyway these are probably mostly chips and splinters that will be burned regardless, but maybe I get lucky and there will be some 10-15 pieces usable for knife handles in there and that would be nice.” So I bought the palette for the circa 100,-€ it costs. That is a lot for a mere 320 kg of firewood.

This is how the palette looked like in my garden.

Sacks full of wooden cuttings.

Nothing special but you can see a nice big rectangular chunk of wood bulging in there, so I reckoned, “There are 12 sacks on the palette, if in each is one such nice piece – big enough for 2-3 knife handles – then the palette has paid for itself in knife handles already, I will get wood for about 25 knives. Nice!”.

Oh, little did I know. The very top sack was brittle and tearing, I suspect it was standing for a long time in the sun so the plastic deteriorated. I reached into the hole and pulled out one random piece of wood. And I could not believe my eyes.

A piece of jatoba.

This is not what in my workshop counts as “a cutting for kindling”. This is a piece big enough for 4-5 knife handles (circa 25x100x200 mm). Jatoba is not very expensive (for tropical hardwood that is), but even at its cheapest, I would pay 4,-€ for a piece like this when buying it extra. But the price could be somewhere between 10 and 20,-€ as well for this amount of top knife-handle material. And then I pulled out five more pieces – four were like this, only the fifth was really crap fit for kindling only.

I am not exaggerating – I could barely wait and sleep after this. But I had other work to do than to muck about, so it had to wait until today evening when I finally got to taking this wood under the roof. The uppermost sack nearly disintegrated on touch and this is what I saw.

Jatoba bonanza.

My jaw dropped. That is wood for about 50 knife handles right there, in the picture, and twice as much not seen. This one sack alone has set me for life as far as jatoba wood goes.

I did not open every one of them, but by the feel on the surface 6 sacks contain big chunks like this, and 6 contain splinters and small unusable cuttings that I initially expected. So I estimate I have enough material for 600 fat knife handles made from jatoba, enough to start small manufacture if I were so inclined.

Oh, there was one piece of black locust too. That is ordinary and real cheapo wood (except for burls, those are costly), but it is pretty, durable and really environmental-friendly to use, since it is a pest.

A “cutting” of black locust.

To summarize, the ratio between the two species was reversed to my expectations (at least in the first sack) and I need to order some more kindling because I do not have nearly enough now.

I still dislike the idea of using tropical hardwood at all though, it just feels wrong. Although I am not a moral philosopher capable of dissecting the morals and ethics of a situation like this. I should probably heed one Czech saying and “leave these musings to a horse, he has a bigger head.”. What do you think?

YouTube Video: The stropping myth and how to sharpen tools with leather

Today a little video about the maintenance of sharp tools. Unfortunately I am not giving my tools the attention they would deserve, because I am not using them enough, but that should hopefully change soon. I have also bought a thick leather strip to make myself a good strop last year, but then I misplaced it and I found it again only last week.

In a pinch, I have also used following things for stropping a knife blade:

Folded newspaper, paper, cardboard, towel, dog’s collar, wooden board, and even the trouser leg of my worn jeans (whilst wearing them).

And when I had not commercial compound available, for stronger abrasion I have used:

A toothpaste, a bit of fine clay/mud, and fine wood ash (grass ash would probably work even better, it contains silica, but I did not try that one yet).

But the best results are in my opinion obtained with a strip of thick leather and jeweler’s rouge (the real stuff – finely ground haematite made from annealed rust). It is definitively worth stropping kitchen knives, especially if you have knives with an apple-seed edge.

Sorting out Abrasives

I had all my abrasives in one big plastic case, some further sorted in smaller containers, but the abrasive papers and pads were just one huge pile. So now that my workshop is in a state when it is actually possible to do actual work again, I have decided before I start to make knives again to sort out my abrasive materials for good (again, so in reality until the next stack overflow).

For the papers I have made a little portable shelf where I could sort them out from the coarsest (40 Grit) to the finest (7000 Grit) with some room to spare for clean paper sheets and carbon paper sheets – those come in handy sometimes in the shop, so why not. I still have three slots to fill, which is a good sign. It is a lot heavier than I thought it will be, partly because that is a lot of MDF and particle boards packed into small space, and partly because that is a lot of abrasive paper – and that is heavy, of course, it is covered in sand after all.

Abrasive papers, sorted and ready to deploy.

Precision is of the essence in such an endeavor, as is the quality of used materials of course. That is why I cobbled it all together from scraps of old furniture – 1 cm particle board from an old bed for the frame and 3 mm MDF stripped from an old bathroom door. And I took the time – about 2 hours. Joking aside, I could, of course, buy completely new MDF and have it precisely cut beforehand in the shop, but waste not, want not. I never got used to throwing money at something that will work just fine when made from scraps that I have at hand (my shop looks the part), and I certainly am not going to do that when I just quit a job and am about to lose reliable income.

Now the case could be filled again with remaining polishing and abrasive materials, in a more orderly fashion – polishing wheels, pads, polishing pastes, etc. It is just as full as it was before – which is not good – but it is all a lot less cluttered.

A lot of felt and fat and various odds and ends.

I will probably have to figure out something better for the steel wool, it tends to rust and crumble before I get to actually using most of it. But, as it is, it is a significant improvement.

I no longer have to take a pitchfork in order to get to the bottom of the case and find the grit I need. Today afternoon I will make some improvements to my belt sander and after that, hooray – I will start to make knives again!

Bufftoofbrush

I am currently in the process of re-organizing my abrasives and polishing compounds, so when Marcus mentioned the tedium of polishing his silver casts, my mind juped to this.

I have used this method once for buffing up the handguard for the rondel dagger when it was already mounted, so today just as further proof of concept of a procedure for buffing small parts that are difficult or impossible to do on the buffer due to complex gometry (or safety).

This is what I started with – an old rotary toothbrush head that I have saved up for this purpose specifically, an extremely old and corroded mirror holder (probably chrome-coated brass or something like that), a piece of never polished brass with patina (a waste piece from machining) and hard, coarse polishing compound. A bit too hard, this is a high-speed compound, a paste would be better, but I could not find it. Not pictured here are paper towels that I have used to wipe the polishing compound off of the piece after work and the green scrubbing pad (see further).

The corrosion on the mirror holder was extremely hard and resistant, so I had to use a piece of scrubbing pad too – but I only used it on the left (thicker) half of the part in the following picture, not the right, thin part so some of the pitting from the corrosion is still visible there.  A big improvement over the initial state nevertheless.

On the brass cylinder, I did not use anything else than the toothbrush and polishing compound

It is hard to take pictures of the results, but in the end, I found a way – I think you can see which side is the unbuffed part of the brass cylinder, and which the buffed part. The time it took me was about 5 minutes, but it would be mere seconds on the buffer. Nevertheless, the biggest obstacle to using this on a bigger scale is the battery capacity of the toothbrush, but it could be useful for getting into nooks and crannies on small thingies.

©Charly, all rights reserved, click for full size.

How to Sharpen a Knife

Instead of writing at lenght, I will let Walter Sorrels to explain it better than I ever could.

This (except the measuring of the angle with a tool, which I was taught to recognize by feel and eyeballing) is how I was taught to sharpen knives and it is essentialy how I do it and teach others to do it.


At least I had a pretty break

Hello there. I know, I’ve been very absent recently. Work was pretty demanding, the Damokles’ Sword of not knowing whether my contract will be renewed hanging over my head* and life being busy as usual.

Last weekend we first had #1’s “culture workshop”, which is an evening when all the groups in her school can present their projects, including her class. It was an amazing evening and the kids are really damn talented, from the chubby boy with the glasses doing a kick ass rap presentation to the Syrian girls reciting poetry about their home town Aleppo.

The next day was the little one’s school festival, which usually means the very same people working a lot. It#s the same everywhere. My colleague was totally stressed out because she was organising things for her kid’s festival the same weekend. Or as Pratchett noted: if you want to get something done, give it to somebody who is already busy.

And the works in the garden have finally begun. There’s nothing like coming home with a migraine and having people use heavy machinery around the house.

As a result, we used this long weekend (holiday on Thursday, “bridge day” on Friday) to lick our wounds and recover and spend some very quiet time together, going for walks etc.

But I also got some resin art done over the weeks, especially after Marcus’ latest parcel.

Some of this will be up for sale/auction for the FtB legal defence fund, so if you set your eye on something, just let me know.

*I’m pretty positive that I won’t be unemployed come next term, but that’s not the same as knowing and I’ve noticed that it has been slowly wearing me down.

First of all, this is what the garden looks like now:

©Giliell, all rights reserved

In tearing down the old stuff they found tons of unreasonable concrete which they have to get our somehow.

First project: tealight holder:

©Giliell, all rights reserved

These look very complicated but are actually dead easy and I’d say the perfect project if you want to do something with resin but not invest a lot of money in moulds and stuff: Just pour your resin onto wax paper, let cure for about 12 hours, fold over a glass, fix with a rubber and cure completely.

©Giliell, all rights reserved

©Giliell, all rights reserved

The fish are printed again, though I bought the sheet this time.

Next projects are under the fold:

[Read more…]

A Brief Update on the HDD Magnets

I have been mostly working on a shelf this weekend. It is very needed because there is more than enough stuff just cluttering up the house and it is getting on my nerves.

But I also had worked on my little project involving the magnets that I have salvaged from defunct HDD a few months ago.

First I took a piece of 3 mm thick, 20 mm wide galvanized mild steel and I cut off a piece big enough so I could bend it into a U-shape in such a way that the magnets can sit inside with about 2 mm free space between the magnets and the bends. then I also cut two just 3 mm bits of the same stock. When put together as seen on the picture, you get a very strong magnet that only pulls in one direction (up). Plus the way the HDD magnets are magnetized means that this magnet now has four poles N-S-N-S. Also that the magnetic field is very strong, but has a very short reach. I tried to measure the force with which it holds a piece of steel and it was about 65 Newton, which is impressive for such a small thing cobbled together from scraps.

© Charly, all rights reserved. Click for full size.

After this, I cut a few pieces of brass to fill the spaces as tightly as possible, and I drilled and cut an M5 thread in one arm of the U. Precision is essential here. Unfortunately, we do not get along very well and she is a mere nodding acquaintance, despite my best efforts, so everything was a bit wonky.

I have no pictures of that work because I still did not figure out exactly how my new phone works – I thought I took pictures, but apparently not.

When I had everything cut, I mixed a generous amount of quick drying epoxy and slathered it all around and glued everything together.  And after the epoxy hardened enough I have ground off (manually) excessive material and I trued and polished slightly the magnetic surface.

© Charly, all rights reserved. Click for full size.

So now I have this strong, one-directional magnet 50x20x10 mm. So far everything goes as planned, and I hope that the next step in this project will go similarly well.