Frederick Saunders. Salad for the Solitary. Dewitt and Davenport, 1856.
via: The Internet Archive

Norma Bright Carson. The Fairy Housekeepers. Illustrations by Hazeltine Fewsmith. Boston, Lothrop, Lee & Shepard co., 1917.
I fell in love with this book! There is only 1 coloured illustration in it, however, the plain drawings are charming and delightful and entirely typical of the Art Nouveau Period. I’ve included all of the full-page illustrations, plus a few others, but if you get a chance I encourage you to check out the entire book. (The address is at the end) There are small illustrations on most pages and the story is a sweet look at how the fairies work as the seasons progress.

Helen Leah Reed. Brenda’s Cousin at Radcliffe. Boston, Little, Brown, and company, 1907.

Stephen Percy. Robin Hood and his Merry Foresters. London : Tilt and Bogue, Fleet Street, 1841.
via: The Internet Archive

Caroline Fuller. The Alley Cat’s Kitten. Boston, Little Brown, 1904.

Frederick Dumont Smith. Book of a Hundred Bears. Chicago, Rand McNally & Co., 1909.
via: The Internet Archive
When Marcus sends out boxes, they are always two things: treasure boxes and challenges. There’s all this wonderful pieces of wood and they’re asking: “What am I?” and then it’s me who has to figure it out. For some of them the question could be answered.
First two pieces of burl:

©Giliell, all rights reserved

©Giliell, all rights reserved
As you can see the wood is very thin, at the most 2mm, which made sanding quite difficult. I made them by firmly wrapping tape around the wood to create a container and then I filled it with resin. This, of course, creates a rather cylindrical resin shape which then needs to be evened out. I’m pretty happy with how both of them turned out, fire and water respectively.
The next three pieces look rather different but are all from the same piece of wood. The last parcel Marcus sent contained some bog oak with which I instantly fell in love. It pretty clearly told me that it wanted to be SOMETHING so I took the first piece and tried SOMETHING. I have some golden pearl pigment I am not completely happy with, as it is heavier than the resin and sinks to the ground, but which for the very same reason became idea for this project.
The original piece of wood was maybe 2″ by 3″, already sawed into a disc with that sharp angle on one side. I cast it in a big slab, pouring the gold pigment resin first and then filling up with mostly clear resin.
This is the “central piece”:
©Giliell, all rights reserved
I cut off all the resin around the wood and cut the top into a rhombus, matching the angle at the bottom. The gold pigment sunk into the gaps in the wood, filling it with veins of shimmer. As you can see there were still some bubbles trapped in the wood, but they’re actually more visible in the pic than in reality. I’m sooooooo happy with how that turned out because I was quite afraid to ruin the gorgeous wood.
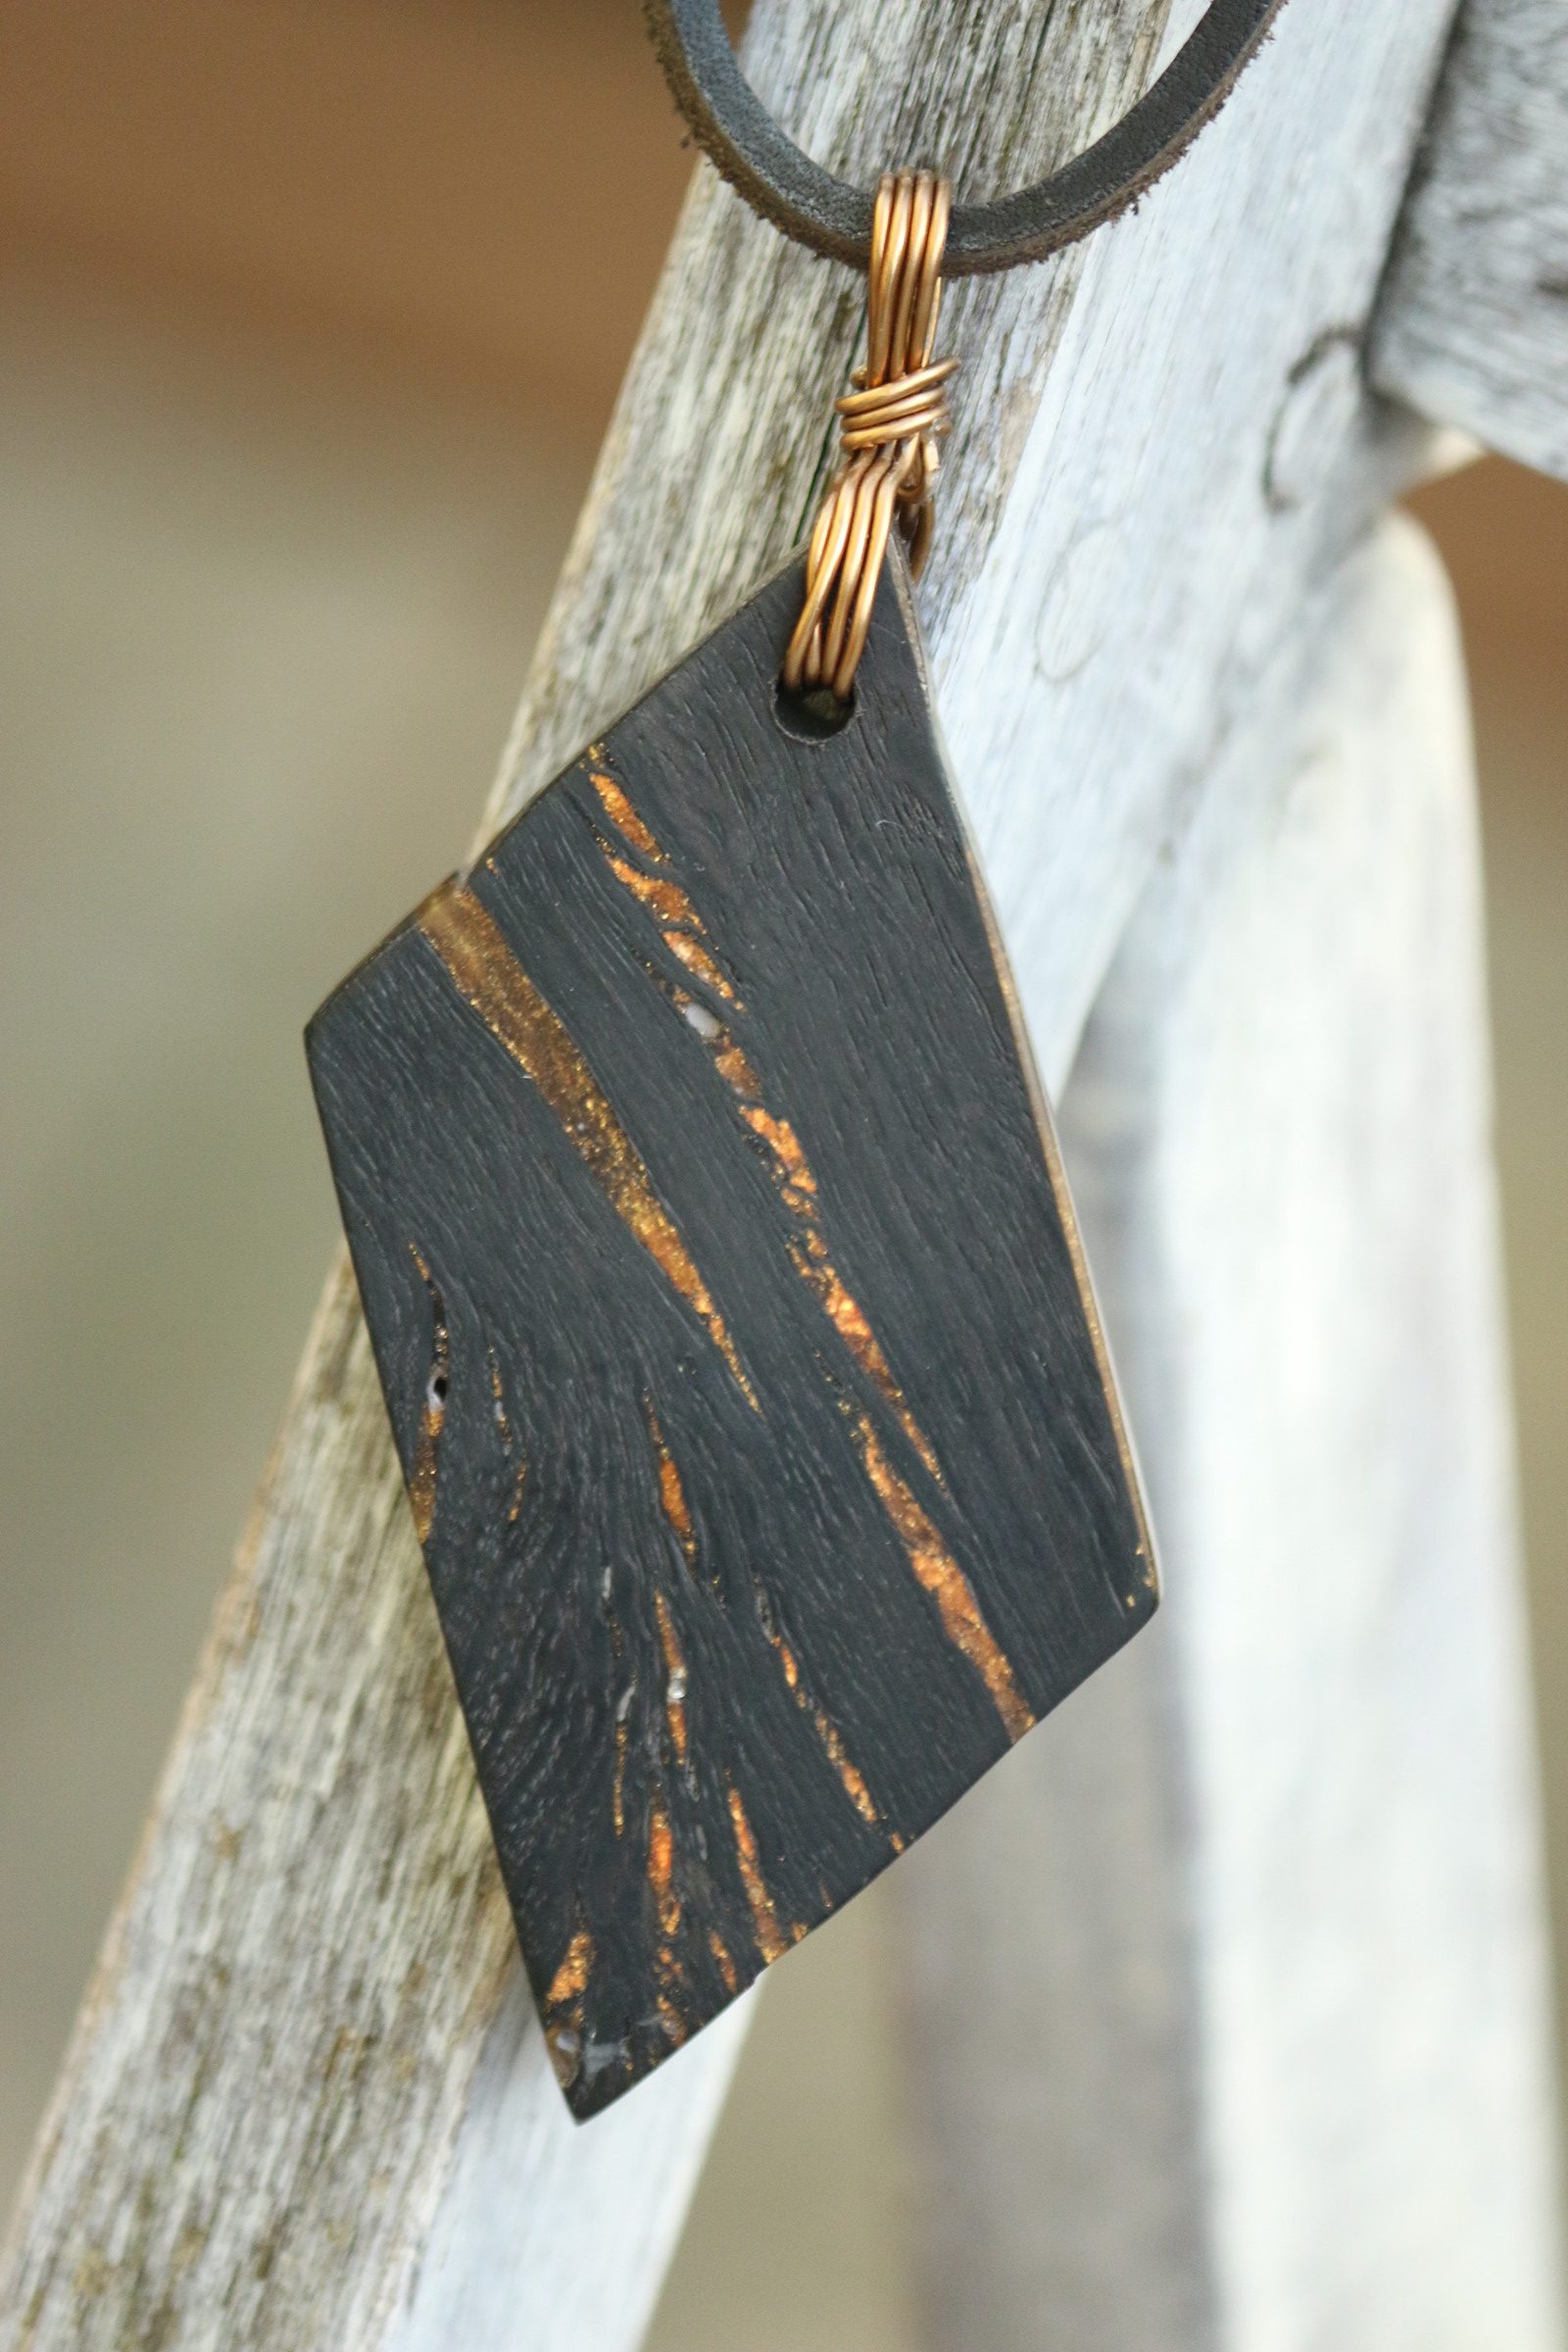
An speaking of the precious wood, it would have been a crime to throw away the scraps:

©Giliell, all rights reserved
This used to be the top of the wood. I cut it into an oval and rounded the sided before polishing. The wire lies in a groove to keep it from slipping, but I still need to glue it to the cabochon with some resin. Same goes for the next piece.

©Giliell, all rights reserved
This one’s a bit smaller and only a tiny bit of wood remains, but the colours are so gorgeous. It’s fascinating how the same cast yielded such different shades. All that was left after that were small pieces of resin, but even they got used, but that project isn’t finished yet, so you’ll have to wait. Those five pieces represent about 15 hours of sanding and polishing and sawing between, not to mention an open wound the size of a big bean on my left palm because I’m stupid.
Always wear your protective gloves, kids.
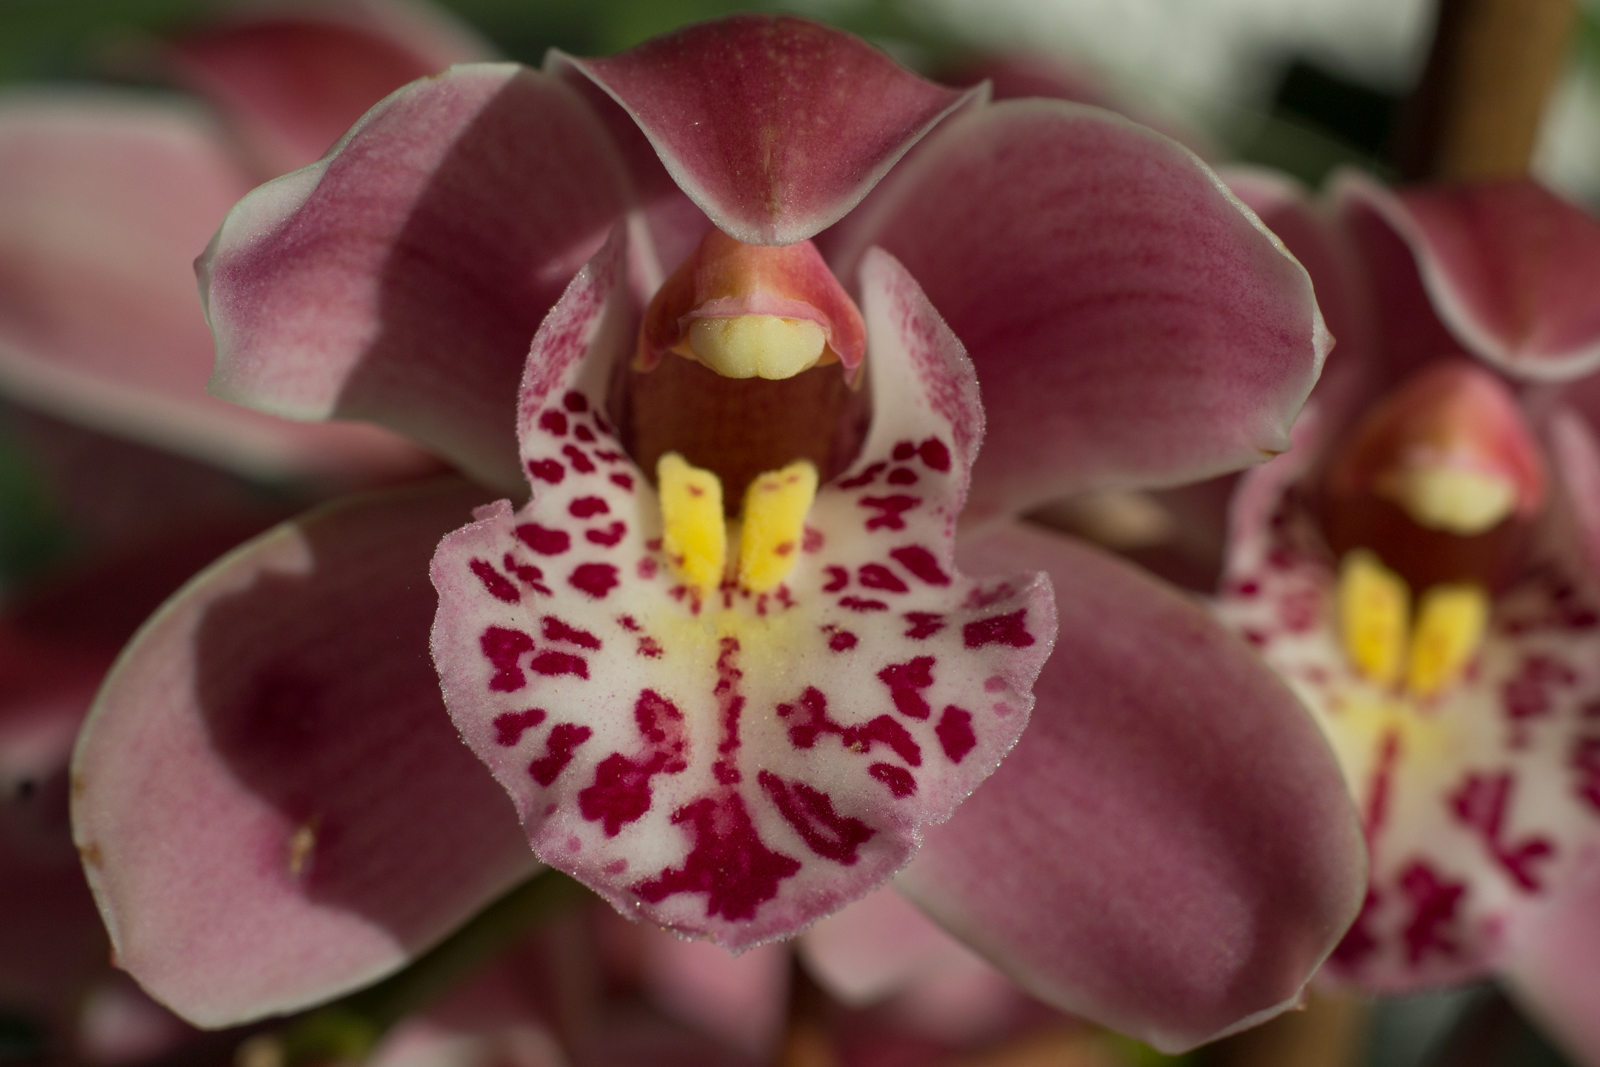
Our weekly flowers from Nightjar have arrived, and they are glorious and a bit other-worldly.
This week I have garden flowers to share, our first Boat Orchid or Cymbidium bloomed! They are beautiful, but depending on the perspective they are also really weird-looking flowers. We have many more varieties and all of them have flowering stems developing that will bloom over the next few weeks, so I’ll probably share more of these soon.

©Nightjar, all rights reserved
©Nightjar, all rights reserved

©Nightjar, all rights reserved

©Nightjar, all rights reserved
I hope I will finally be able to do this series justice since I am starting to re-pot my trees this year. Part one was here.
You do not actually need some very sophimasticated or expensive tools to start growing bonsai trees, but even if you only aspire to have one, these are the essentials that you will need. If you have a garden or potted plants, you probably already have some or even most of them.
First – not depicted – flower pot(s). Bonsai are typically grown and shown in beautiful elaborate glazed bowls, proportioned to the tree. But ordinary flowerpot will do in a pinch – important is the plant, not the pot. Some trees can also be grown on a flat stone or a hollowed-out piece of wood etc. Anything that holds the substrate together will work, but if you intend to display the tree anywhere, the pot should be chosen accordingly. An ugly pot detracts from a beautiful plant. If you get your first bonsai tree in the form of one of the mass-produced little ones, you will probably get a passable pot with it. If you start your bonsai from a cutting or a seed, it will take several years before you need something more ornate than an ordinary flower pot. However, from the start you should keep one thing always in mind – for most bonsai styles the roots need enough space to grow to the sides, so wider and shallower pots are better than narrow deep ones.
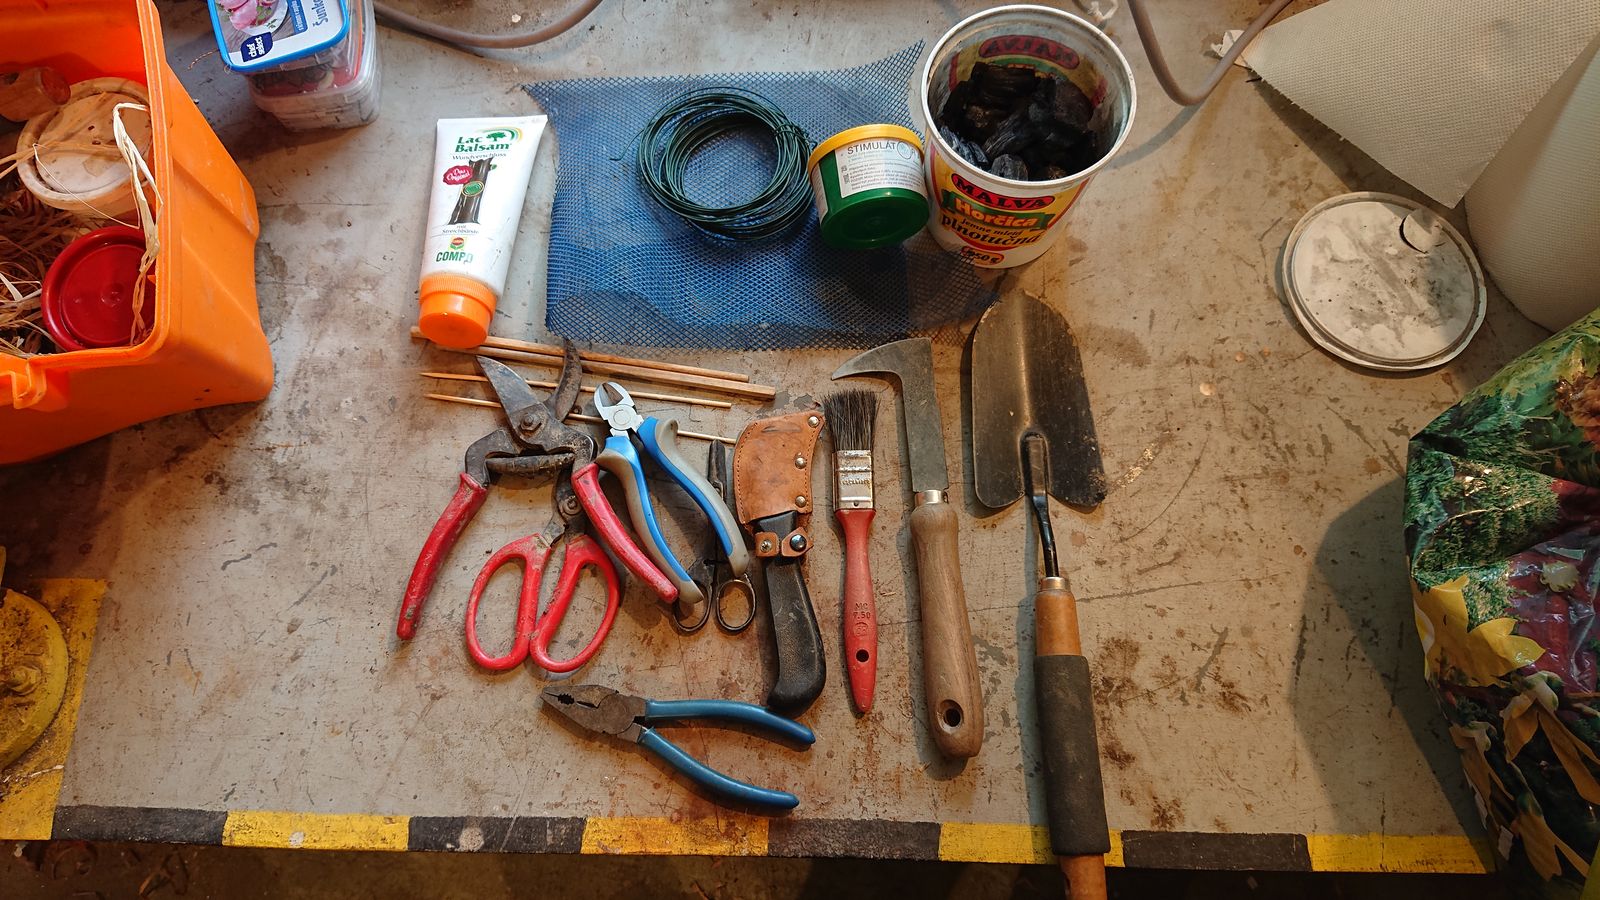
And now for the tools on the picture, from left to right, top to bottom.
A container for storing all your tools. Whether you have one tree or many, you will usually need more than one tool at one time, so it is good to have them packed in such a way that you can take them all with you when needed, and neatly put them away when not, since they will not have any other use.
A tree balm. Either acrylic or wax/resin-based. You need something to dress cutting wounds. Acrylic-based balms are the best and some sort of ordinary acrylic paint will do too if nothing better is available. Wax/resin-based balms are perfectly OK for most conifers and for big trees, but some deciduous bonsai trees do not respond to them well, it seeps deep into the wood and can kill buds, even branches.
A mesh (plastic, glass) or pottery shards to cover the holes in the pot.
A wire. For holding the mesh over the hole and for forming the tree. Depicted here is thin steel binding wire, PVC coated. Alluminium or copper wires are better but more expensive and harder to get. A string will do in many cases, but it is more difficult to work with.
Root growth stimulator. You will need to cut roots, and in some instances, you will need to encourage the plant to grow new ones.
Charcoal. Best is low-quality charcoal from soft or rotten wood, even better one that was already lit and water-quenched several times. The reason for this is that such charcoal is very brittle and porous and can be easily crushed in fingers to a fine powder and applied to the cutting wounds. It is important for dressing bigger root wounds of all trees – it prevents fungal spores and microbes from entering them. For trees that excrete latex from wounds, it can also be applied to dry the latex quickly and seal the wound on branches and twigs too.
Bamboo BBQ skewers and chopsticks. To tease apart fine roots and comb out old substrate from the root ball when re-potting the plant.
Two pairs of pruning shears. They should be visually different, since one pair you will use for roots only, and one pair will be exclusively for branches. That is not only to prevent dragging spores from the dirt into the branches but mainly because the shears for roots will blunt faster and would tear the branches instead of cutting them neatly.
Pliers. The combination pliers will suffice since they can cut the wire too. But I have dedicated wire cutters as well.
Ordinary shears. You may need to cut leaves or very thin and fine twigs. Pruning shears are too coarse for that kind of job. Some very old shears are fine, and if you are able, grind the bevels to a steep knife-like angle.
A knife. Not only for grafting, that is improbable for a beginner, but it gets used also for cutting f.e. a piece of wood into a temporary spatula to apply tree balm.
A flat brush. To carefully clean the surface of the tree trunk without damaging the bark, to sweep away needles/leaves from exposed roots, and to tidy the surface of the substrate.
A flat hook. Or a very blunt knife or a spike or something similar to soften old hardened soil in the pot, to cut it away from the sides where it often gets stuck and to pry away more difficult root-tangles.
A trowel. Enuff said.
A substrate. Ideal substrate depends on the plant(s) you intend to grow – more on that when I will write about individual species – but most plants will survive in a substrate consisting of equal parts of coarse sand, high-quality topsoil (f.e. collected from molehills) and peat/compost. Bought substrates are OK, but I would recommend to mix them with soil and sand anyway, they contain a tad too much organic material. It is also recommended to heat any substrate, whether bought or self-made, to at least 70°C prior to planting to kill any germs it might contain. For that, you might need a tin pan and a baking oven, or a plastic bowl and a microwave.
If you start growing more trees, your toolbox will expand and no doubt you will buy some of the more beautiful and specialized ones. But all these will fit into a little bag and they are all you need to start. All the tools in the picture are ones that I am consistently using for over a decade by now, some even for several decades. None of them are expensive or difficult to get. Why buy a fancy tool, when an old one does the job just as well?

Howard R. Garis. Uncle Wiggily’s Rheumatism. New York, A. L. Burt company, 1920
It’s Children’s Book Saturday and I love the cover of this book. Uncle Wiggily is a very dapper looking rabbit with sparkling pink eyes that shine. I took the time to read a bit of this book and the stories are just as charming. Uncle Wiggily is a rabbit who has adventures and he and the other characters in the book are sweetly portrayed for a young audience.
Unfortunately, the artwork inside the book is a bit disappointing. The animals are more realistically drawn and lose some of the charm of the cover. The colours are also dull and uninspired. There are also only 4 illustrations in the book. I had hoped for more from an edition of this date. If you’d like to see the artwork, I’ve included it below the fold. There are apparently more Uncle Wiggily books out there and you may see another title down the road.
I do not give names to my paintings, this is just an association that has popped in my head when I took this one out of the pile to photograph. The painting is 450×715 mm, distemper on hardboard and, as you can see, in rather a bad shape. That is the result of two things. Firstly, I did not have access to high-quality art supplies twenty-five years ago (and anyways, I lacked the knowledge to use them or the money to buy them) so it was done with the only distemper available at the local stationery store. And secondly, the painting hung several years in a room adjacent to a badly ventilated kitchen. The fumes from burning propane do “wonders” to everything in their vicinity. When I finally got round to buying varnish to help to stabilize the painting, it was already heavily damaged.

© Charly, all rights reserved. Click for full
And since I got nothing else to offer for a new open thread, let this be one. Usual rules apply – talk whatever, just don’t be an ass.

