© Nicolas Bruno, all rights reserved.
The matters of our psyche and our dreams, in particular, permeate the work of Nicolas Bruno not only as a phenomenon but moreover as the articulation of personal experience. The allusive, surreal and haunting works he creates are embodiments of the state in between waking and sleeping. They are an effect of the artist’s torment; the situation in which he is constrained to embrace the subconscious and its perils while being paralyzed in bed. Although the works of Nicolas Bruno are quite personal and might seem hush, bizarre and even violent, they are explicitly suggestive and are calling the observer to participate in the sense of enrolling their own associations or perhaps dealing with their own anxieties and fears.
© Nicolas Bruno, all rights reserved.
Photography As Therapy.
Nicolas Bruno was born in 1993 in Northport, New York, a small harbor community located on Long Island. He studied at Purchase College and received his BFA in Photography in 2015. His studio is located in Northport, so practically all of the preparations for the shoots are taking place there, as well as postproduction. Since all of his practice is very much devoted to the symbolic of dreams, the artist keeps the dream journal and starts each new series by analyzing previous experiences. As a matter of fact, his creative process begins with in-depth planning, but the very shoot is far more spontaneous and open to experimentation.

© Nicolas Bruno, all rights reserved.
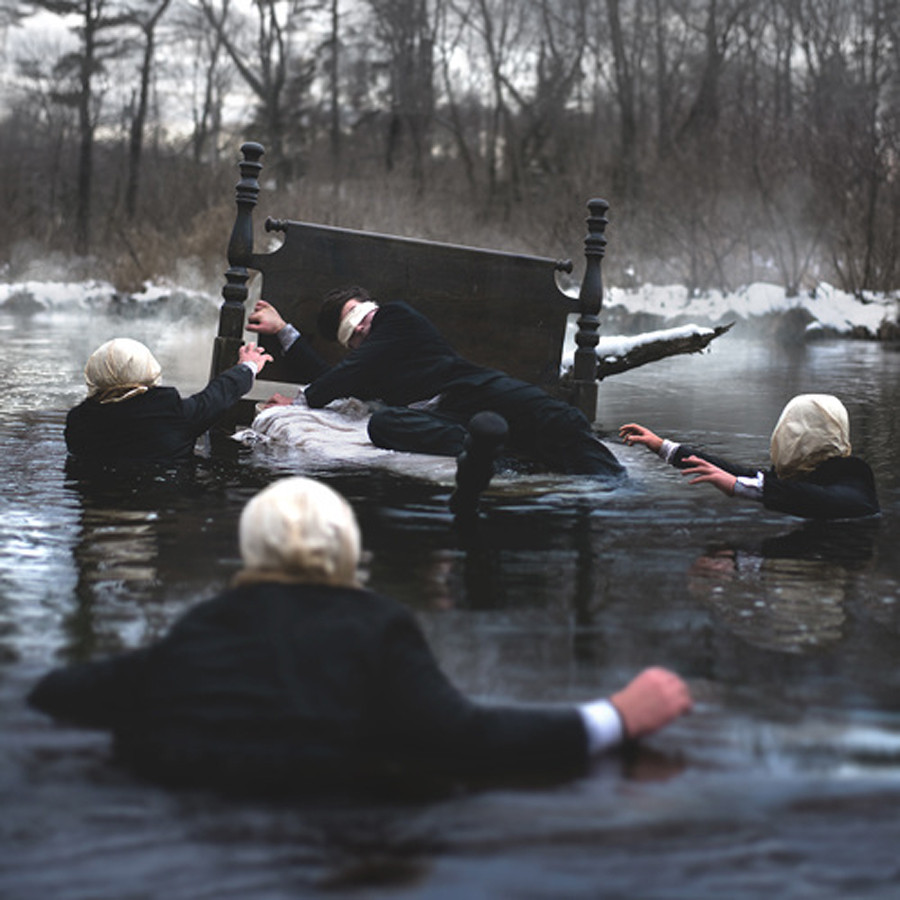
The Sleep Paralysis of Nicolas Bruno.
The foundation of his photographic experimentation lays in Bruno’s struggle with the sleep paralysis, from which he has been suffering for almost ten years. It is a common phenomenon occurring in between wakefulness and sleep, in which the body becomes immobile and it often causes severe hallucinations. This state of inescapability forced Nicolas Bruno of finding some sort of solution and with the advice of a therapist he found it through creative expression. Therefore, he started working on surreal self-portraiture as a therapeutic translation of night tremors in order to cope with these fears and simultaneously share these familiar emotions of anxiety, suspense, uncertainty, and danger.

© Nicolas Bruno, all rights reserved.
Nicolas Bruno’s works are haunting, evocative, and terribly poignant. They not only express the explicit fears brought to Mr. Bruno in his paralyzing sleep, they also express implicit fears and anxiety of people in general. Each photograph is a masterpiece of unspoken fear, and when viewing, you simply cannot help but to feel, in a very small way, what the night and sleep is like for Mr. Bruno. Sleep Paralysis is not common, and unfortunately, not well understood either. Many people do have an isolated incident of sleep paralysis. I had a period in my teens into my early twenties of sleep paralysis, and it’s terrifying, to say the very least. Nicolas Bruno has come up with a unique way of dealing with it, and I think he deserves a much wider audience for this amazing work.
You can read and see more of Mr. Bruno’s bio here, and his portfolio here. There’s also this all too brief video: