Speaking of failure… Well, it’s not over until it’s over.
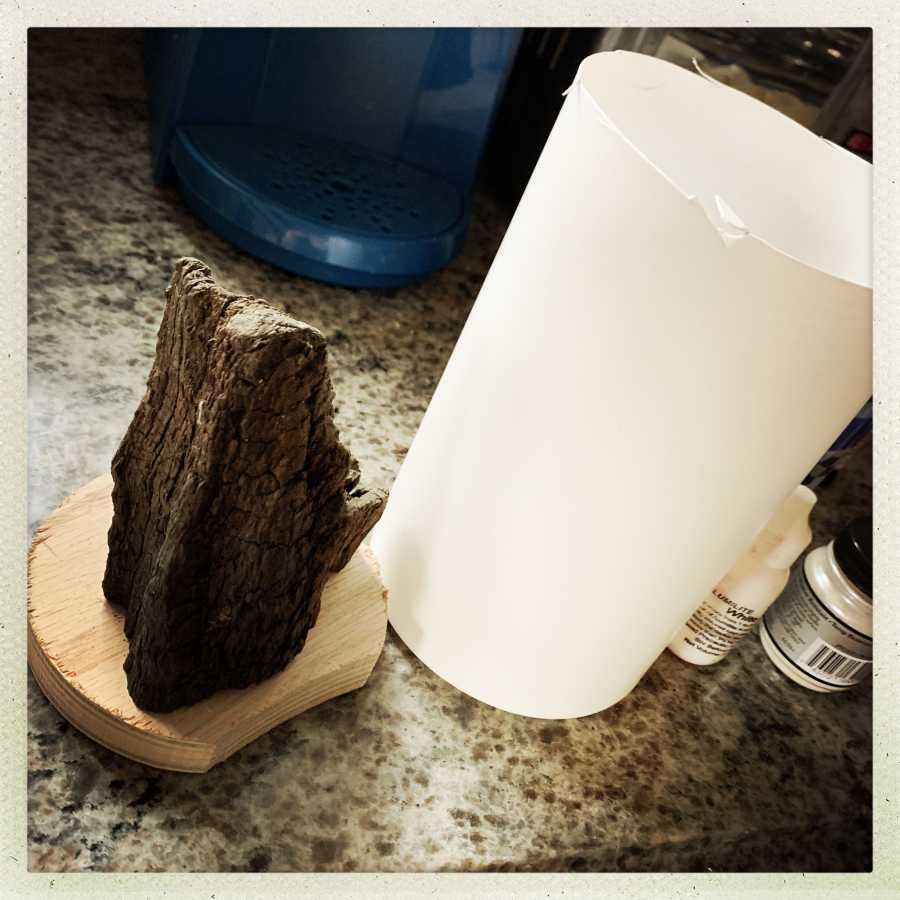
I’ve been thinking about how to do “dragon eggs” safeishly, and I’m concerned about having things come off the lathe and blow up like the resin/oak bowl did. So it occurred to me that a sacrificial piece of plywood embedded in the resin would make a super-solid mount point for the chuck ring.

I whipped up a jig for cutting disks on the bandsaw and made a few in various sizes. Enough to convince me I a) need a better jig and b) can use them for all sorts of things. First attempt: “bog oak mountain in storm” is what I was thinking of it as – but that’s not how it turned out.
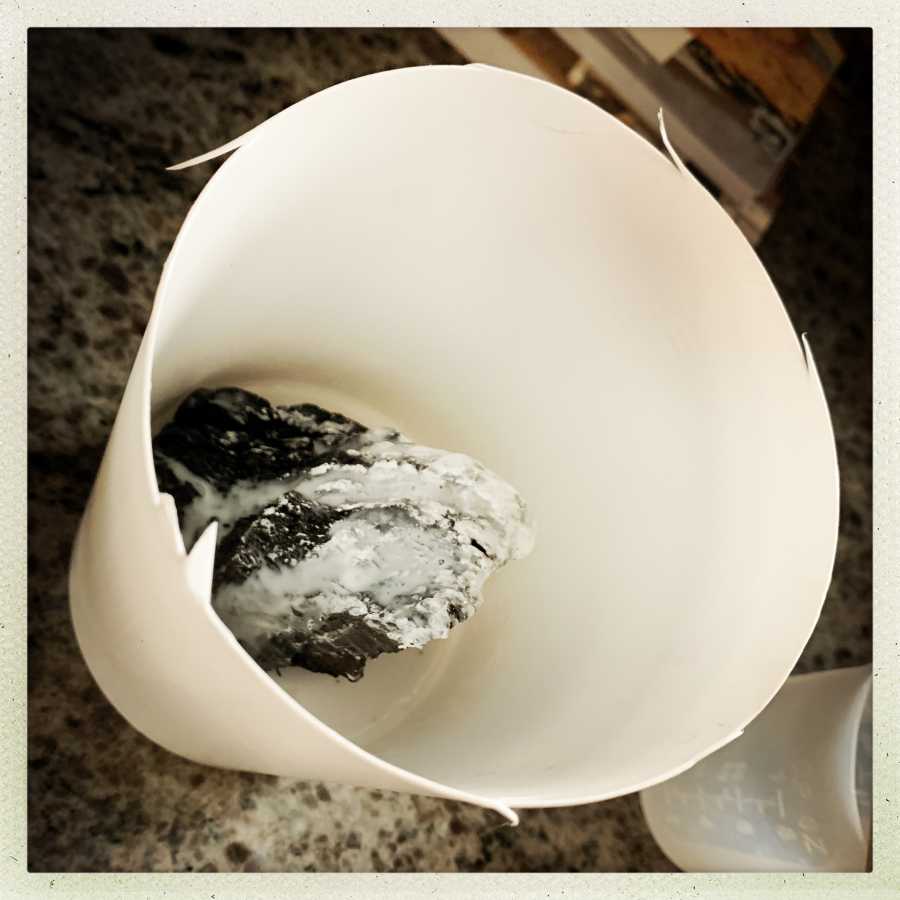
Polypropylene former-Metamucil containers make great molds when you cut the top off. So I thought I’d glue the bog oak to the plywood and start pouring. I should have also glued the plywood to the bottom of the container but I didn’t. Next time, I will.
I made an initial pour of resin with white in it (“snow!”) and used a Qtip to paint some of the white pigment onto the mountain-top. The plan was that there’d be a snow-covered plain with this big bog oak mountain. You can see it, can’t you?

I did the pour and let it cure for 3 hours, at which point it was very sticky and I figured I could add the next layer. My SuperSecretMasterPlan was to add a layer of clear, then let that get sticky, and stir a layer of blue on top. It seems like a good plan until it got screwed over by Archimedes’ Principle, followed by the immutable laws of physics.
I poured the clear and was happy to notice a small bit of white pearl swirling in it. That was going to look super cool. Then, the plywood (bog oak is heavier than water, plywood is not!) started to lift up. Panic! I have a spare hammer head in need of a handle and it fit nicely on the peak of Mount BogOak. Then, to clear the bubbles I put the whole thing in the vacuum chamber.
[picture needed]
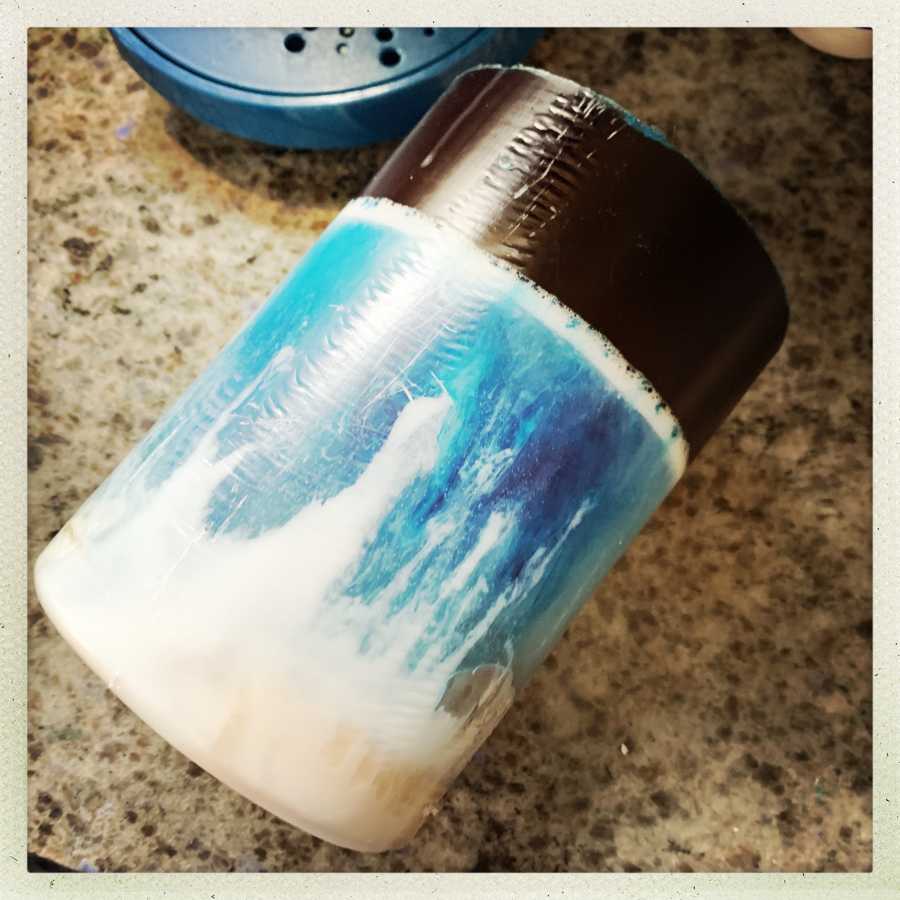
Here’s where physical law came and slapped me upside the head: resin curing is exothermic. If you have been drinking your remaining bottle of red wine and put your resin in a vacuum chamber, there’s not as much air in there to convect away the heat! Normally if it were sitting and dripping on my counter-top, there’d be plenty of convection and it wouldn’t reach whatever is the temperature at which resin misbehaves. The wine made me feel like napping a bit and the nap lasted until 3:00am when my bladder alarm went off, and I ran downstairs to see a cloudy white mess. The resin had begun to boil (or otherwise misbehave) and was hard as a rock. My final layer of blueish resin was still required but there would be no swirly transition-zone. I mixed it and poured it, anyway. In my pre-hangover state, I put way too much blue pigment into the resin.
Let me just mention that the Alumilite/Smooth-on “so strong” pigments really are. The little blue abalone and resin paperweights I was making were pigmented by sticking the tip of a toothpick into the inside of the pigment cap. I was not thinking well and put 2 drops in.

The rising white stuff is the resin that was ejected when I pushed the plywood back down (I did not see this because the container was opaque) If I ever need a “sea foam” effect I now know how to accomplish it. And the great big “blue night” layer is… uh, it’s what it is.
I’ll turn it anyway, because a) I have already paid for it b) it’s good practice c) it might look cool anyway.
Most of my career as a maker-of-things has been getting the first couple of times wrong, then nailing it, then getting tired of it and moving on to something else. So if this follows my usual trajectory my next attempt will be pretty good, having figured out those sneaky laws of physics.

Oh Marcus! What did you expect making it under the influence? Still it has potential …
This may yet turn out to be a super cool project. If it does, don’t call that a “mistake”, call it a “design element”. Turning those on a lathe is a great idea, it will be fun to see how it looks when you’re done.
Update:
It was unsuccessful and looked more like a “dragon’s buttplug” than a “dragon’s egg.” Clarity in the resin is definitely a must, and positioning things in the object is also difficult and requires some study. I will post a few pictures in a while.