… continued.
I’m part of the secret clique that is trying to turn FreethoughtBlogs into an arts and crafts collective.
One of the most important things I learned in this project is that scraping resin away with a chisel is slow and messy, which means that your objective should be to minimize the amount of resin between you and “finished.”
In the case of the red/black bowl, I kept adding resin in order to take it back off, which was definitely offensive to the gods, and I was duly punished.
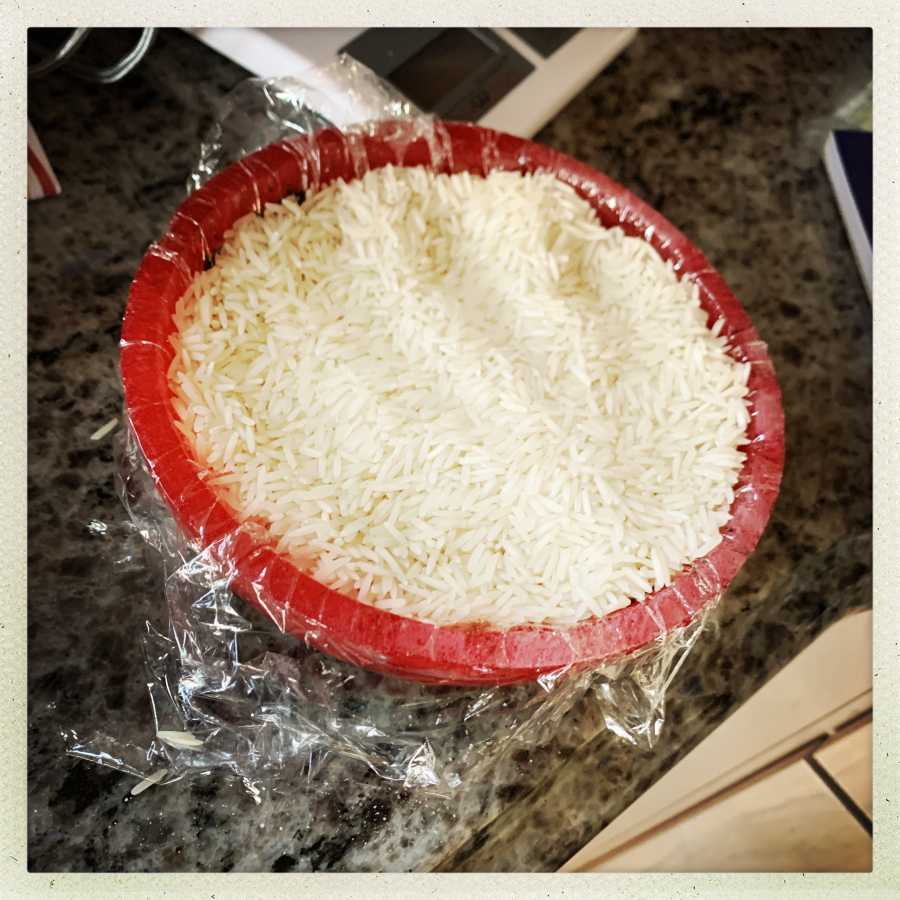
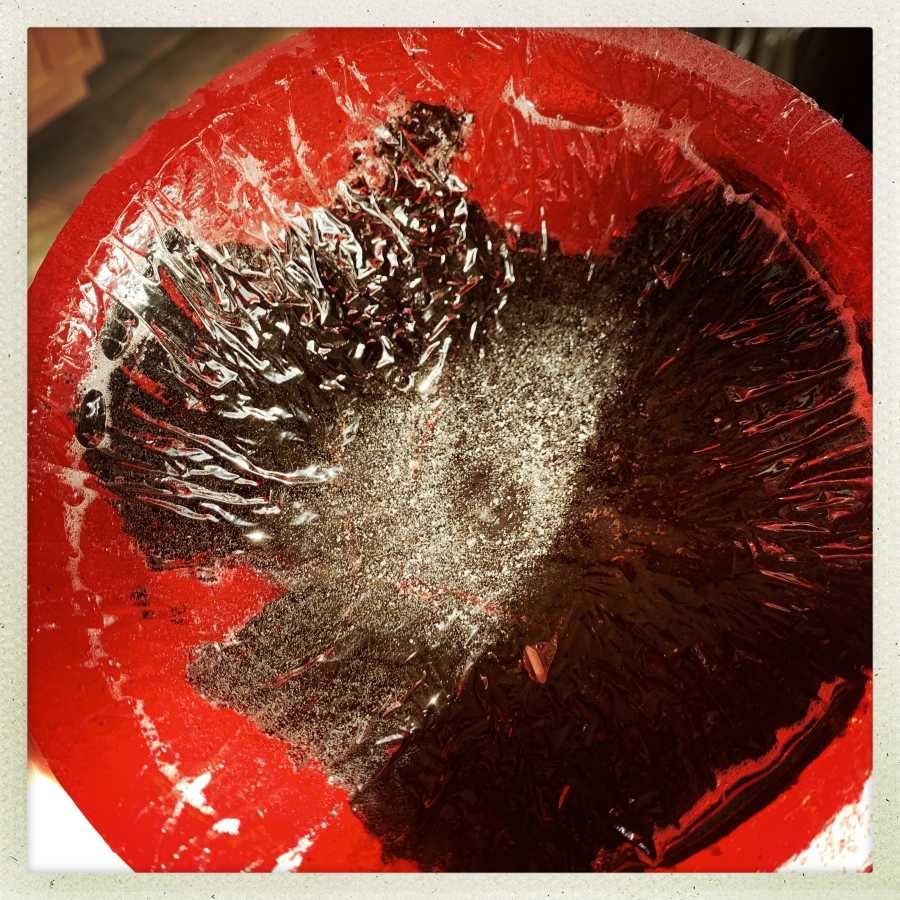
Since there were big air pockets on the inner surface, I reasoned that all I needed to do was fill the interior with more resin and something to press it into the pockets, and then I could turn the inside and finish the outside. That strategy was successful:

I felt pretty clever. Rice packs and locks against itself, and saran-wrap does not stick to epoxy (and if it did, the chisel would eradicate it pretty fast) – I let it cure over night and when I went to pick it up, it didn’t budge. I tapped it with some whacky-things and that didn’t work, so finally I took a kiridashi and used a small hammer to tap it under the bottom edge, levering up some good-sized chunks of granite counter-top. The counter-top cost me about $9,000 when my exwife picked it out, and I’ve always thought that granite was sealed so it was non-porous and more or less indestructible. Apparently I am an avatar of Shiva, which is a heavy responsibility. Anyway, I have to admit that ruined my Taoist detachment from material things and I did some serious /facepalming. (Don’t touch your face unless your hands are clean!)

There were some chips on the edge and I filled them by making sure there was enough resin under the saran wrap to go around the top of the bowl. It came out pretty well in my humble opinion.
Then I took it to the shop and nearly rammed a chisel through my hand, trying to carve the epoxy out of the bottom recess where it had ruined the registration for the chuck to grab.
 Nova makes a set of jaws called the “Cole Jaw” which are designed for holding large work-pieces with non-marring (ha!) stoppers that grab the piece from the front. I have a set of those, so I positioned the bowl so the back was open, and then used a parting tool to clean out the grab-zone in the back.
Once that was done, I flipped it around and started making more muppet shreds.
A few interesting things: resin heats up when you sand it, the sandpaper can suddenly get hot enough to raise blisters on your fingertips. And they tell you not to wear gloves when using a lathe. So, you just take your time and sand and grind and try to get the wood to be situated where you want it. In this case that meant carving back until lots of the bog oak was showing, and the rim of the bowl was thin.
After about an hour of messy work I started polishing the surface with 60, 80, 120, 240, 400, 600, 800, 1000, 2000 grit sandpaper, then some beeswax with diatomaceous earth mixed in. The lathe makes polishing a dream: you just hold the thing against the surface and don’t get any part of yourself caught in the chuck.

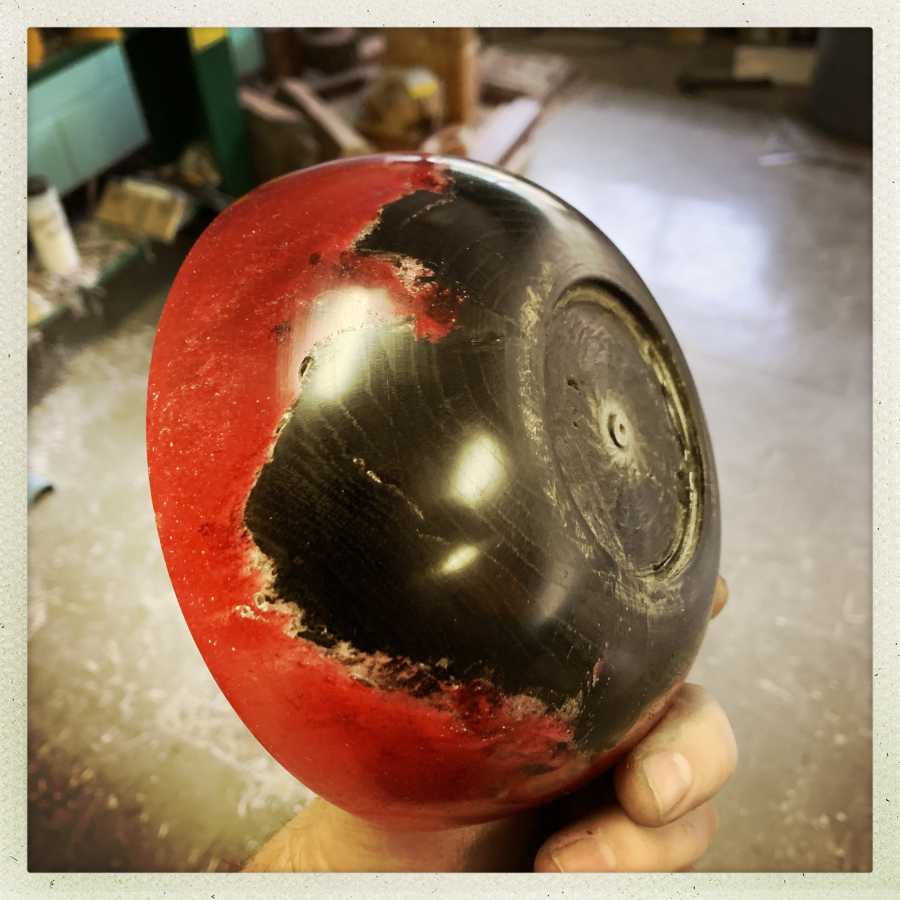
You can see the gorgeous sheen that the bog oak adopts. Wow, I love that stuff. It’s a shame it’s so flippin’ expensive or I’d be turning big blocks of it. The resin is strong as !*#&!! which is also pretty nice. There are a few spots where it’s clear through at the bottom – the resin is surprisingly transparent considering the abuse it has taken.

There are still a few voids but I’m going to stop before something goes horribly wrong. The edge of the bowl is a bit thicker than 1/4″ (6mm) and you can see your fingers through it. The flake and pigment in the red make it a bit obscure but it’s pretty cool.
This was an experiment to see what turning resin/wood composites was like, and I am pleased with how it came out. I am not blown away by it but pleased is good enough because now I can think over my process and do something I know will be better. One of the primary things I’ve realized is to get a chisel on it before it’s completely rock hard. Also, smallish areas of resin are less dramatic. And the clarity of the resin is a shame to waste (thanks to Gilliel for illustrating that!) so to summarize: you need to think in terms of dramatic composition. I have a flat of oak log that is quite dry and split, so my plan is to split it with a couple whacks of axe, then glue the pieces to a piece of plywood, like it’s exploding, and pour clear resin into that. That should give plenty of visual drama.
The next couple weeks I am going to focus on the other set of shop doors and getting the propane and forging presses moved to the new building. I’m way behind on my schedule but I guess it’s the Trump administration and coronavirus’ fault.

How did the resin get through to the counter-top? It’s pretty fine and watery stuff; it just soaked right down through the oak. Oak is pretty porous and the bog oak is unsealed.

It might not be as perfect as it could be, but it is indeed very dramatic – one of the best colour combinations, and the textures and translucencies are lovely.
On the up side, you know that whatever resin you’re using adheres very well indeed to your counter, so you have a handy material to fill the voids you’re made in it.
I think that for a proof of concept its pretty damn good.
I do think a picture of the damage you did to your worktop would be of interest.
I’m with Andrew Molitor on this, I think it would be entirely appropriate for you to repair your granite with resin.
That turned out (turned, haha) super cool. The new one you’re working on sounds like it will be even better. That resin takes a polish pretty nicely.
Sorry to hear about the counter top… as suggested you may be able to repair it with resin and may even be able to dye it so it matches. On the other hand, depending on the size of the holes, you could also use clear resin and put some interesting objects in the holes. A lake monster springs to mind… Or Cthulhu, emerging from the depths of the counter…
If you could locate one of the jewelry crucifixes you could place a tiny Jesus into the geological record.
It is really pretty.
I have seen one of the lathe YouTubers to repair his bowl by mixing a small amount of epoxy with the pigment, letting it gel a bit and then slather it into the voids with popsicle stick like glue and polish over again (before waxing though). Maybe even transparent epoxy glue with pigment could be used to fil in those little voids and get the perfect surface.
However, if it is pretty and works for the intended purpose, there is no need to try and make it perfect. Sometimes it is important to know when to stop tinkering and accept the work as it is.
Fabulous contrast of the dark wood and red resin. The bog oak is gorgeous polished and it’s nicely shaped. Excellent experimenting. Looking forward to seeing what you make next.
It’s like a volcano. Fresh magma and hardened volcanic rock.
Sorry about the countertop. Although my kitchen table is already pretty ruined, I always put a cheap wax tablecloth on top. I learned that not quick enough for my husband’s liking.
It’s beautiful. My favorite color combination too.