I just might tumble all blades from now on, even those that I will mirror-polish manually afterward. Because after two-three days of tumbling, an interesting phenomenon appears. Something that is not surprising when you think about it, but I did not in fact expect it upfront.
© Charly, all rights reserved. Click for full size.
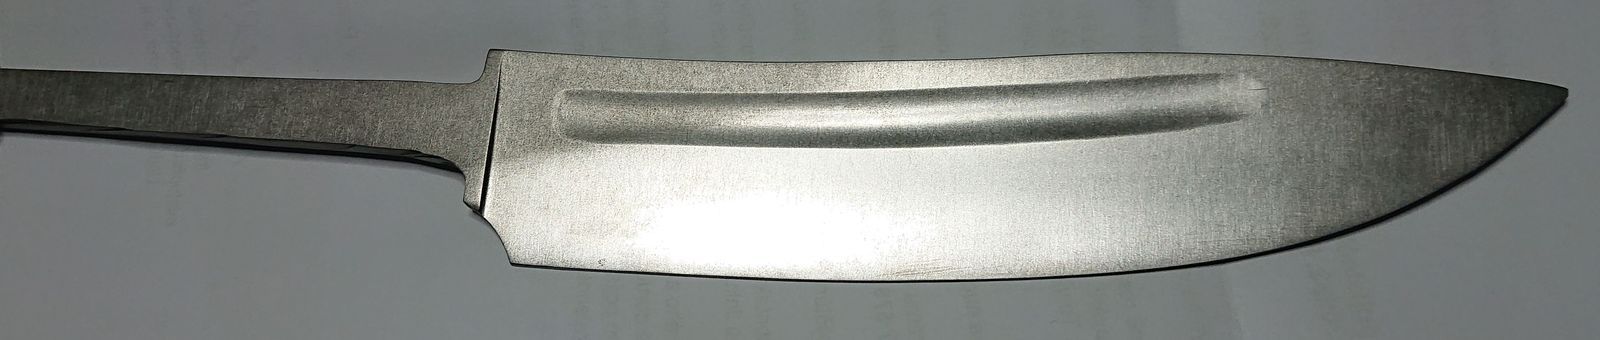
It is difficult to snap a picture of it, but here it is visible – the blade is all shiny except that triangular shadow at the tang. That is an area where the blade is not hardened.
In this specific case, this is OK. The tang should be soft and a soft piece of the spine, especially near the tang, also does not hurt. And because this blade will be blackened with oak extract, the visible difference in color should not be a problem.
However, there were two other blades, one from spring steel like this and one from N690, that had shown this discoloration in areas where soft steel definitively is not desirable – one about 2 cm at the tip and one ca 2 cm of the blade near the ricasso. Those were improperly hardened and I did not find out during the scratch test right after the quench, because most of the blade was OK.
That is quite useful and thus I really consider incorporating sand-tumbling not only as a cheap surface finish but also as cheap and easy quality control.